Setting up channels – Teledyne LeCroy WavePro 7 Zi_Zi-A User Manual
Page 61
Getting Started Manual
922137-00 Rev A
53
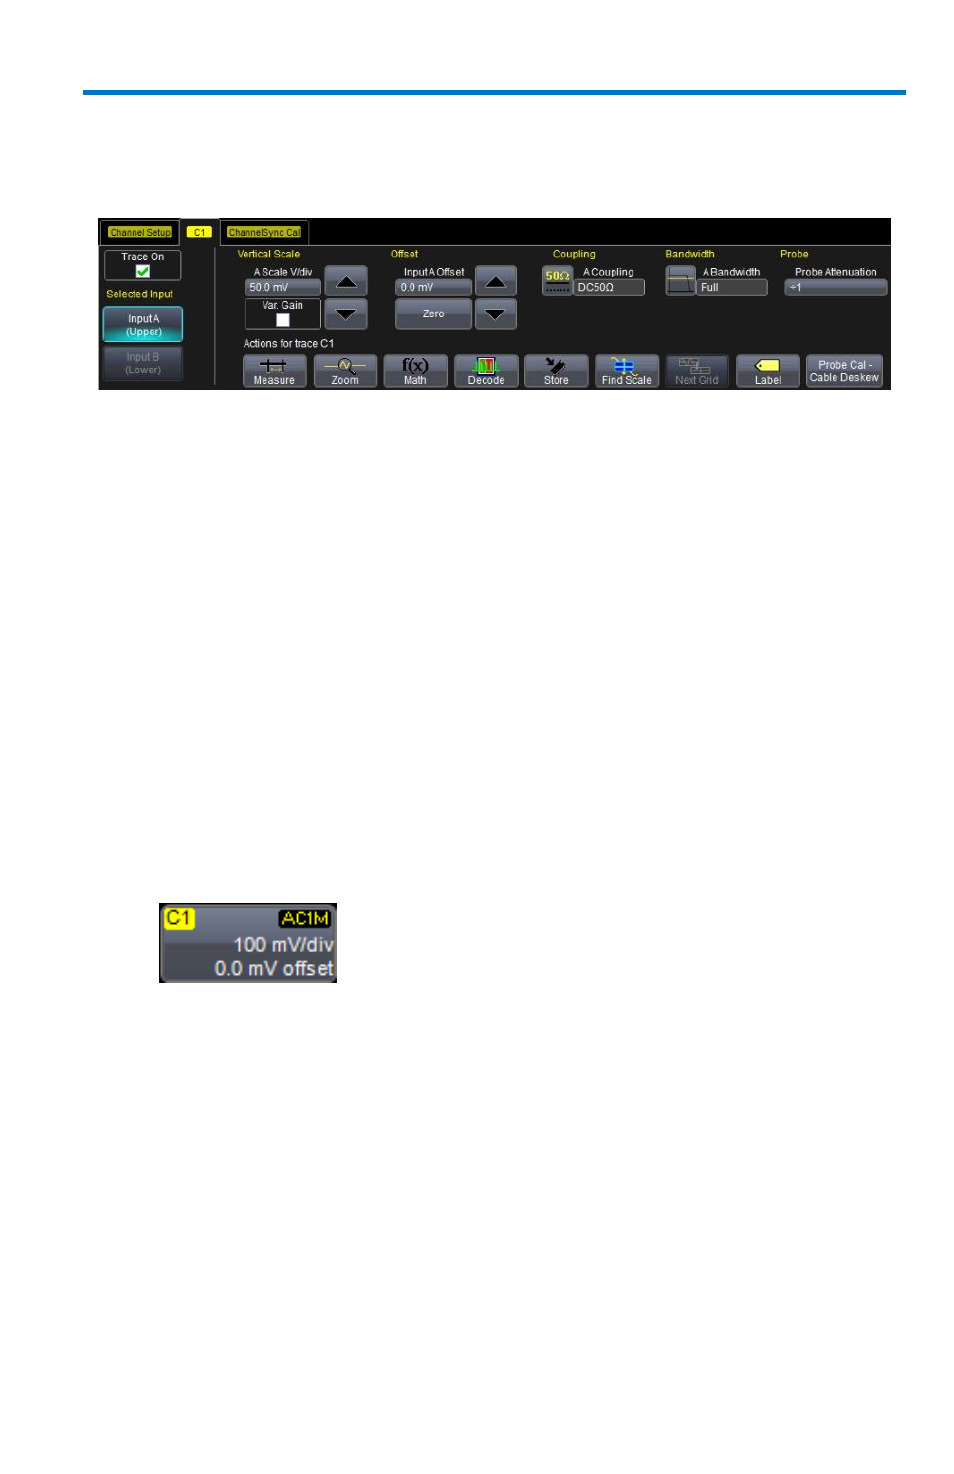
Probe - Teledyne LeCroy's ProLink system automatically senses
probes and sets their attenuation for you. For each channel, the
probe attenuation can also be set manually.
Setting Up Channels
1. Touch Vertical → Channelx Setup... from the menu bar.
2. Touch inside the Trace On checkbox to display the trace.
3. On pertinent model oscilloscopes, under Selected Input, touch the
Input A (Upper) button or Input B (Lower) button. Otherwise, no
Selected Input buttons are provided.
4. Turn the V
ERTICAL
G
AIN
front panel knob for the selected channel.
OR
Touch inside the Volts/Div field and enter a value. Click the keypad
button to enter a value using the pop-up keypad, or use the
up/down arrows.
The set voltage is shown on the trace descriptor label and in the
Volts/Div field in the dialog.
5. Turn the V
ERTICAL
O
FFSET
adjust front panel knob directly above the
channel button whose waveform you want to move vertically. Or
you can touch inside the Offset field and type in a value on the pop-
up keypad. To set the vertical offset to zero, touch the Zero button
directly below the Offset field.
6. Touch inside the Coupling control and select a coupling mode from
the pop-up menu.
7. Touch inside the Bandwidth control and provide a Bandwidth Limit
value using your preferred input control method. Additional
information on using the touch screen controls can be found in the
Dialog Area (on page 33).