Example 6: recalling a preset, Figure 41. press the enter button, Figure 42. clear all selections – Extron Electronics DXP HDMI User Manual
Page 36
DXP DVI, DXP DVI Pro, and DXP HDMI Series • Operation
30
2.
Press and
hold the Preset button until it blinks (approximately 2 seconds). (In the
example below, preset 2 was
not assigned in a previous example.)
Press and
hold the Preset button until it blinks.
2 seconds
All buttons with assigned presets
light.
If you then save the configuration
to a lit preset number,
the
configuration data at that preset
location will be overwritten.
Preset Assigned
INPUTS
1 2 3 4 5 6 7 8
No Preset Assigned
PRESET
PRESET
Figure 39.
Enter Save Preset Mode
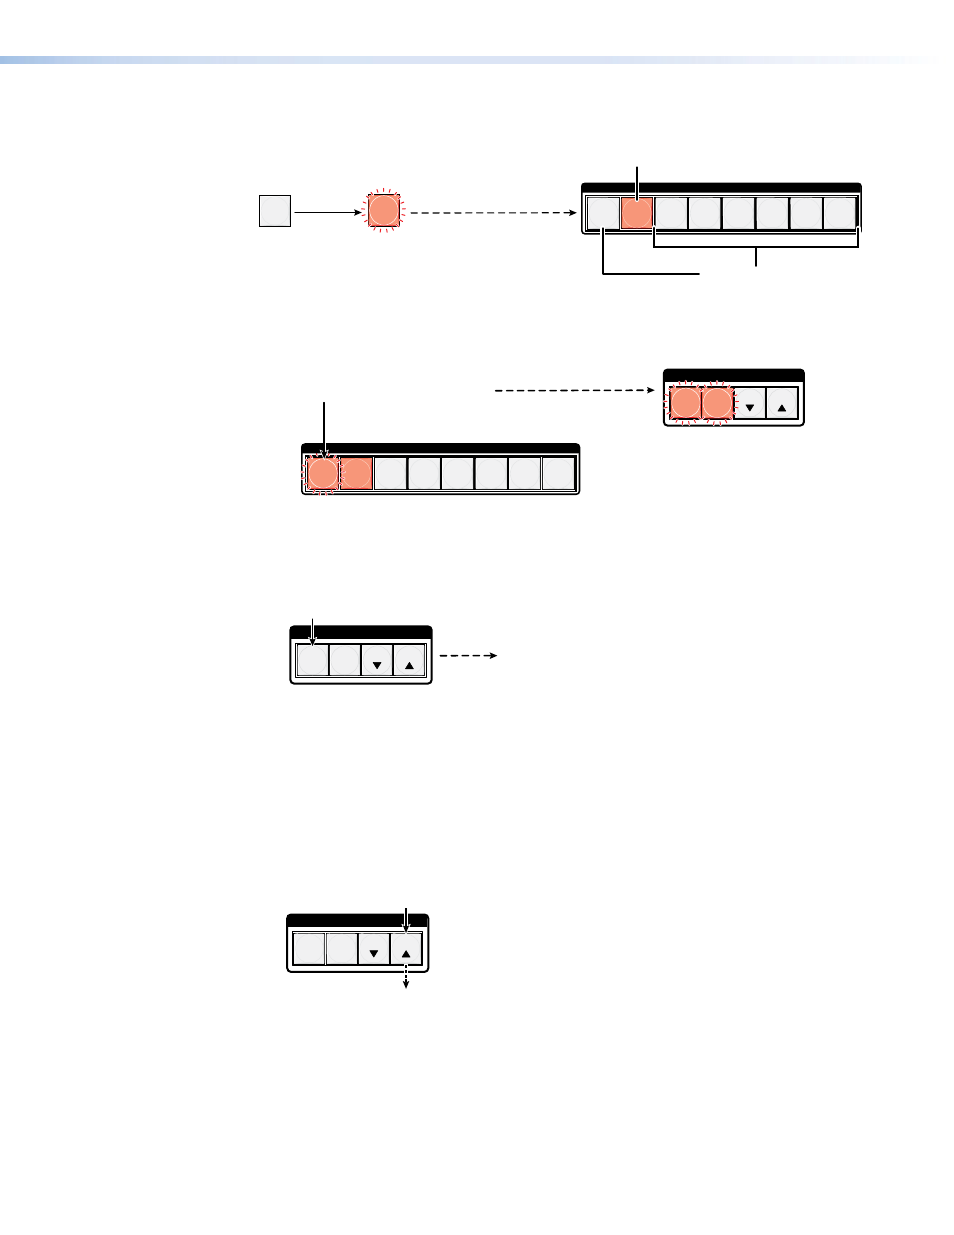
3.
Press and release the input or output button for the desired preset.
C O N T R O L
ESC
VIEW
•
•
The Enter button blinks
to indicate the need to
save the preset.
The Preset button
continues to blink.
PRESET
ENTER
Press and release the Input 1 button.
The button blinks to indicate that this
preset number is selected but not saved.
INPUTS
1 2 3 4 5 6 7 8
Figure 40.
Select the Preset
4.
Press and release the Enter button. The current configuration is now stored in the
selected memory location.
C O N T R O L
PRESET
ENTER
ESC
VIEW
The Enter and Preset
buttons return to unlit or
background illumination.
Press the Enter button to
save the preset.
All
input buttons return to unlit
or background illumination.
Figure 41.
Press the Enter Button
Example 6: Recalling a Preset
In the following example, a preset is recalled to become the current configuration. The
steps show the front panel indications that result from your action.
1.
Press and release the Esc button.
C O N T R O L
PRESET
ENTER
ESC
VIEW
Press the Esc button to clear all selections.
The button blinks once.
Figure 42.
Clear All Selections