Differential carrier overhaul, Rear axle - install pinion, Rear axle - install differential in carrier – Spicer Tandem Drive Axle Dual Range & Double Planetary 34,000-45,000 lbs User Manual
Page 56
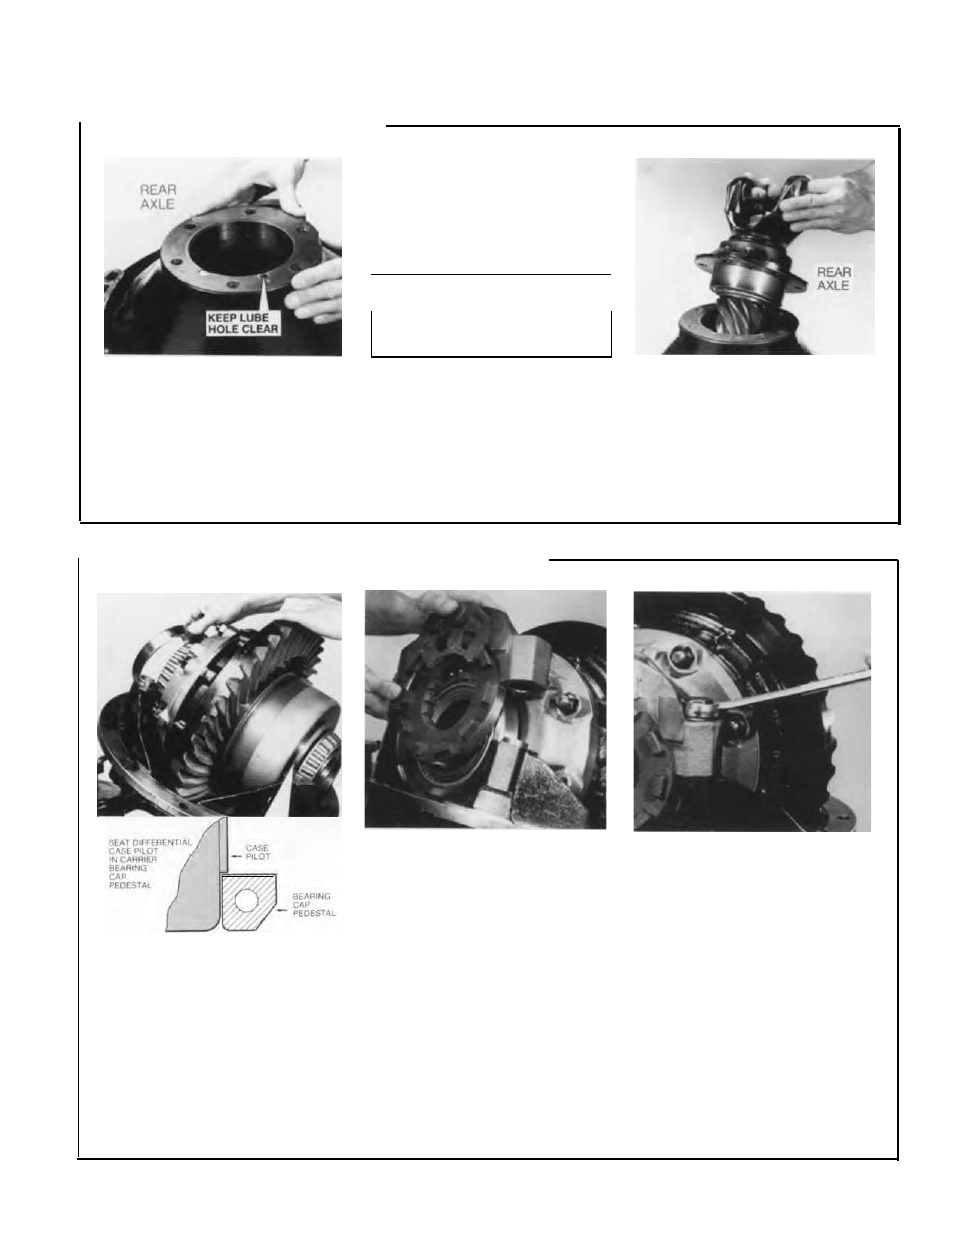
Differential Carrier Overhaul
Rear Axle - Install Pinion
1.
Place
shim pack on carrier
making
sure
lube hole is clear (see
photo).
NOTE:
If the gear set is to be re-
used, use same quantity and size
shims removed during disassem-
bly. If a new gear set is to be in-
stalled, install a nominal shim pack
(see chart).
I
Nominal Shim Pack
I
in
mm
0.023
0.584
2.
Install drive pinion assembly.
NOTE: Make certain lube holes
in carrier, shims and cage are
aligned. install bearing cage cap
screws and lockwashers. Torque
cap screws to 110-125 ft-lbs.
(149-170 Nm).
Rear Axle - Install Differential in Carrier
NOTE:
Lubricate bearings during
the following assembly procedure:
1.
Place ring gear and differential
assembly in carrier. Insure that
ring gear and drive pinion mesh
properly.
During installation, tilt carrier to
allow support case pilot to rest in
carrier bore, then install bearing
cup as shown in photo.
Also
install bearing cup on opposite
side of differential.
2.
If the same gear set is used,
install the assembled bearing cap,
adjuster and lock on the backface
side of the ring gear. Otherwise
install adjuster and cap separately.
NOTE: When installing cap, it may
be necessary to tap it lightly with a
hammer.
Be
sure cap is fully
seated and threads are aligned
properly, If trouble is encountered,
check for cross-threading of bear-
ing adjuster and carrier threads.
On teeth side of ring gear, install
the other adjuster and bearing
cap, observing same precautions
to avoid cross-threading.
3.
Install and tighten bearing cap
screws finger-tight. If this is diffi-
cult, use hand wrench.
NOTE:
The assembly is now ready
for adjustment of differential bear-
ing preloan, ring gear backlash
and gear tooth contact (see page
57).
56