Power divider overhaul, Adjust input shaft end play, Measure and adjust end play – Spicer Tandem Drive Axle Dual Range & Double Planetary 34,000-45,000 lbs User Manual
Page 42
Power Divider Overhaul
Adjust Input Shaft End Play
NOTE:
After power divider overhaul and installation in power divider,
check and adjust input shaft end play.
Correct end play when new parts are used in overhaul is 0.003î to
0.007î, with reused parts 0.01 3ñ to 0.01 7ñ. Refer to page 19 for other
variations.
Measure and Adjust End Play
IMPORTANT:
In September 1988, Spicer added a Spring and a Thrust
Button between the input and output shafts. End play tolerances are the
same for axles with or without this Spring and Button. However, end play
measurement procedure is different than described below. Refer to Service
Bulletin Supplement at back of this manual for procedure variances.
1.
Remove input shaft nut, fiat washer and yoke. Remove input bearing
cover cap screws and lockwashers. Remove bearing cover (and shim
pack if installed).
2.
Reinstall bearing cover without shims. Hold in position with hand
pressure and measure clearance between power divider cover and
bearing cover, using a feeler gauge.
3.
The bearing cover clearance measured in Step 2 plus 0.005" will
equal shim pack thickness required for desired end play (rebuild with
new parts). Add 0.015" to shim pack for rebuild with used parts.
4.
Install shim pack and bearing cover. Install cap screws and lock-
washers. Torque screws to 75-85 ft-lbs. (101-115 Nm).
5.
Install yoke, flat washer and nut. Tighten nut snugly. Tap end of
input shaft lightly to seat bearings.
6.
Check input shaft end play with dial indicator positioned at yoke
end of input shaft. Move input shaft axially and measure end play. If
end play is correct, seal shim pack to prevent lube leakage then torque
input shaft nut and cover cap screws (see chart).
7.
If end play is incorrect, change shim pack size, as follows:
Add shims to increase end play.
Example: Desired end play (New Parts) . . . . . . . . . . . . . . 0.003" to 0.007"
Measured end play (Step 6) . . . . . . . . . . . . . . . 0.001" - 0.001"
Add shims to provide desired end play . . . . . 0.002" to 0.006"
Remove shims to decrease end play.
Example: Measured end play (Step 6) . . . . . . . . . . . . . . . 0.015" - 0.015"
Desired end play (New Parts) . . . . . . . . . . . . . . 0.003" to 0.007"
Remove shims to provide desired end play . . 0.012" to 0.008"
8.
To add or remove shims, remove input shaft nut, flat washer and yoke.
Remove cap screws, lockwashers and bearing cover. Add or remove
shims as required.
9.
Install bearing cover, cap screws and lockwashers. Install yoke, flat
washer and nut. Seal shim pack to prevent lube leakage then torque
input shaft nut and cover cap screws (see chart).
I
Torque Chart
Input Shaft Nut
Ft-lbs.
1-5/8-18
780-960
*M42 X 1.5
840-1020
Bearing Cover Cap Screw
1/2-13
75-85
Nm
1057-1301
1140-1383
101-115
Tightening Yoke Nut.
(Grade 5)
Measuring Bearing Cover
Clearance.
Installing Bearing Cover and
Shim Pack.
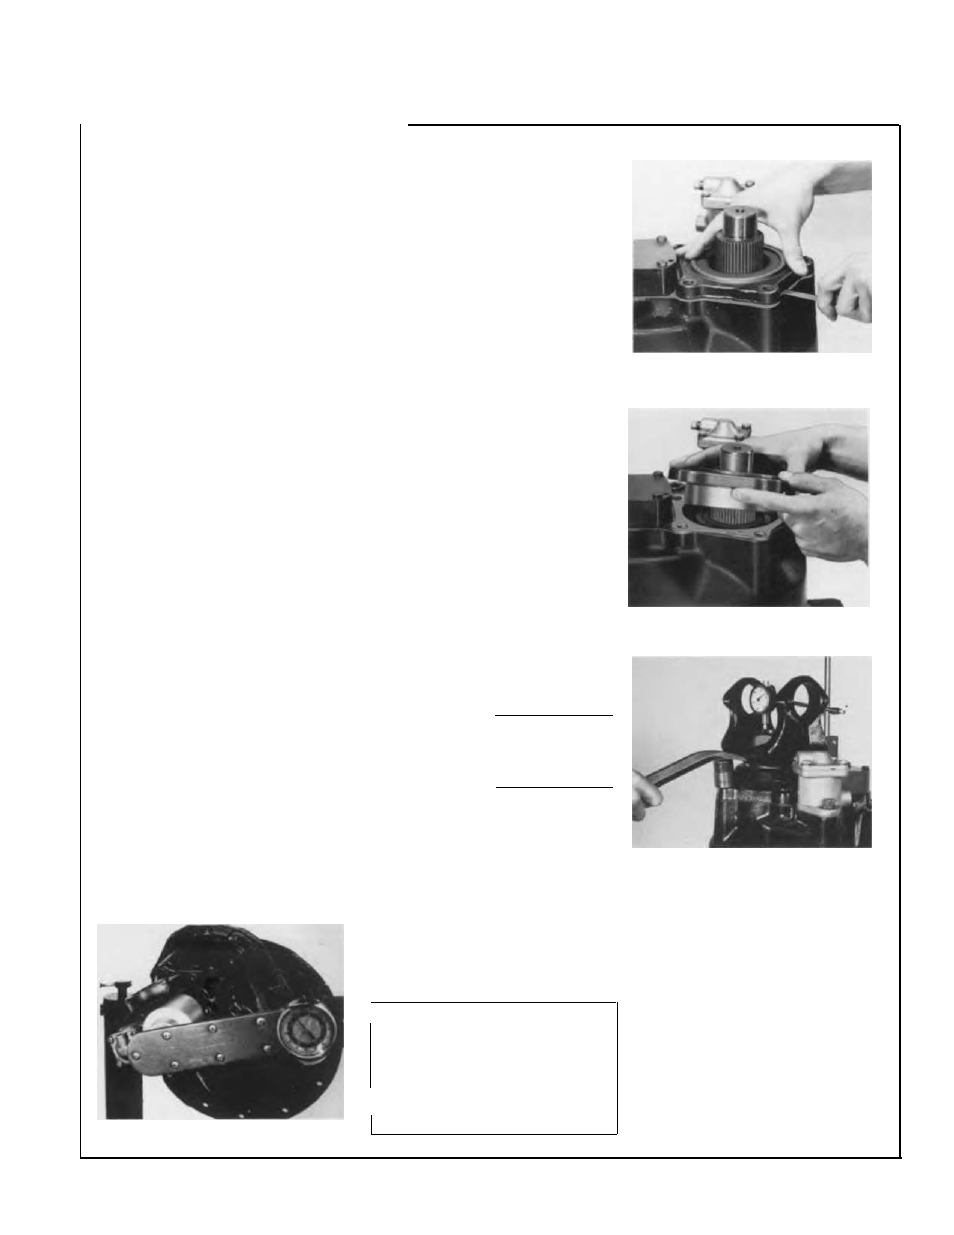
Measuring End Play with Dial
Indicator.
NOTE:
If difficulty is experienced
in achieving correct torque on the
input yoke nut, torque the nut with
truck on the ground and axle shafts
installed.
ñMetric Nut used on Axles produced after 7/1 /95
42