Toshiba E-STUDIO 351C User Manual
Page 270
3. Printing
270
Printing Guide — Printing from Macintosh
1) Destination
This selects the output destination tray.
-
Inner Tray — Select this when no finisher is installed.
-
Tray 1 — Select this to route the output to the upper tray of the Finisher.
-
Tray 2 — Select this to route the output to the lower tray of the Finisher.
NOTE:
“Tray 1” and “Tray 2” are only available when the Hanging Finisher, Multi-staple Fin-
isher, or Saddle-stitch Finisher are installed.
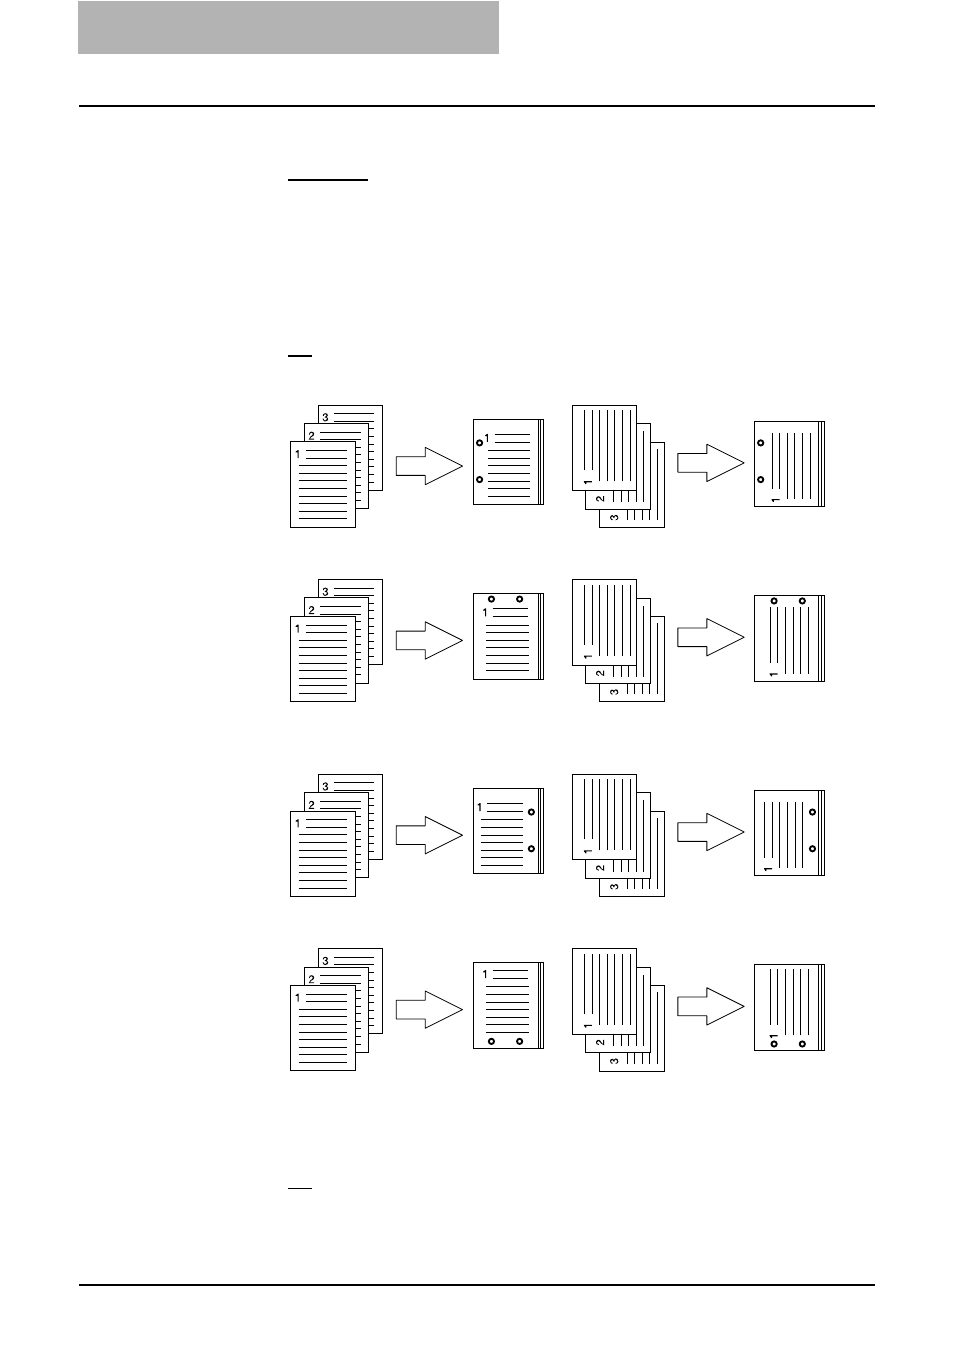
2) Hole Punch
This sets whether or not a print job is hole punched.
-
Off — Select this to print without hole punches.
-
Long Edge Punch without rotation — Select this to create holes on the left
side for the portrait document, or on the top for the landscape document.
-
Short Edge Punch without rotation — Select this to create holes on the top for
the portrait document, or on the right for the landscape document.
-
Long Edge Punch with 180 degree rotation — Select this to create holes on
the right side for the portrait document, or on the bottom for the landscape docu-
ment.
-
Short Edge Punch with 180 degree rotation — Select this to create holes on
the bottom for the portrait document, or on the left for the landscape document.
NOTE:
This option cannot be selected if a hole punch unit is not installed.
3) Stapling
This sets whether a print job is stapled.
-
Off — Select this to print without stapling.