Adjustments & settings – Toshiba TLPX10E User Manual
Page 55
55
Adjustments &
Settings
FULL MENU adjustments and settings – Picture (continued)
3-a
MENU
ON/STANDBY
INPUT
L-CLICK
R-CLICK
ENTER
KEYSTONE
AUTO
SET
EXIT
PIP
FREEZE
MUTE
CALL
RESIZE
VOLUME/ADJUST
TEMP LAMP
ON
BUSY
FAN
KEYSTONE
SET
AUTO
AUTO
EXIT
ENTER
MENU
INPUT
VOL/ADJ.
3-a
3-a
TEM
P LA
MP
ON
BUSY
FAN
ON/ST
ANDB
Y
KEYST
ONE
SET
AUTO
AUTO
EXIT
ENTE
R
MEN
U
INPU
T
VOL/A
DJ.
ON/STANDBY
LASER
2
2
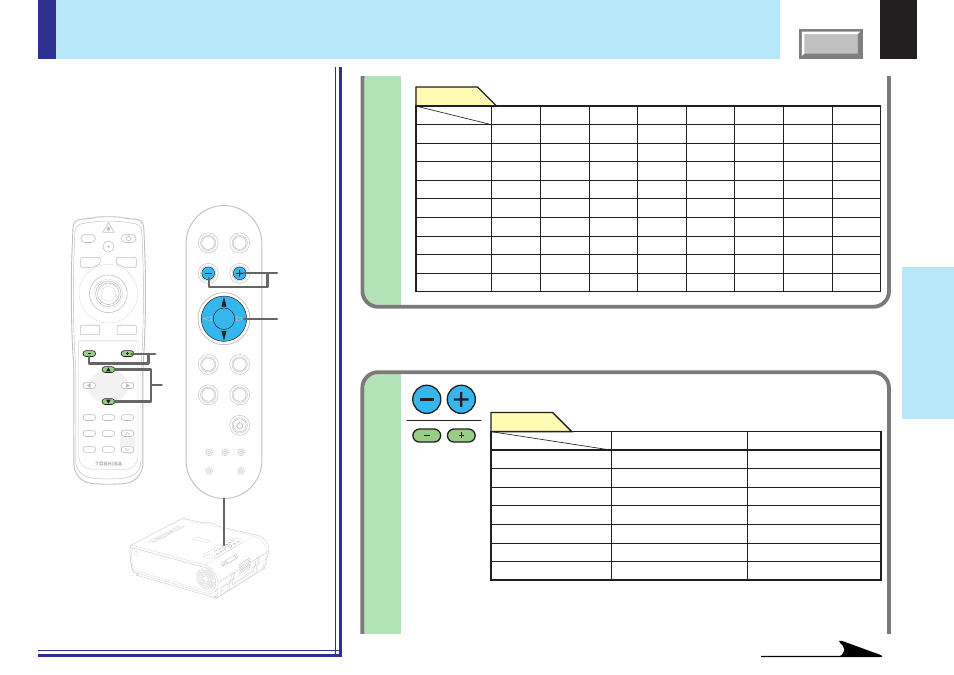
Analog RGB1 Analog RGB2 Digital RGB
Y/P
B
/P
R
Video
S-video
Memory Card
o
o
o
x
x
x
x
x
o
o
o
o
o
o
o
o
x
x
x
o
x
x
x
x
x
x
x
x
o
o
x
x
x
x
x
x
x
x
o
x
x
x
x
x
x
x
o
x
x
x
x
x
x
x
o
x
x
x
x
x
x
x
o
x
x
x
x
x
x
x
x
o
Settings
Inputs
Items
o
:
Settable
x
:
Not displayed
Picture mode
Screen size
Signal format
Video mode
Input select mode
Auto. demo
Slide show
Interval
Shutter
Document
Imaging Camera
When selecting “Contrast”, “Brightness”, “Color”, “Tint”, “Sharpness”, “Phase”, “Frequency”,
“Picture mode”, “Screen size”, “Input select mode”, “Auto. demo” or “Slide show” in step 2.
2
(Continued)
Press VOL/ADJ (+/-) to adjust and set.
(-)
(+)
Contrast
Lower
Higher
Brightness
Darker
Brighter
Color
Thinner
Deeper
Tint
Redder
Greener
Sharpness
Softer
Sharper
Phase
Adjust flickers
Adjust flickers
Frequency
Adjust vertical stripes
Adjust vertical stripes
Adjustments
Buttons
Items
Continued
Remote control
Control panel
(Main unit side)