Floor-mounted projector placement (continued), 18 installation and connection – Toshiba TLPX10E User Manual
Page 18
18
Installation and
connection
Place the projector on a steady, level surface such as a table.
To obtain proper screen projected, place the projector so that the projecting light hits the screen squarely.
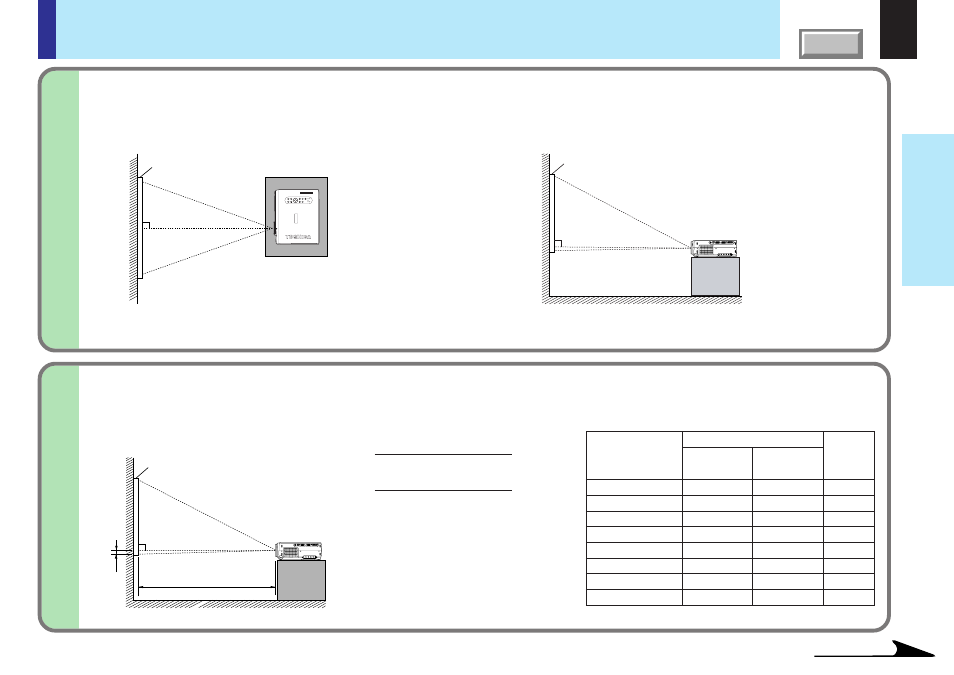
Floor-mounted projector placement (continued)
Top view
Screen
Screen
a
b
90
°
Side view
90
°
Screen
a: Distance between the lens and
the screen (m)
b: Distance between the lens height
and the bottom of projection area
(cm)
Projection size
(inches)
25
40
60
80
100
150
200
250
b (cm)
3.8
6.1
9.1
12.2
15.2
22.9
30.5
38.1
Minimum
(At maximum zoom)
–
1.43
2.16
2.89
3.62
5.45
7.28
9.11
Maximum
(At minimum zoom)
1.14
1.84
2.77
3.71
4.65
6.99
9.33
–
a (m)
• The values are approximations.
1
2
90
°
TEMP
LAMP
O
N
B
USY
F
AN
ON/ST
ANDBY
KEYST
ONE
SET
AU
T
O
AU
T
O
EXIT
ENTER
MENU
INPUT
V
O
L/ADJ
.
Point the lens straight at the center of the screen as above.
Determine the screen size projected on the screen.
The projection size depends on the distance between the lens and the screen.
Adjust the projection size by changing the distances as shown below.
Place the projector horizontally so that the projecting light hits the
screen squarely.
Continued
a (min.) =
Projection size - 0.9345
27.343
a (max.) =
Projection size - 0.7301
21.362
b =
Projection size (cm) x 0.06