P.158 “5-10 po, 10 position (page) – Ricoh JP8000 User Manual
Page 178
User Tools
158
4
B
Enter 5 with the number keys,
and then press the [OK] or
{{{{q
q
q
q}}}}
key.
C
Enter 7 with the number keys,
and then press the [OK] or
{{{{q
q
q
q}}}}
key.
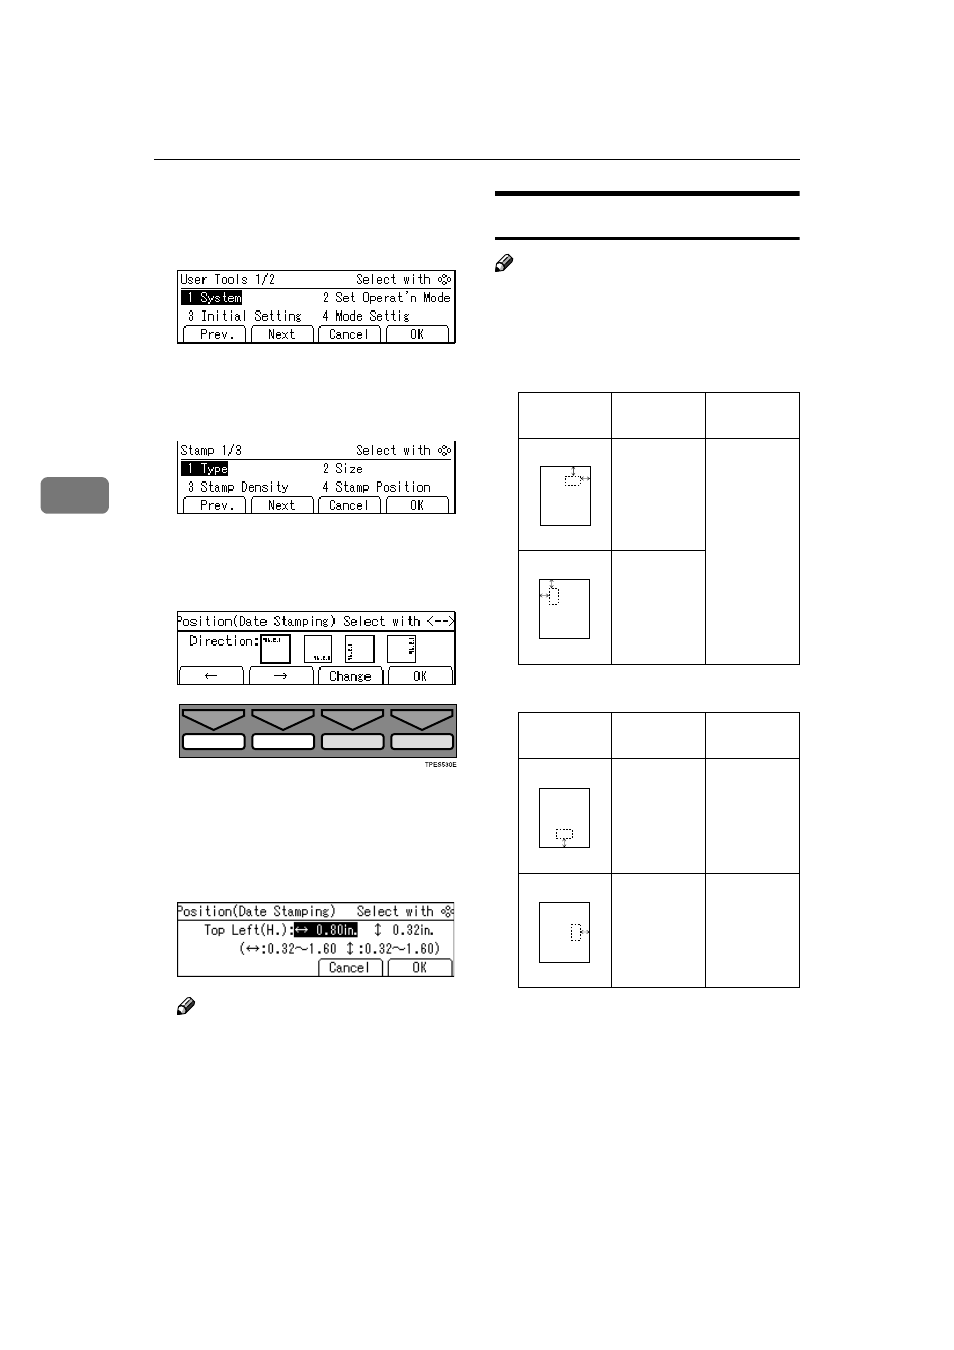
D
Select the date stamp direction
you want to adjust with the [
←
←
←
←]
[
→
→
→
→] or {{{{~
~
~
~}}}} {{{{}
}
}
}}}}} keys.
E
Press the [Change] key.
F
Adjust the horizontal date stamp
position with the
{{{{|
|
|
|}}}} or {{{{{
{
{
{}}}} key,
and then press the
{{{{}
}
}
}}}}} key.
Note
❒ The value increases or decreases
in 4mm, 0.16" steps.
G
Adjust the vertical date stamp po-
sition with the
{{{{|
|
|
|}}}} or {{{{{
{
{
{}}}} key.
H
Press the [OK] key twice.
5-10 Position (Page)
Note
❒ The default position and available
settings of each page stamp are as
follows:
❖
❖
❖
❖ P1 or
1
/
5
❖
❖
❖
❖ -1-
Stamp
positions
Default
Available
settings
a = 8mm,
0.32"
b = 12mm,
0.48"
a = 8 –
40mm, 0.32"
– 1.60"
b = 8 –
40mm, 0.32"
– 1.60"
a = 12mm,
0.48"
b = 12mm,
0.48"
Stamp
positions
Default
Available
settings
a = 8mm,
0.32"
a = 8 –
40mm, 0.32"
– 1.60"
a = 8mm,
0.32"
a = 8 –
40mm, 0.32"
– 1.60"
a
b
P.1
GRPPOS0E
a
b
P.1
GRPPOS1E
a
–1–
GRPPOS2E
a
–
1
–
GRPPOS3E