Playing without accompaniment, Using the upper part, Using the upper and lower parts – Roland KR111 User Manual
Page 25: Using the upper and layer parts, English, Balance kr111 digital intelligent piano
Balance
KR111 Digital Intelligent Piano
r
23
ENGLISH
ENGLISH
ENGLISH
ENGLISH
6.
Playing without accompaniment
When you switch on the KR111, it selects the “Piano” mode. This means that you can use the KR111 like a digital piano,
or a synthesizer.
The melodic accompaniment and One Touch function
are not available in “Piano” mode (the Arranger can,
however, play back the rhythm part of the Style you
select).
The KR111 provides three parts for your live playing
(and many more for Arranger backing and song play-
back):
Using the Upper part
(1) To activate the Upper part and assign it to the
entire keyboard, press the [Piano] button (the
icon disappears).
The [Split] indicator goes dark, the Arranger stops (if it
was playing), and the KR111 automatically selects a
piano sound for you.
(2) Play a few notes on the keyboard.
(3) If necessary, select another sound by pressing one
of the 6 Tone buttons. See p. 37 for details.
Note: You can also assign Drum Sets to the Upper part.
Note: You can press the [Start÷Stop] button to add a rhythm
accompaniment to your playing. This is based on the currently
selected Music Style. See p. 20 for how to select a different
one.
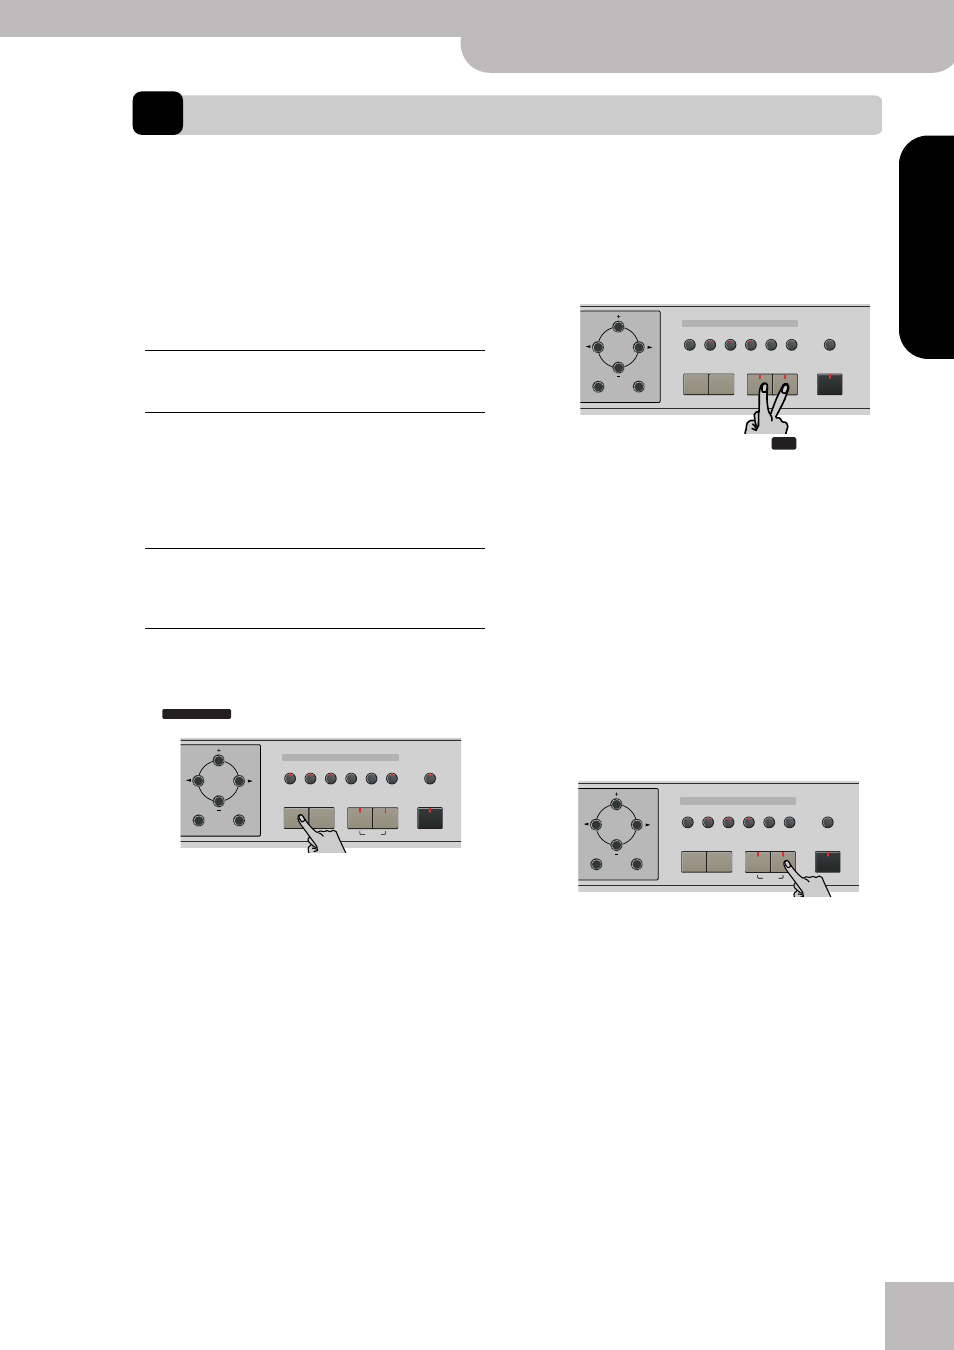
Using the Upper and Lower parts
(1) To play different sounds with your left and right
hands, simultaneously press the [Split] and [Layer]
buttons.
The [Split] indicator flashes and the
icon appears
in the display.
(2) Play a few notes on the keyboard.
At first, the keyboard is split at the G3 (note number
“55”). If necessary, you can select a different split
point. See “SplitPnt* (Split point)” on p. 46.
See page 44 for how to set the volume of the Upper
and Lower sounds.
(3) To assign another sound to the Lower part, press
the [Split] and [Layer] buttons (to switch on the
Lower part) and proceed in the same way as for the
Upper part (page 37).
Note: You cannot assign Drum Sets to the Lower part.
Using the Upper and Layer parts
(1) To play two sounds simultaneously, press the
[Layer] button (its indicator lights).
(2) Play a few notes on the keyboard.
See page 44 for how to set the volume of the Upper
and Layer sounds.
(3) To assign another sound to the Layer part, activate
it and proceed in the same way as for the Upper
part (page 37).
Note: You cannot assign Drum Sets to the Layer part.
Upper
This is the most important part. As long as the
Lower part is off, the Upper part is assigned to
the entire keyboard.
Lower
When you switch on this part, it is assigned to
the left half of the keyboard, while the Upper
part can be played with your right hand. The
[Split] button flashes to signal that the Lower
part is assigned to the left half of the keyboard
(and that the melodic Arranger parts are not
available).
Layer
This part can be added to the Upper part and is
also assigned to the entire keyboard (unless you
activate the Lower part as well). This allows you
to play two sounds simultaneously.
ARRANGER
Tone
Guitar
Bass
Melody
Intelligence
Piano
Piano
Lower
One Touch Program
Layer
Split
Arranger
Disk
Strings
Organ
Others
Drum/Sfx
Sax
Brass
Exit
Enter
Tone
Guitar
Bass
Melody
Intelligence
Piano
Piano
Lower
One Touch Program
Layer
Split
Arranger
Disk
Strings
Organ
Others
Drum/Sfx
Sax
Brass
Exit
Enter
SPLIT
Tone
Guitar
Bass
Melody
Intelligence
Piano
Piano
Lower
One Touch Program
Layer
Split
Arranger
Disk
Strings
Organ
Others
Drum/Sfx
Sax
Brass
Exit
Enter