Connecting to an answering machine – Lexmark 9500 Series User Manual
Page 32
3
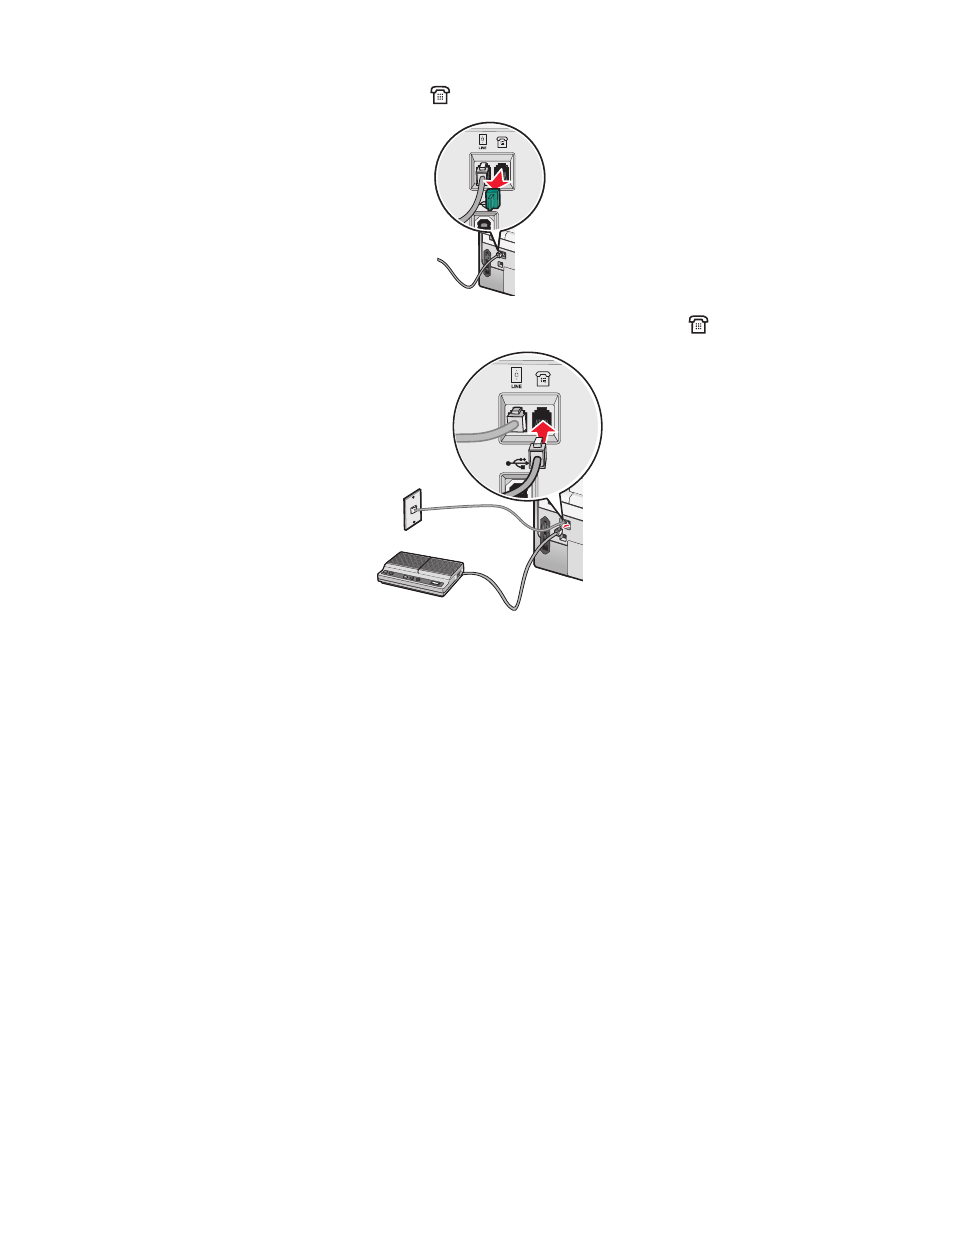
Remove the protective plug from the EXT port
of the printer.
4
Connect the other telephone cord to a telephone, and then plug it into the EXT port
of the printer.
Connecting to an answering machine
Connect an answering machine to the printer to receive both incoming voice messages and faxes.
Note: Setup steps may vary depending on your country or region. For more information on connecting the printer
to telecommunications equipment, see “Using an RJ11 adapter” on page 35.
1
Make sure you have the following:
•
A telephone
•
An answering machine
•
Three telephone cords
•
A telephone wall jack
Setting up the printer
32
See also other documents in the category Lexmark Printers:
- E260d (142 pages)
- 6600 Series (173 pages)
- 10N0227 (1 page)
- Z12 (2 pages)
- 301 (144 pages)
- NO. 35 (1 page)
- Z65n (111 pages)
- dn2 (217 pages)
- 10E (144 pages)
- Z2300 (54 pages)
- 230 (213 pages)
- 310 Series (2 pages)
- PRO700 (24 pages)
- C 720 (18 pages)
- C520 (145 pages)
- X656 MFP (104 pages)
- Prospect Pro207 (27 pages)
- 337 (258 pages)
- OptraImage 242 (207 pages)
- T64x (6 pages)
- C524 (146 pages)
- 4098-001 (70 pages)
- 1200 Series (21 pages)
- X650 Series (8 pages)
- 5300 (179 pages)
- 302 (274 pages)
- 4549 (235 pages)
- 202 (320 pages)
- 4076-0XX (89 pages)
- 10N0016 (1 page)
- 5025 (171 pages)
- 1361760 (1 page)
- C 546dtn (6 pages)
- Interpret S400 (40 pages)
- x6575 (2 pages)
- 27S2156-001 (2 pages)
- MENUS AND MESSAGES C522 (55 pages)
- Z25 (24 pages)
- Z35 (101 pages)
- series x5100 (77 pages)
- Z82 (105 pages)
- 2500 Series (76 pages)
- 1200 (208 pages)
- Z33 (114 pages)
- 7600 Series (181 pages)