Removing the front wheel, Installing the front wheel, Assembling/using/adjusting the handcycle rack – Invacare Force User Manual
Page 71
SECTION 9—OPTIONS
71
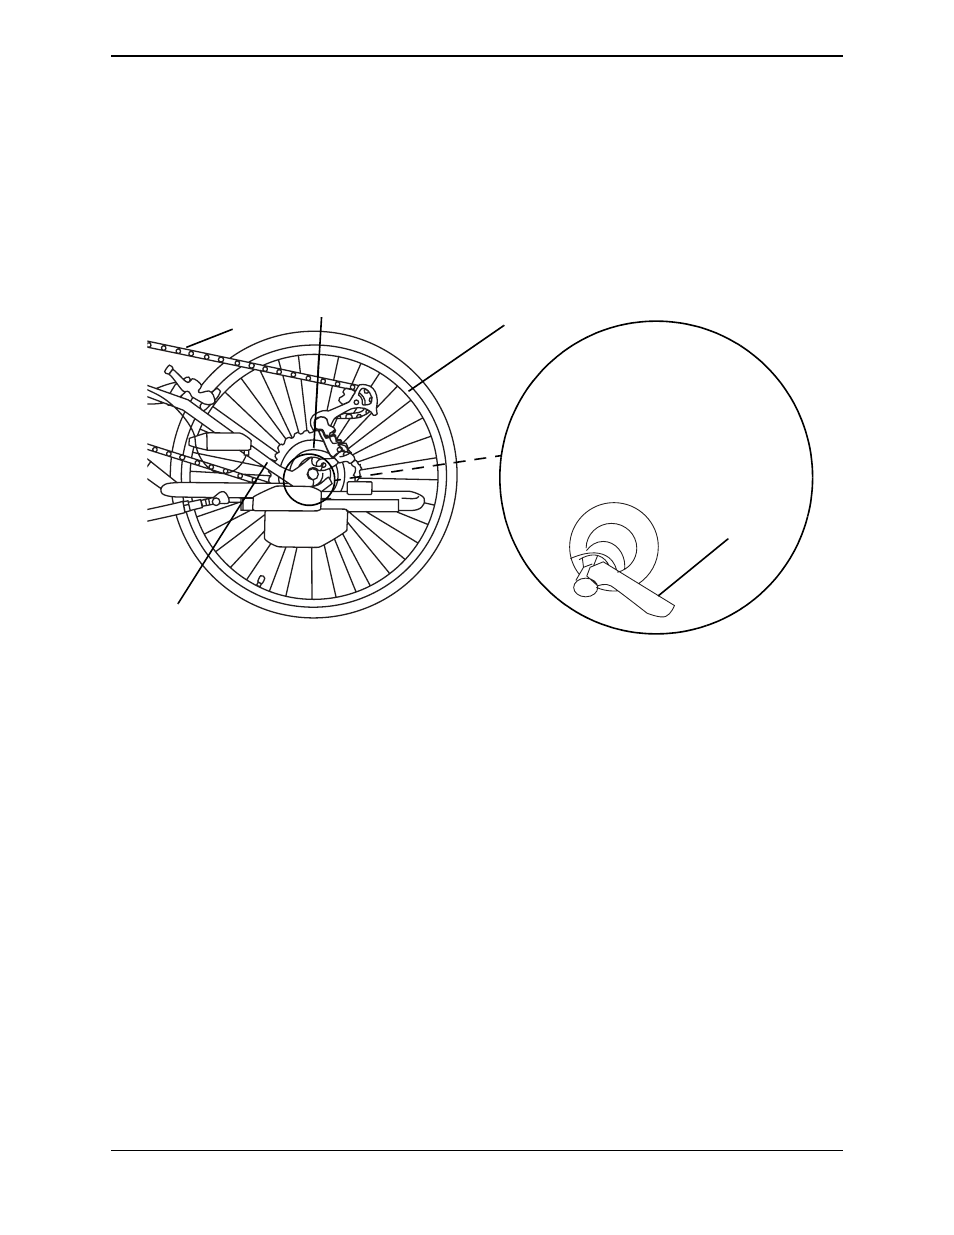
Installing the Front Wheel
NOTE: For ease of installation, secure handcycle frame approximately 6 inches from the ground or
seek assistance.
1. Loop the chain over the front wheel sprocket.
2. Position the front wheel sprocket into the fork slots.
3. Tighten the knob on the opposite side of the quick‐release lever.
4. Secure the wheel to the fork with the quick‐release lever.
FIGURE 9.17 Removing/Installing the Front Wheel - XLT Gold, XLT Pro and XLT with Speed
Assembling/Using/Adjusting the Handcycle Rack
NOTE: For this procedure, refer to FIGURE 9.18 on page 72.
Assembling the Handcycle Rack
1. Position the receiver with the bracket facing up.
2. Position the rear wheel bar with the wheel brackets facing up.
3. Remove the two large mounting bolts and locknuts from the receiver and set aside.
4. Remove the two small mounting bolts and locknuts from the receiver bracket and set
aside.
5. Secure the wheel tray to the receiver with the two large mounting bolts and locknuts.
6. Using two small mounting bolts and locknuts, secure the receiver bracket to the wheel
tray.
7. Remove the two mounting bolts and locknuts from the rear wheel bar and set aside.
Chain
Sprocket
Front Wheel
Fork
DETAIL “A” - FRONT
WHEEL QUICK-RELEASE
LEVER
NOTE: Quick Release Lever is an
opposite side of wheel.
Quick-release
Lever