Installing road crown compensator, Refer to – Invacare Force User Manual
Page 50
SECTION 8—SERVICE PROCEDURES
50
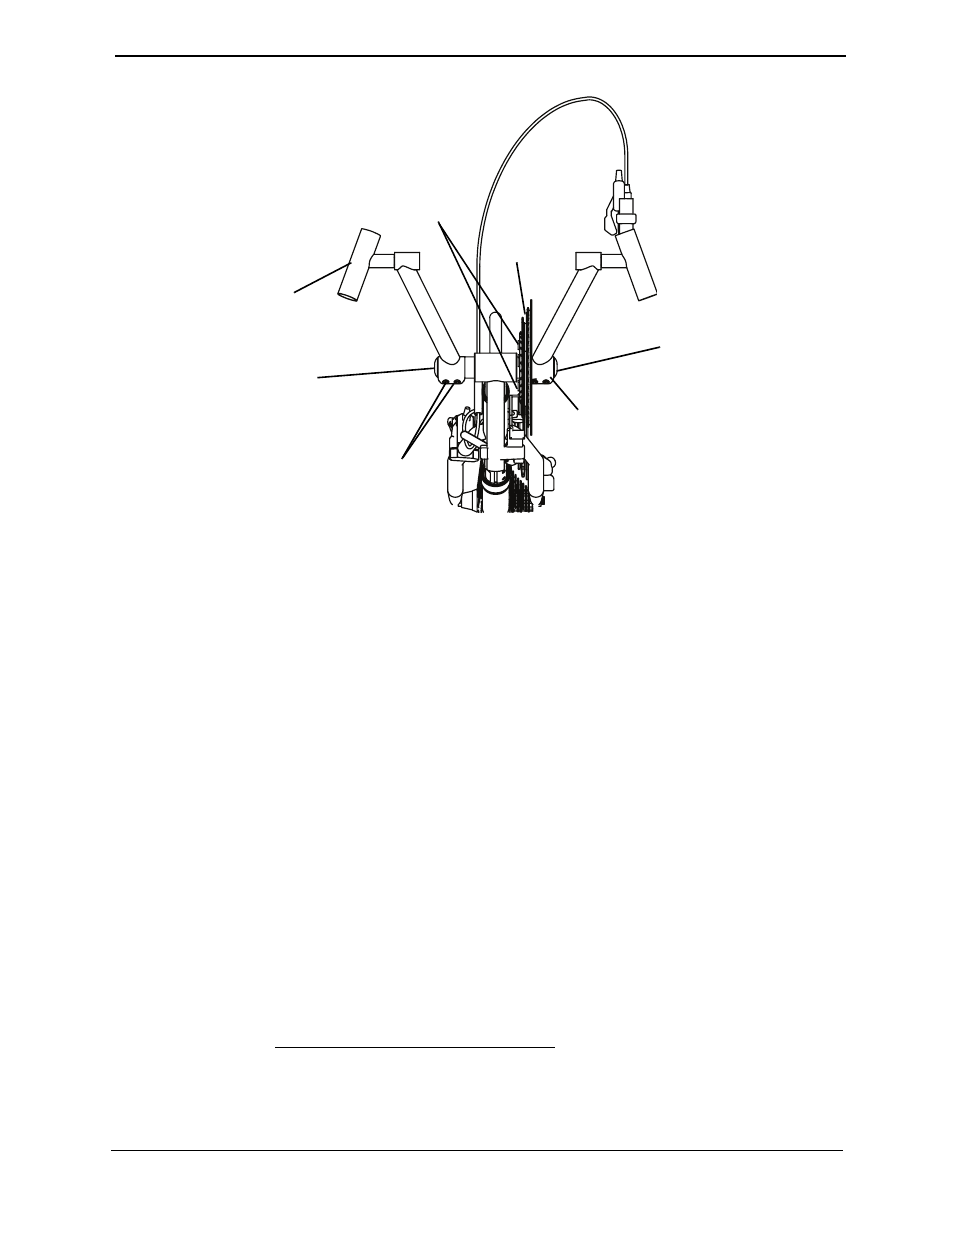
FIGURE 8.2 Replacing the Crank Arms - XLT Gold, XLT PRO and Top End Force
Installing/Removing/Adjusting the Road Crown
Compensator
NOTE: For this procedure, refer to FIGURE 8.3 on page 51.
NOTE: The road crown compensator is designed to stabilize the handcycle during transfers and
while riding and is not intended to keep the handcycle straight when pedaling but to keep the
handcycle from leaning excessively to one side or another.
Installing Road Crown Compensator
1. Position the bolt through the frame end of the road crown compensator.
2. Position the spacer on the bolt.
3. Install the bolt with spacer and road crown compensator into the mounting hole on
the frame.
4. Rotate the fork to ensure the front wheel is pointing directly forward.
5. Position the fork end of the road crown compensator on the fork bolt.
NOTE: If necessary, lengthen or shorten the road crown compensator to position the fork end onto
the fork bolt. Refer to Adjusting Road Crown Compensator on page 51.
6. Secure the road crown compensator to the fork bolt with the locknut. Tighten securely.
Right Crank Arm (Tabs)
Spindle, Socket
Screw and Cap
Chain
Ring Disk
Socket Screws
Crank Arm Clamp
Left Crank Arm
Mounting Bolts
and Locknuts
Crank Arm Clamp and
Socket Screws
Spindle, Socket
Screw and Cap