Menu panel, Setting advanced options – HTC Pro2 User Manual
Page 113
Section 2I. Experiencing Multimedia
103
Experiencing M
u
ltimedia
Menu Panel
The Menu panel lets you quickly adjust common camera settings and provides access to more advanced
camera settings. To open the Menu panel, tap
on the Camera screen, and then tap
. To adjust a
setting, repeatedly tap a button, for instance,
White Balance
, to cycle through the available settings.
Setting Advanced Options
Tap
Advanced
on the Menu panel to open the Advanced screen where you can configure settings for your
selected capture mode.
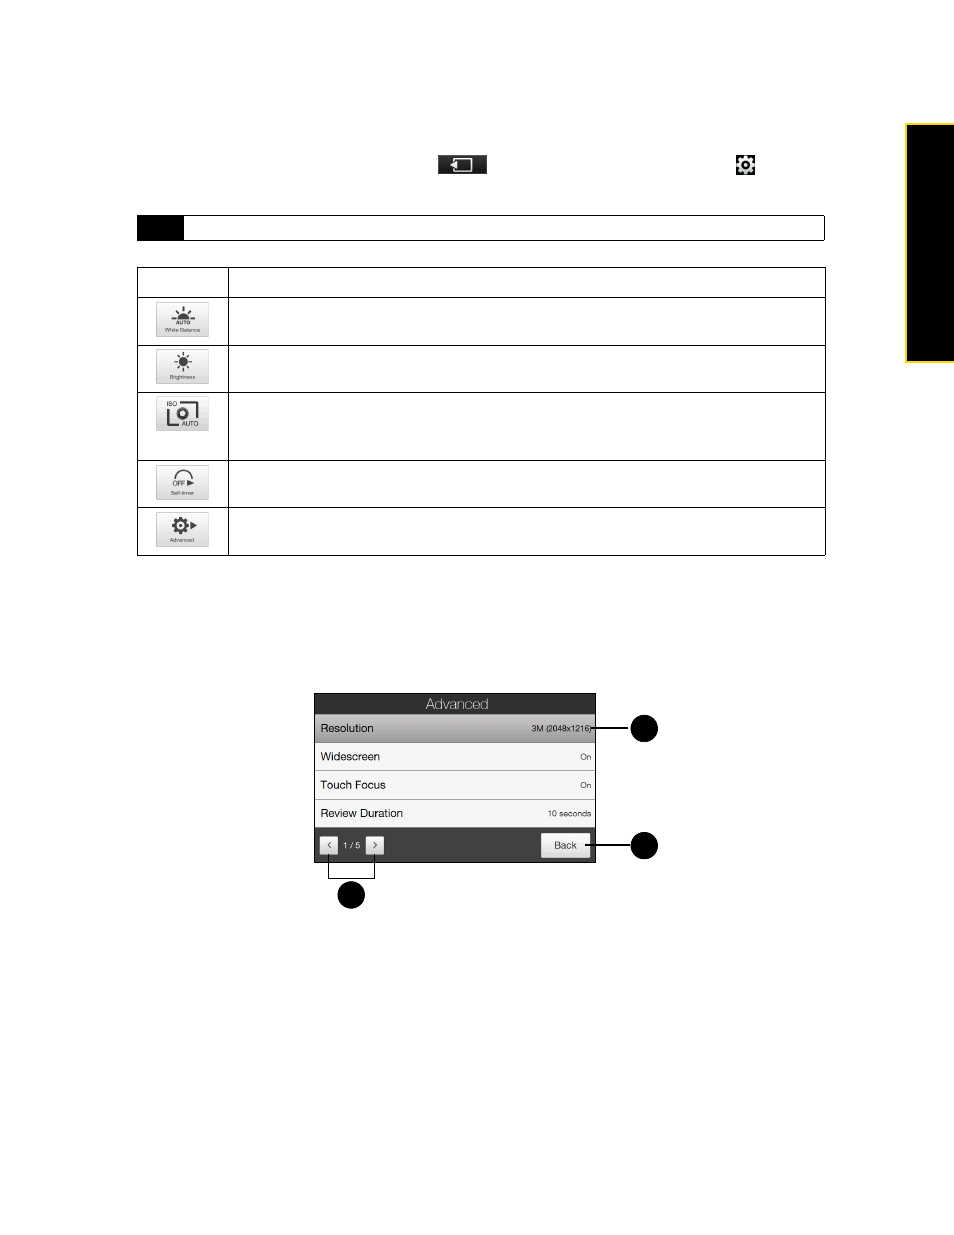
Navigating the Advanced Screen
1.
Tap the left and right arrows to go through the different pages of settings.
2.
Tap
Back
to go back to the live camera screen.
3.
Tap an item to change the setting.
Note
The available Menu Panel buttons depend on the selected capture mode.
Icon
Function
Select the white balance setting according to the current lighting condition to capture
colors more accurately.
Open the Brightness bar and adjust the brightness level. Tap outside the Brightness bar
to apply the change.
Set the ISO level manually to
100
,
200
,
400
, or
800
, or set it back to
AUTO
. Higher ISO
numbers are better for taking pictures in low light conditions.
When set to
AUTO
, the camera automatically adjusts the ISO level up to 400 only.
Set the self-timer to
2 seconds
,
10 seconds
, or
Off
when in Photo or Contacts Picture
mode.
Open the advanced camera settings. See “Setting Advanced Options” (below)
for details.
3
1
2