Using your favorite 3rd party software – Blackmagic Design DeckLink Studio 4K Capture & Playback Card User Manual
Page 29
Using your Favorite 3rd Party Software
29
Setting Up a VTR
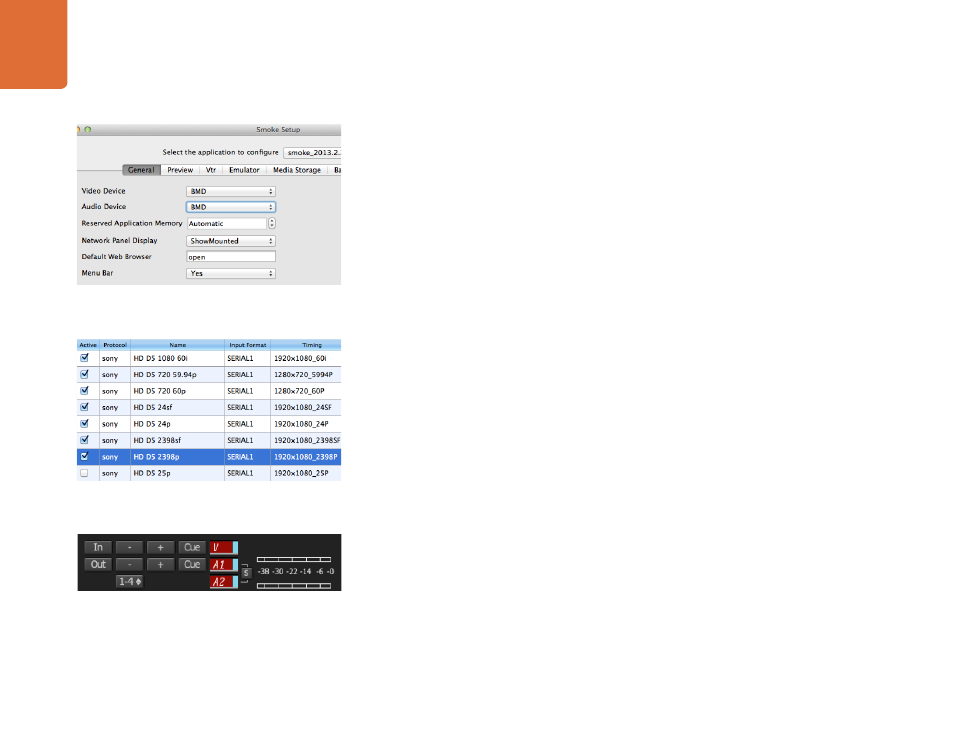
Before starting Autodesk Smoke, you must use a utility called Smoke Setup to select the model of the VTR(s)
in your facility and its appropriate timing settings.
Step 1.
Go to Applications>Autodesk>Smoke>Utilities and open Smoke Setup.
Step 2.
In the General tab, make sure that Video Device and Audio Device are set to BMD.
Step 3.
In the VTR tab, enable the VTR model and the timings you want to use with Autodesk Smoke.
Enable the rows with live NTSC or live PAL to enable crash-record or live output.
Step 4.
Click Apply and close Smoke Setup.
Capture from Controllable Devices with UltraStudio and DeckLink
Autodesk Smoke can be configured to capture from controllable VTRs with RS-422 deck control.
Step 1.
Select a folder in the Media Library where you want the captured clip to be created.
Step 2.
Select File>Capture from VTR. The VTR Capture module appears.
Step 3.
Cue the tape to the start frame of the clip you want to capture.
Step 4.
Select the video and audio channels you wish to record. The buttons will turn red to let you know
which tracks are enabled.
Step 5.
Enter In and Out points in the In and Out fields.
Step 6.
Click Capture to start the capture. The timecode field will turn green to indicate that capture is in
progress.
Step 7.
End the capture at any time by clicking anywhere over the Preview window. The clip will
automatically be saved to the location that you selected before entering the VTR Input module.
Ensure Video Device and Audio Device are set to BMD in the
Smoke Setup utility.
Select timing settings for your VTR using the VTR tab in the
Smoke Setup utility.
Video and audio tracks turn red when enabled for capture from
your VTR.