Capturing and playing back video, Getting started – Blackmagic Design DeckLink Studio 4K Capture & Playback Card User Manual
Page 11
Getting Started
11
Capturing and Playing back Video
It's a good idea to run a quick test to ensure you can successfully capture and play back video.
Setting-Up
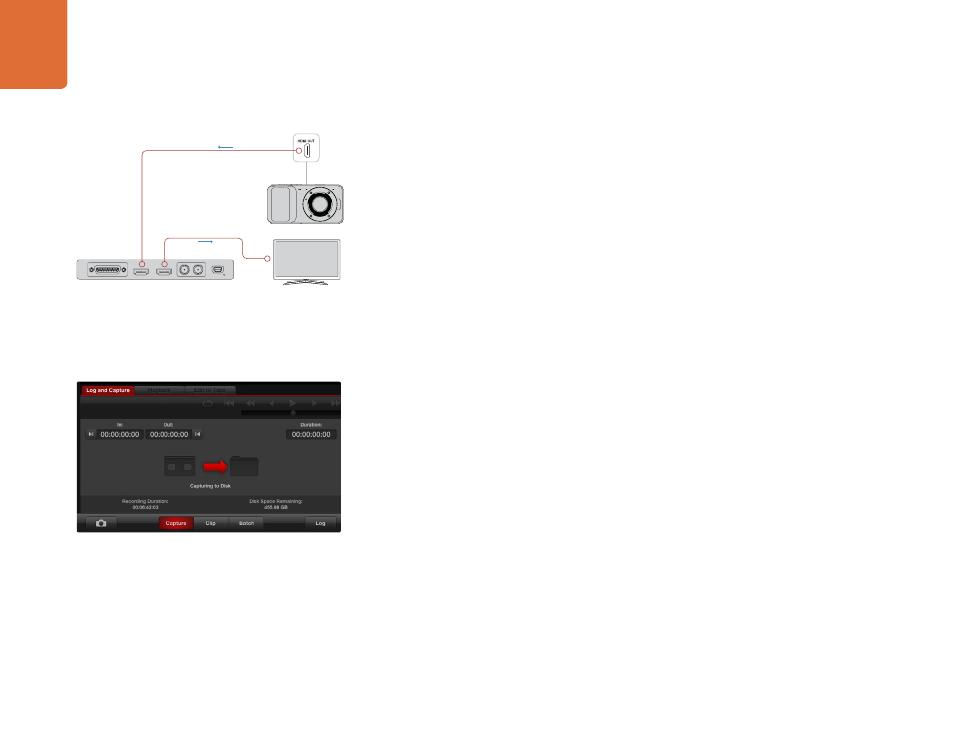
Step 1.
Connect a video monitor or TV to the video output of your Blackmagic video hardware.
Step 2.
Connect a video source to the video input of your Blackmagic video hardware.
Step 3.
Use the Blackmagic system preferences to set your video and audio connections for input and
output. See the "Using Blackmagic System Preferences" section for details.
Testing Video Capture
Step 1.
Go to Media Express>Preferences on Mac OS X or Edit>Preferences on Windows or Linux and
select a project format that matches your video source. Also choose a capture file format and
storage location.
Step 2.
Close the Preferences and click on the Log and Capture tab. Your video source will appear in the
preview pane of Media Express.
Step 3.
Click Capture to perform the capture test. Click Capture again to finish the test.
Testing Video Playback
Step 1.
Click on the Playback tab.
Step 2.
Double-click the test clip and the video will appear on the monitor connected to the output of
your Blackmagic video hardware. Audio output can also be monitored.
Camera Outputs
HDTV
Click the "Capture" button to commence recording.
Connect a video monitor and source to your Blackmagic video
hardware.