Removing and installing ink cartridges – Epson WorkForce Pro WF-C4310 Wireless Color Printer User Manual
Page 134
134
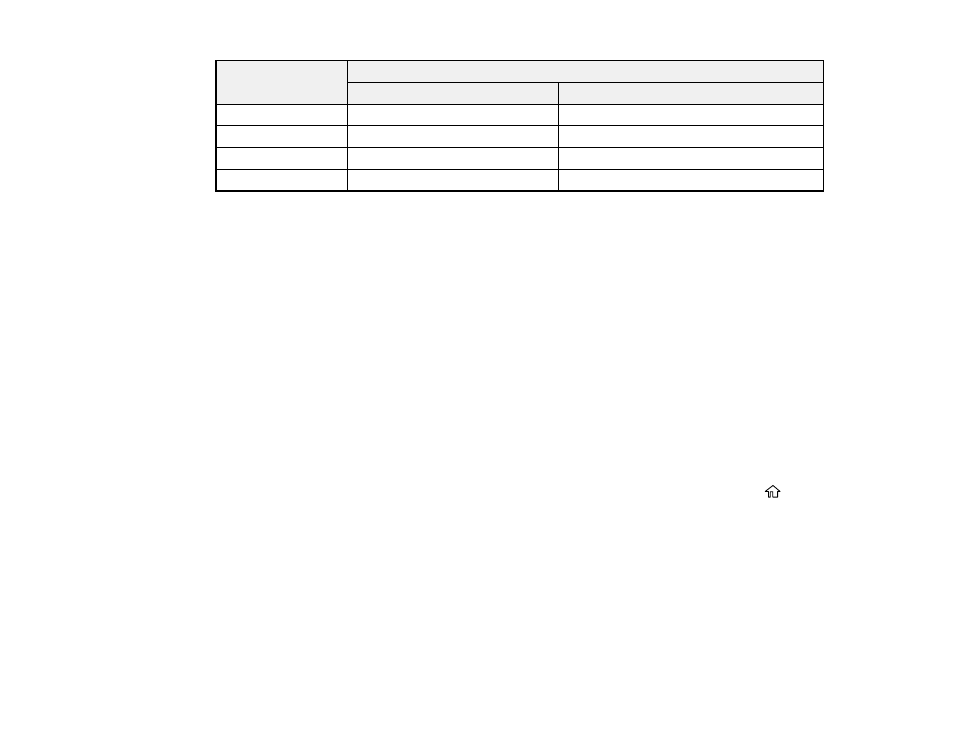
Ink color
Part number
Standard-capacity
High-capacity
Black
924120
924XL120
Cyan
924220
924XL220
Magenta
924320
924XL320
Yellow
924420
924XL420
Parent topic:
Purchase Epson Ink Cartridges and Maintenance Box
Removing and Installing Ink Cartridges
Make sure you have your replacement cartridges handy before you begin. You must install new
cartridges immediately after removing the old ones.
Caution:
Leave your old cartridges in the printer until you are ready to replace them to prevent the print
head nozzles from drying out. Do not open ink cartridge packages until you are ready to install the ink.
Cartridges are vacuum packed to maintain reliability.
Caution:
Make sure you follow all safety precautions when handling ink cartridges. See the link below
for more information.
1.
Turn on your product.
• If an ink cartridge is expended, you see a message on the LCD screen. Note which cartridges
need to be replaced, then select
How To
and press the
OK
button. Follow the instructions on the
screen.
• If you are replacing a cartridge before you see a message on the LCD screen, press the
home
button if necessary, and select
Maintenance
>
Ink Cartridge Replacement
and press the
OK
button.
2.
Follow the on-screen instructions to replace the expended ink cartridge.
If you remove a low or expended ink cartridge, you cannot re-install and use the cartridge.
Caution:
If you remove an ink cartridge for later use, protect the ink supply area from dirt and dust and
store it in the same environment as the printer. The valve in the ink supply port is designed to contain
any excess ink, but do not touch the ink supply port or surrounding area. Always store ink cartridges with
the label facing up; do not store cartridges upside-down.