Modifying the mud ring, Modifying the mud ring -8, Preliminar y – Extron Electronics MLC 104 Plus Series User Manual
Page 148: Labeling, installation, and mounting, cont’d
Labeling, installation, and Mounting, cont’d
MLC 104 Plus Series • Labeling, installation, and Mounting
6-8
PRELIMINAR
Y
5.
If necessary, use a rasp or file to enlarge the hole. Smooth the edges of the
hole to avoid injury to yourself or damage to the cables during installation.
6.
Insert the mud ring into the hole in the wall.
7.
Tighten all of the dogleg screws until the doglegs clamp the mud ring to the
mounting surface. Do not overtighten.
N
The MR 200 uses four doglegs to secure it to mounting surface. The MR 400
and MR 600 use six doglegs to secure them to mounting surface.
Mud
Ring
Model
Dogleg
assemblies
Segment
assembly
screws
(#4-3/8")
Surface
mounting
screws
(#4-3/8")
Device
mounting
screws
(#6-1/2")
Top/
bottom
segments
Side
segments
MR 200
4
4
4
4
2 small
2
MR 400
6
6
4
8
2 small
2 large
2
MR 600
6
8
4
12
2
2 small
4 large
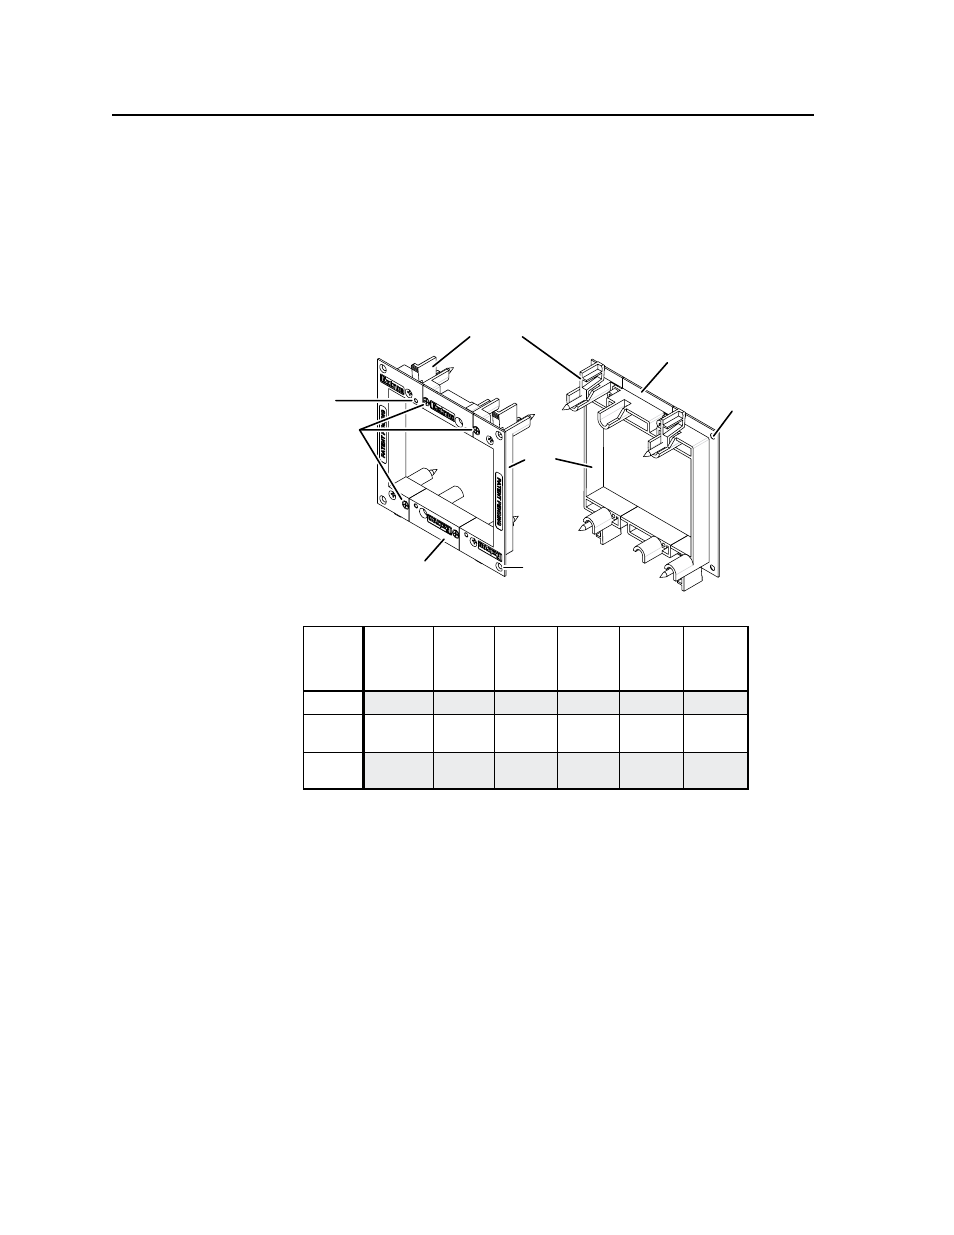
Dogleg
Assembly
Surface Mount
Screw Hole
Side
Segment
Top/Bottom
Segment
Segment
Assembly
Screws
Top/Bottom
Segment
Surface Mount
Screw Hole
Device
Mount
Screw
Hole
N
Each mud ring kit includes an expansion kit consisting of two small top/bottom
segments that allow the mud ring to be enlarged or reduced to the next larger or
smaller gang size. See “Modifying the mud ring,” below.
Modifying the mud ring
Each mud ring size, 1-gang through 7-gang, can be modified to make the mud ring
one gang-size larger or smaller. You can resize the mud ring by adding a top and
bottom segment, removing a top and bottom segment, or replacing one size top and
bottom segment with another. See the following diagram.