Poppy rev.b/tcat – Epson PhotoPC 600 User Manual
Page 57
Setting the clock
PhotoPC 600 can record the date and time of your
pictures automatically. When you transfer the pictures
from the camera to your computer, you can see exactly
when each shot was taken.
In order to have the time and date recorded, you need to
set the camera’s clock by using the camera’s LCD
monitor or by using the Set Time feature described
below. The PhotoPC 600 clock will continue to keep time
accurately until you replace the batteries. See page 20 for
instructions on setting the camera’s clock by using the
LCD monitor.
Follow these steps to set the camera’s clock from your
computer:
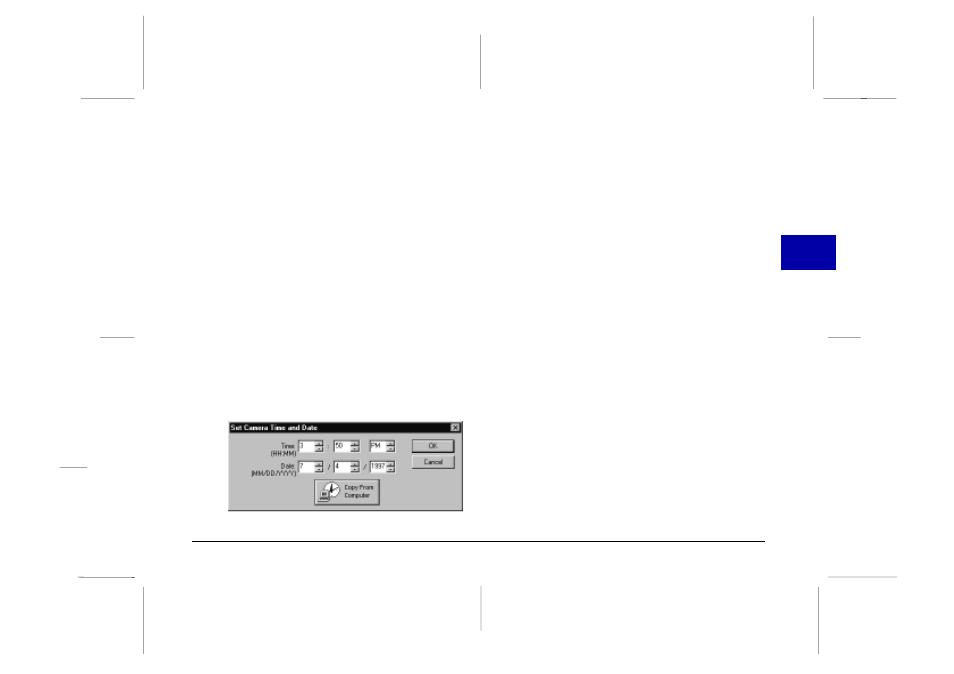
1. Click the Set Time button. The Set Camera Time and
Date dialog box below appears. The way the time
and date are displayed in this dialog box depends on
the time and date display settings for your computer.
2. Use the arrows to change the time and date. Or you
can just click the Copy From Computer button to
set your camera to your computer’s current date and
time.
3. Click OK. EPSON Photo!2 updates the date and time in
your camera.
Setting auto shut-off time
PhotoPC 600’s power-saving feature automatically shuts
off the camera if you wait more than 60 seconds before
taking a picture. You can adjust this time period by
connecting the camera to your computer. Click the arrow
on the Auto Shut-off Time list to change the setting. You
can select from 1 to 5 minutes.
Auto shut-off takes place after 5 minutes when the
camera is connected to your computer. You cannot
change this time period.
Changing the camera ID
If you want to change the name that is used to identify
the camera when it is connected to a computer, simply
type a new name into the Camera ID edit box.
The camera name appears on the introductory screen
when you start EPSON Photo!2 and in the About dialog
box.
3
R
Poppy Rev.B/TCAT
A5 size
Chapter 3
97/09/18
pass 6
Using PhotoPC 600 with Your Computer
57