13 measure plane (cycle 431, din/iso: g431), Cycle run – HEIDENHAIN iTNC 530 (340 49x-06) Cycle programming User Manual
Page 437

HEIDENHAIN iTNC 530
437
16.13 MEA
S
URE PLANE (Cy
c
le 431, DIN/ISO: G431)
16.13 MEASURE PLANE (Cycle 431,
DIN/ISO: G431)
Cycle run
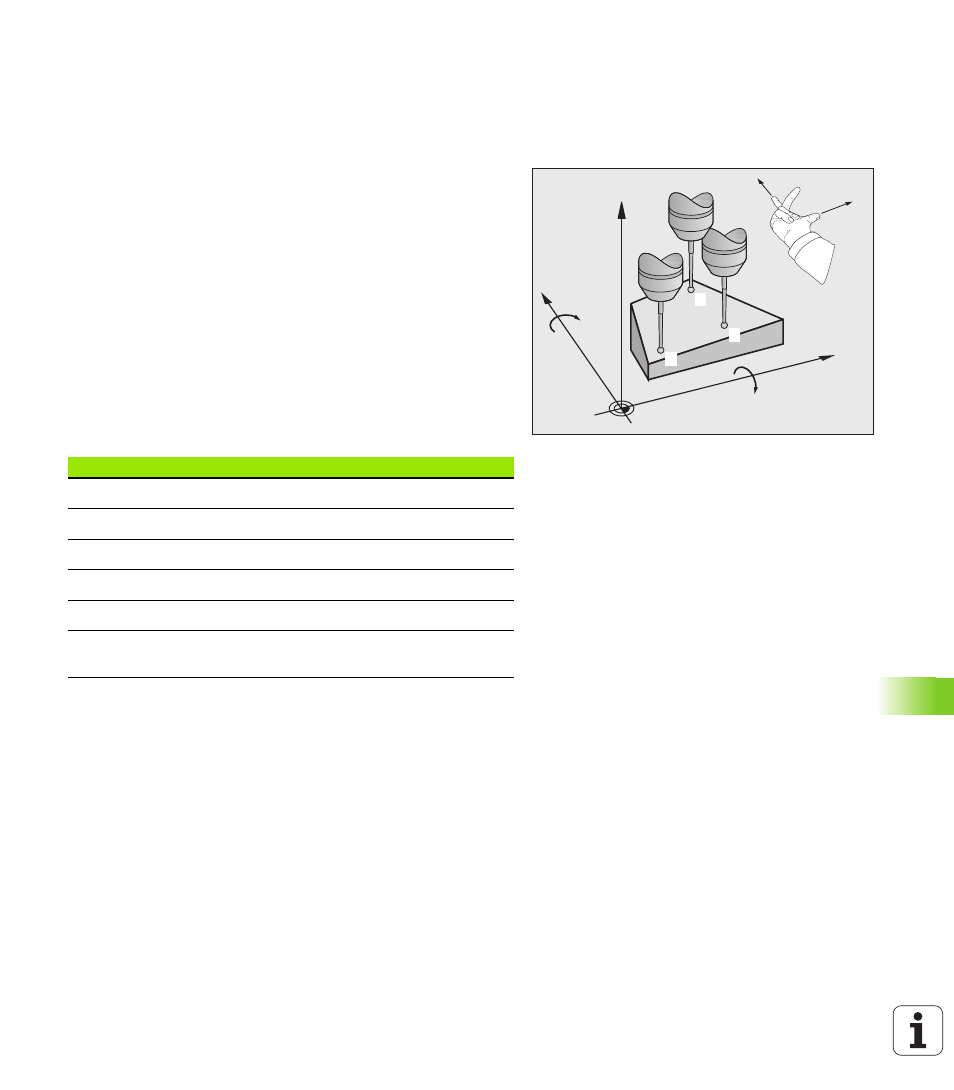
Touch Probe Cycle 431 finds the angle of a plane by measuring three
points. It saves the measured values in system parameters.
1
Following the positioning logic (see “Executing touch probe
cycles” on page 318), the TNC positions the touch probe at rapid
traverse (value from MP6150) to the programmed starting point
1
and measures the first touch point of the plane. The TNC offsets
the touch probe by the safety clearance in the direction opposite
to the direction of probing.
2
The touch probe returns to the clearance height and then moves in
the working plane to starting point
2
and measures the actual value
of the second touch point of the plane.
3
The touch probe returns to the clearance height and then moves in
the working plane to starting point
3
and measures the actual value
of the third touch point.
4
Finally the TNC returns the touch probe to the clearance height and
saves the measured angle values in the following Q parameters:
X
Z
Y
1
2
3
+X
+Y
A
B
Parameter number
Meaning
Q158
Projection angle of the A axis
Q159
Projection angle of the B axis
Q170
Spatial angle A
Q171
Spatial angle B
Q172
Spatial angle C
Q173 to Q175
Measured values in the touch probe axis
(first to third measurement)
