Cycle parameters – HEIDENHAIN iTNC 530 (340 49x-06) Cycle programming User Manual
Page 338

338
Touch Probe Cycles: Automatic Measurement of Workpiece Misalignment
14.7 Compensating W
o
rk
piece Misalignm
e
n
t b
y
Rota
ting the C Ax
is (Cy
c
le
405, DIN/ISO: G405)
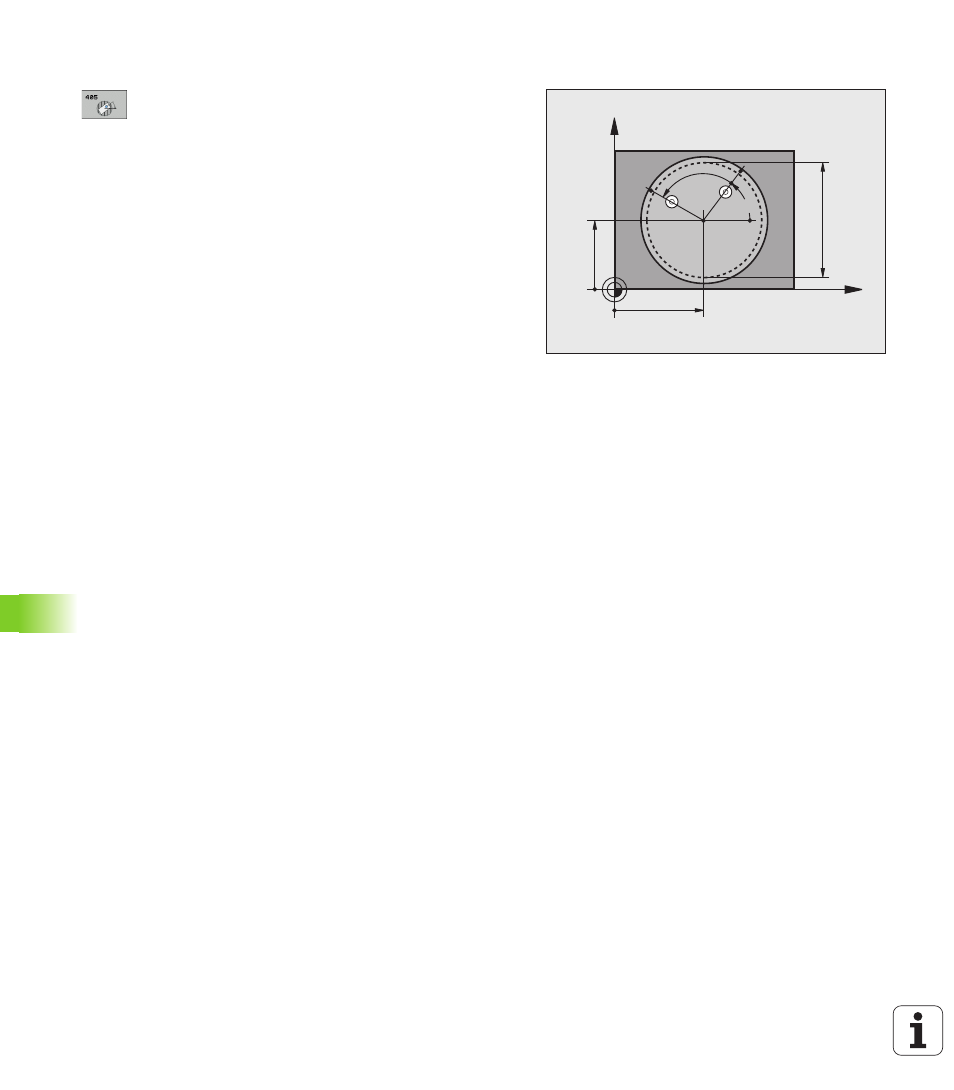
Cycle parameters
U
Center in 1st axis
Q321 (absolute): Center of the
hole in the reference axis of the working plane. Input
range -99999.9999 to 99999.9999
U
Center in 2nd axis
Q322 (absolute value): Center
of the hole in the minor axis of the working plane. If
you program Q322 = 0, the TNC aligns the hole
center to the positive Y axis. If you program Q322
not equal to 0, then the TNC aligns the hole center
to the nominal position (angle of the hole center).
Input range -99999.9999 to 99999.9999
U
Nominal diameter
Q262: Approximate diameter of the
circular pocket (or hole). Enter a value that is more
likely to be too small than too large. Input range 0 to
99999.9999
U
Starting angle
Q325 (absolute): Angle between the
reference axis of the working plane and the first touch
point. Input range -360.000 to 360.000
U
Stepping angle
Q247 (incremental): Angle between
two measuring points. The algebraic sign of the
stepping angle determines the direction of rotation
(negative = clockwise) in which the touch probe
moves to the next measuring point. If you wish to
probe a circular arc instead of a complete circle, then
program the stepping angle to be less than 90°. Input
range -120.000 to 120.000
X
Y
Q322
Q321
Q262
Q325
Q247
