QuickLabel 200 Kiaro! User Manual
Page 48
Designing and Printing Labels
34
Kiaro! 200 User Guide
3
Choose
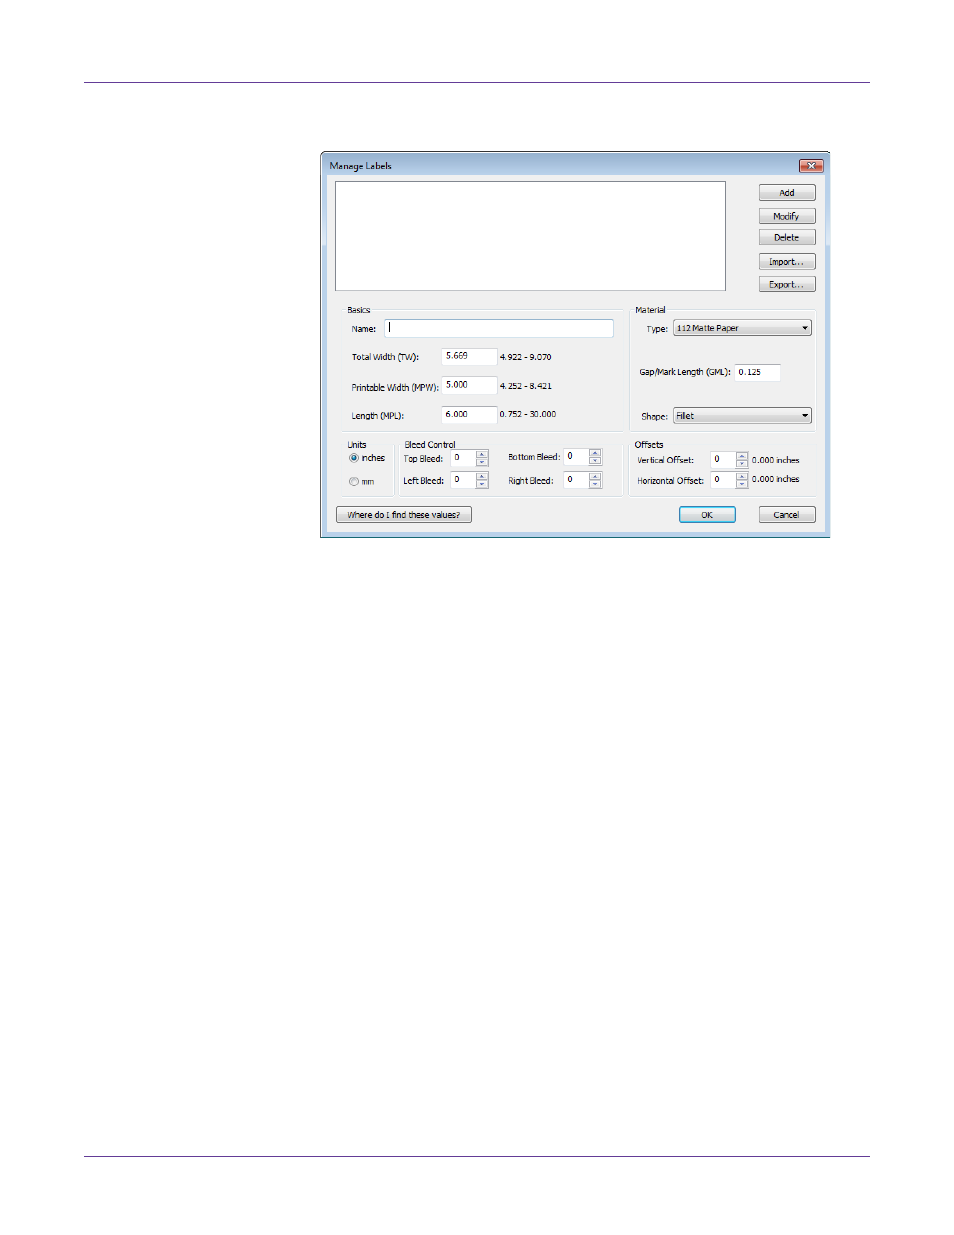
Manage Labels
. The Manage Labels window will open.
Note: Choose the “Where do I find these values?” button to view a help topic that describes
how to locate setup information about your labels.
4
Enter a name for the label stock.
5
Select whether to specify sizes in inches or millimeters.
6
Enter the total width (TW) of the media construction, including the narrow
portions of exposed liner near the edges of the media.
7
Enter the printable width (also called maximum printable width, or MPW). Do not
include the narrow portions of exposed liner near the edges of the media.
8
Enter the label length (also called maximum printable length, or MPL). The MPL
is printed on a label located inside the cardboard core of the label roll.
9
Select the type of material the label will be printed on.
10
Enter the length of the media reflective mark (also called GML).
11
Select the shape of the label.
12
If you are printing a full-bleed label, you can eliminate white space along the edges
of the label by selecting vertical and horizontal bleed values. If a value is greater
than zero, the printed label length/width will be slightly increased to bleed to the
edge of the label.
Up to four degrees of vertical overbleed can be used. Each vertical bleed degree
increases the label length by .1 mm in each vertical direction. Up to eight degrees
of horizontal overbleed can be used in each horizontal direction. Each horizontal