FSR RN-8200 User Manual
Page 44
3.0 Configuration Utility Software
RN-8200 Reference Manual
Page 3-23
3.2.8.12 Set Operational Mode Command
The Set Operational Mode is a fixed command with no options that need to be selected. This command should be
used per the RN8200_Default_xxxxxx.mcf as described in section 2.3.1 of this manual. Note that the Set
Operational Mode command only works in the System On/Off button. Note that this command can be sent to the
RN using the Remote RS-232 interface at any time to put the system into Operational Mode as might be desired
when the system is connected to a PC-based software control application.
3.2.8.13 Set Idle Mode Command
The Set Idle Mode is a fixed command with no options that need to be selected. This command can be used in any
button configuration but should always be the last command in the command sequence. Refer to section 2.3.1 of
this manual to see how this command is used in the RN8200_Default_xxxxxx.mcf.
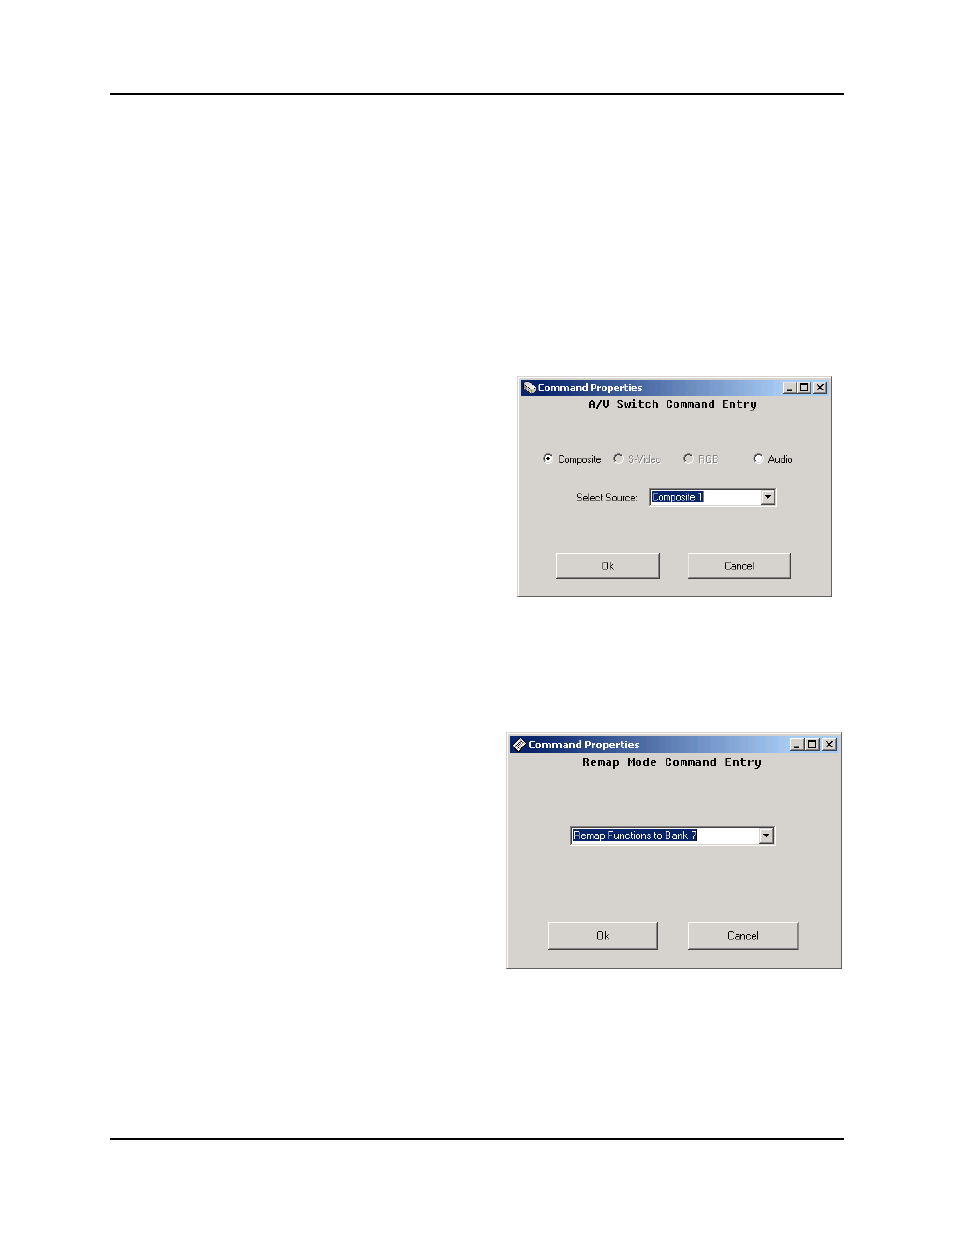
3.2.8.14 Configuring an A/V Switch Command
The A/V Switch Change Command allows the user to
connect an audio or video input to the corresponding
output. This command uses the user’s A/V interface
configuration identified on the A/V Interfaces Tab to limit
the valid connections to those that are consistent with the
user’s A/V interface assignments. For this command, the
user selects the specific output that will be connected,
Composite, S-Video, RGB, or Audio. The user then selects
the specific source that will be connected to the selected
output. For each video output type, only those inputs
assigned to this video type will be made available in the
source selection drop-down based on the current A/V
Interface Tab configuration. Once the A/V Switch
Command is configured as needed, click the “Ok” button to
build the final formatted command in the main Button
Command Configuration panel. The A/V Switch Command
Entry panel is shown to the right.
3.2.8.15 Configuring a Remap Mode Command
Remap Mode is a mode where function button presses are
remapped to be associated with locations other than the
currently active bank. While originally intended to provide
access to the virtual bank locations using the standard
panel, any bank can be the target of remap mode. REMAP
Mode is activated by a Remap CMD using the Remap
Mode Command Entry Panel by selecting the Remap Mode
condition desired using the pull-down options. The Remap
Mode Command Entry panel is shown to the right.
In order to provide a visual indication that a remap
condition is in effect, the active device lamp will blink as
opposed to being on steady. Once REMAP MODE is
activated, it remains in effect until it is either deactivated
using a REMAP OFF CMD or by pressing any device
select button.