Server management – TelVue HyperCaster® User Manual
Page 86
TelVue HyperCaster
®
User Manual / v5.0 / October 2014
© 2014 TelVue Corporation 16000 Horizon Way, Suite 500, Mt. Laurel, NJ 08054
HyperCaster
®
is a registered trademark of TelVue Corporation 800-885-8886 / www.telvue.com
85
Click the Submit button on the right to add the rule.
To delete a firewall rule, click the Delete button to the right of that rule.
Firewall Status
When the firewall is running, its status is STARTED. In rare cases you might want to stop the firewall
briefly. For example, too many trusted machines are suddenly blocked and you need to give someone
access to diagnose the problem. To stop the firewall, click the Stop button. Be sure to start the
firewall again when the work is complete.
Guidelines for Firewall Rules
Adding a stream automatically adds a rule to the list.
If you have remote users, add a firewall rule so they can continue using remote access. You
must be on-site to add a rule; you cannot add one remotely.
It is good practice to record your rules, such by printing the firewall screen to paper or a file
and keeping it in a secure location off your network.
Do not delete the netbios rules. They are for Samba access.
In some cases you might want to return the firewall rules to the original configuration that
came with your server. For example, too many individual rules seem to conflict with one
another. Keep in mind that this will delete the firewall rules for active streams, remote users,
etc. Record your firewall rules, then click the Restore Initial Configuration button.
To return to the configuration page, click the Config tab.
Server Management
Server Management requires admin-level privileges. The Server Management section lets you
manage email settings, look at server information, change the hostname, configure your network
settings, and reboot or turn off the server.
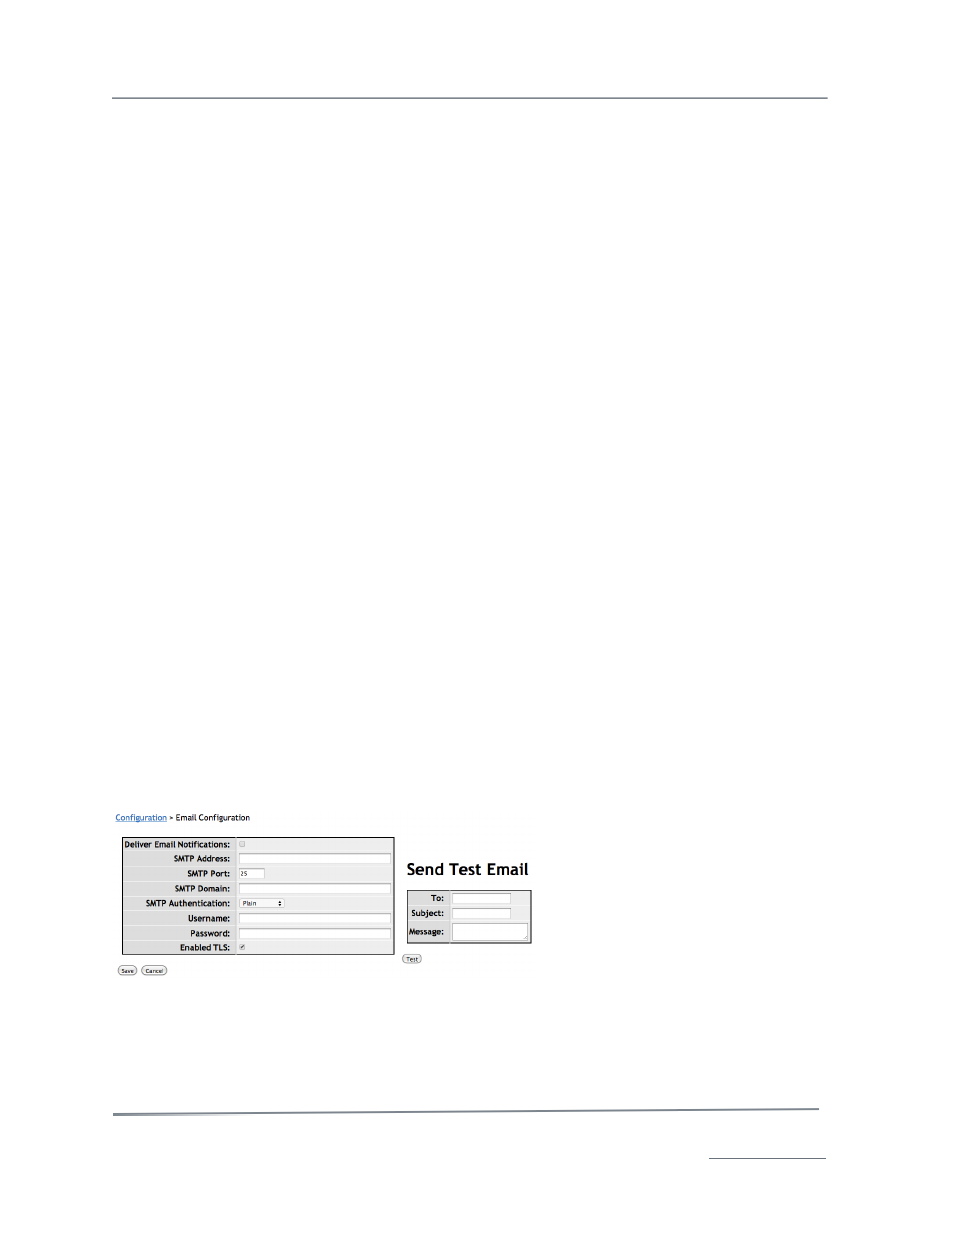
Enabling email notifications on your server will ensure that even when you are away from your server
you will be alerted to any significant events. To manage your email configurations, click on the email
option. The application displays the Email Configuration screen. The left portion is an example using
a gmail address as the account that will send the alert emails. Once you enter the credentials you can
send a test email to another account to ensure that your setup is working.
Once you save on this screen you have just one more step. Navigate to config -> users and select a
user that you would like the alert emails to be sent too. Make sure that user has a valid email address.
Select the Email notification check box and save. Repeat this for any other users as needed. Each
enabled user will now receive emails in the event of a server state change such as the firewall being
disabled or if you have an event scheduled within 4 hours that has no media uploaded. The missing
files alert window is configurable in the config -> schedule window.