Removing printouts from the high capacity stacker – Pitney Bowes RISO ComColor Printer User Manual
Page 37
35
Preparations for Use >> Paper and Originals
1
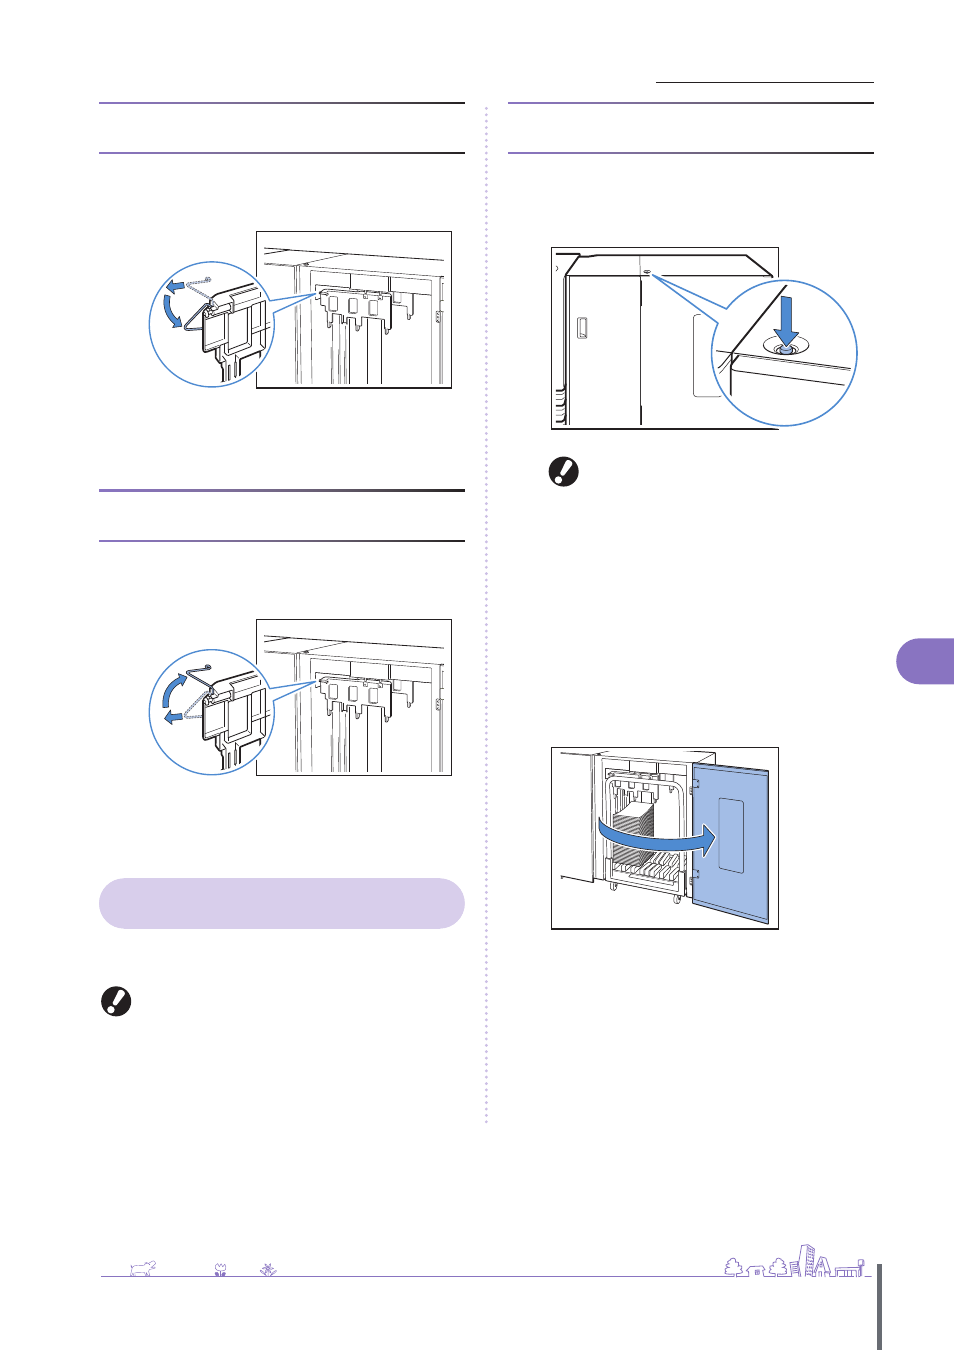
When using A3/B4/B5-LEF paper or thin
paper
1
Lower the front corrugator while pressing it toward
the machine (to the left).
2
Lower the back corrugator while pressing it toward
the machine (to the left).
When you perform normal printing (with
the corrugator upright)
1
Lift the front corrugator while pressing it toward the
machine (to the left).
2
Lift the back corrugator while pressing it toward the
machine (to the left).
Removing Printouts from the High
Capacity Stacker
Remove printouts from the high capacity stacker.
There are two ways of removal.
You can remove printouts when the stacking tray is at a
stop. A message appears indicating the state of the
stacking tray. Follow the message.
• If you remove printouts along with the carriage
Remove printouts using the carriage for the high capacity stacker.
• If you remove only printouts
You can remove printouts without pulling out the carriage. You can
remove printouts without waiting for the standard tray to lower to
the bottom.
If you remove printouts along with the
carriage
1
Press the stacking tray descent button.
If you output approximately 3,200 to 4,000 (full) sheets, the
stacking tray automatically lowers to the bottom.
• When you press the stacking tray descent button,
make sure that both the right and left covers of
the high capacity stacker are closed. The button
does not operate when the covers are open.
• When printing is completed, the stacking tray
automatically lowers to the position that you
have set in [High capacity stacker] of the “Admin.
Settings”. To change the downward position of
the stacking tray, contact the administrator.
• If you press the stacking tray descent button
during printing by mistake, remove printouts. If
printouts are piled up, you cannot raise the
stacking tray.
2
Open the right cover of the high capacity stacker.
ComColor Series Basic Guide 02