Creating a barcode area definition file – Pitney Bowes RISO ComColor Printer User Manual
Page 105
103
Scanning >> Scanner Mode Screens
4
z
About the “menu bar”
The menu bar has [File], [Edit], [View], [Tools] and [More] in it. Each menu has edit functions or setting items in it. Here are
some other functions that edit tools (icons) do not have:
Menu bar
Function name
Use
File
Recreate CSV file
Delete a barcode area that you are displaying.
Save as...
Save an open file under a new file name.
Page Settings...
Specify the page size of a barcode creation area.
Edit
Repetition...
You can specify the same barcode area repeatedly. You can specify the cycle to 1-999
pages.
View
Rotate Right 90°
Rotate the on-screen print image 90 degrees to the right.
Rotate Left 90°
Rotate the on-screen print image 90 degrees to the left.
Display Units
Specify a unit to use on a barcode area definition page.
Thumbnail
Display/Cancel Thumbnail.
Status Bar
Display/Cancel Status bar.
Tool Bar
Display/Cancel Tool bar.
More
About...
Display version information.
Creating a Barcode Area Definition File
Open the original data and output the PRN file in the
printer driver. Open the PRN file using the barcode
application, and create a barcode area definition file (CSV
format).
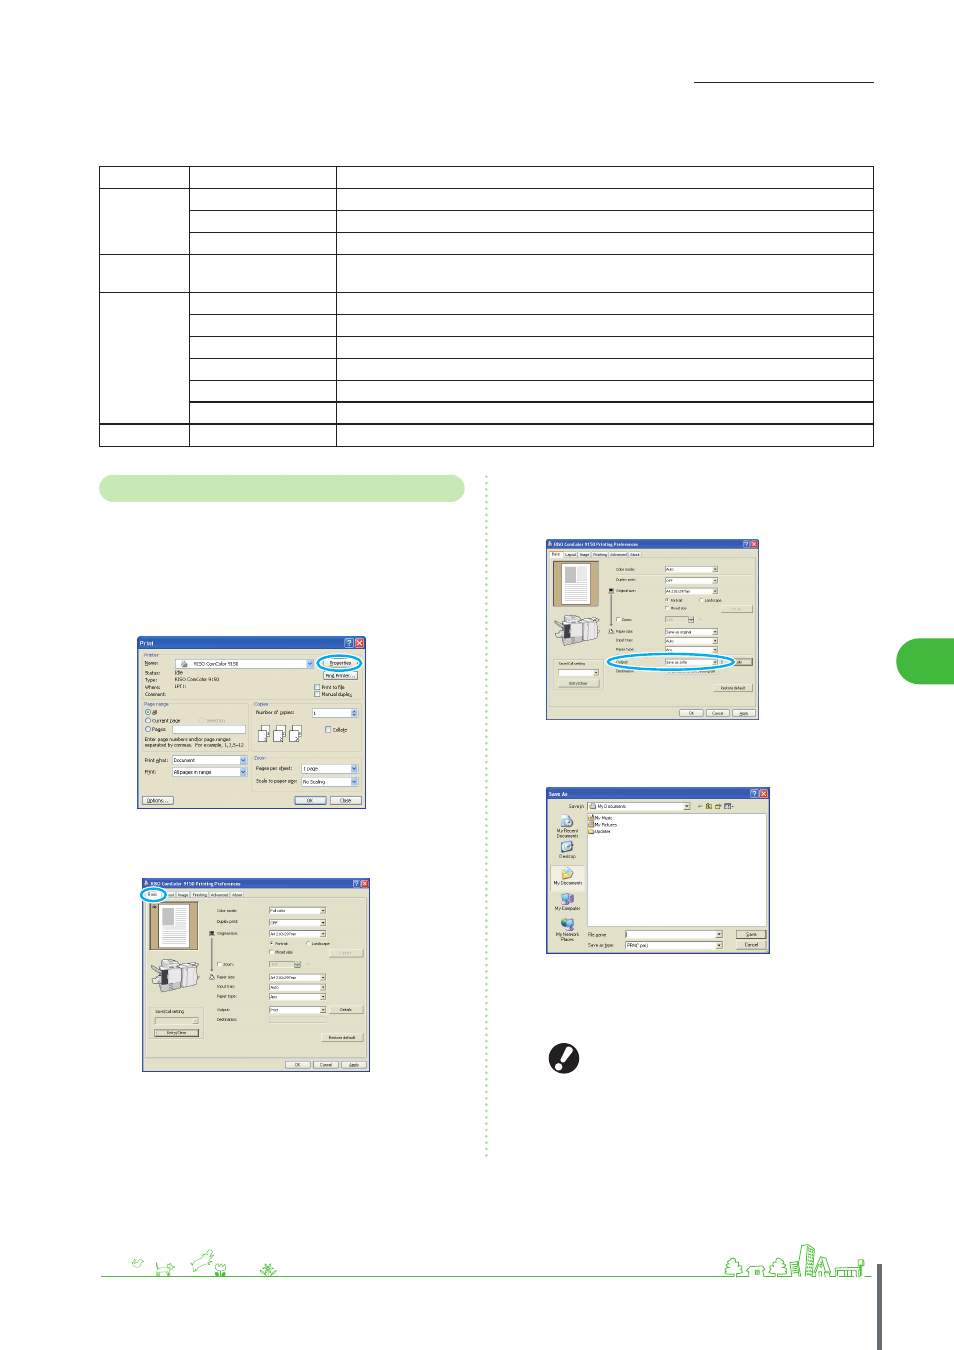
1
Click [Properties] (or [Preferences]) in the printing
dialog box of the source application.
2
Click the [Basic] tab.
3
Select [Save as a File] in the [Output] pull-down
menu.
4
Click [Details], and specify a destination.
5
After input is finished, click [Save].
A print format file is created in the specified destination.
Perform the same settings for the printer driver as
when you actually print, other than in [Output]. If
the PRN file format and the actual print setting
(original size, print direction, paper size, imposition,
etc.) are different, the barcode area definition may
not be correctly applied. If you change the layout
setting, the location of the area changes.
ComColor Series Basic Guide 02