Additional device development steps, Creating an izot ct stencil – Echelon IzoT NodeBuilder User Manual
Page 74
Additional Device Development Steps
After you create your device application and successfully test your device in a network, you can
perform the following additional steps in the device development process, which are summarized in
the following sections:
• Create an IzoT CT stencil.
• Create an IzoT device plug-in.
• Create an HMI.
• Create a device installation application
• Apply for L
ON
M
ARK
certification for your device.
Creating an IzoT CT Stencil
You can create a IzoT CT stencil for your device to make it easier for network integrators to install. A
IzoT CT stencil should contain a custom IzoT CT shape for your device and for each functional block
in the device interface. These custom shapes can then be provided to network integrators so that they
can quickly integrate your device into their L
ON
W
ORKS
networks using the IzoT Commissioning Tool.
To create a IzoT CT stencil for your device, you do the following:
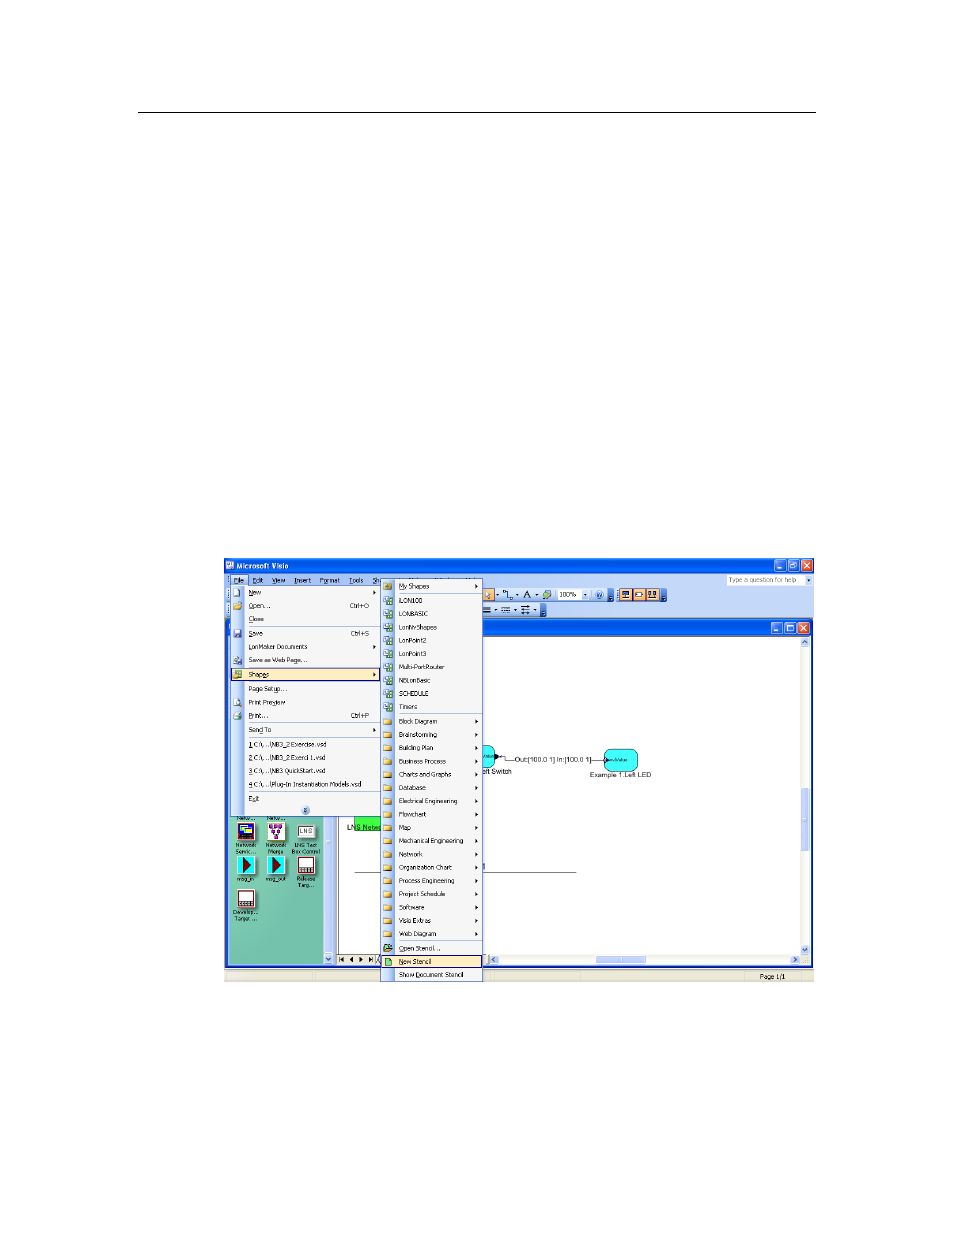
1. Create a new IzoT CT stencil. To do this follow these steps:
a. Open the IzoT CT drawing containing the NodeBuilder device for which you want to make
custom shapes.
b. Click File, point to Stencils, and then click New Stencil.
c. A blank IzoT CT stencil named Stencil is added to the Shapes window.
2. Create a custom device shape. To do this follow these steps:
a. Right-click the NodeBuilder device in the IzoT CT drawing page and then select Properties
on the shortcut menu.
60
Creating and Opening IzoT NodeBuilder Projects