Front av, Rear av, Rear sv – Vitek VT-4097 SR User Manual
Page 10: Scart av, Otr (one touch timer recording), Timer recording, Recording from a dv (digital video) camcorder, English
Attention! The text in this document has been recognized automatically. To view the original document, you can use the "Original mode".
ENGLISH
TV
Front AV
Rear AV
Rear SV
DV
Scart AV
If you want to record a TV program select TV mode. Select a station you
want to record by pressing Channel- or Channel +.
4. PressRECbuttontostartyourrecording. PressPAUSEbuttonifyou
want to stop the recording for a short while. Press REC button to
continue recording.
5. Press STOP button to stop your recording.
Note:
• A DVD±R/DVD±RWcan record for upto6 hours, up to 49 titles.
• Ifyour source is copy-protected, you will not be able to record it.
OTR (One touch Timer Recording)
1
.
2
.
During basic recording, press REC button. Everytimeyou press REC
button, the recording timewill increase by30 minutes. It is possible
to record for up to 3 hours if there is enough room on the disc (or
HDD) and the record quality is SEP. (orthe length of time shift buffer
is set to 360 minutes.)The DVD recorder will stop automatically after
recording for a specific time.
If you want to cancel OTR, press STOP button.
6. Select“Mode”bypressing T,pressENTERbuttontobringupthe
list. Select how often you want to make the recording, for example,
once, daily orweekly by pressing▲ or ▼, press the ENTER button to
confirm.
7. Select “Date” by pressing ▼, press ENTER button. Enterthe date
by using 0to9 buttons, and press ENTER button to confirm. Ifyou
selected “Weekly” in step 6, press the ENTER button after selecting
a day of week by using ▲ or ▼.
8. Select “Start” by pressing ▼, press ENTER button. Enter the Start
time by using 0to9 buttons, and press ENTER button to confirm.
9. Select “End” by pressing ▼, press ENTER button. Enterthe End time
by using 0to9 buttons, and press ENTER button to confirm.
10. Select “Title” by pressing ▼, press ENTER button. Enterthe title
name by using ◄►▲▼, and press ENTER button to confirm.
11. Switch VPS/PDC “ON” or “OFF” by using , and ENTER button.
(If “Source” is not set to TV channel, this function is not available.)
The VPS/PDC system automatically adjusts the recording time
so that even if a program is not running to schedule you won’t
miss it. ForVPS/PDCtowork properly, you must inputthe correct
announced time and date of the program you want to record. Note
that VPS/PDC may not work with every station.
12. Press ENTER button after selecting “OK” by using ▼, if all the
settings are correct.
13. Switch your DVD Recorder off by pressing STANDBY/ON button.
Note:
• You can switch your DVD Recorder on again if you want to set the
timer to record another program. Remember to switch the DVD
Recorder off when you have finished.
•
To stop a timer recording which has already started, press
STANDBY/ON or STOP button.
• You can pre-program the schedule to record up to 8 programs.
• We recommend you set up the recording time over 5 minutes.
Timer review - changing and erasing record settings
1. Press TIMER RFC button.You can
see
all the timer programs
currently set.
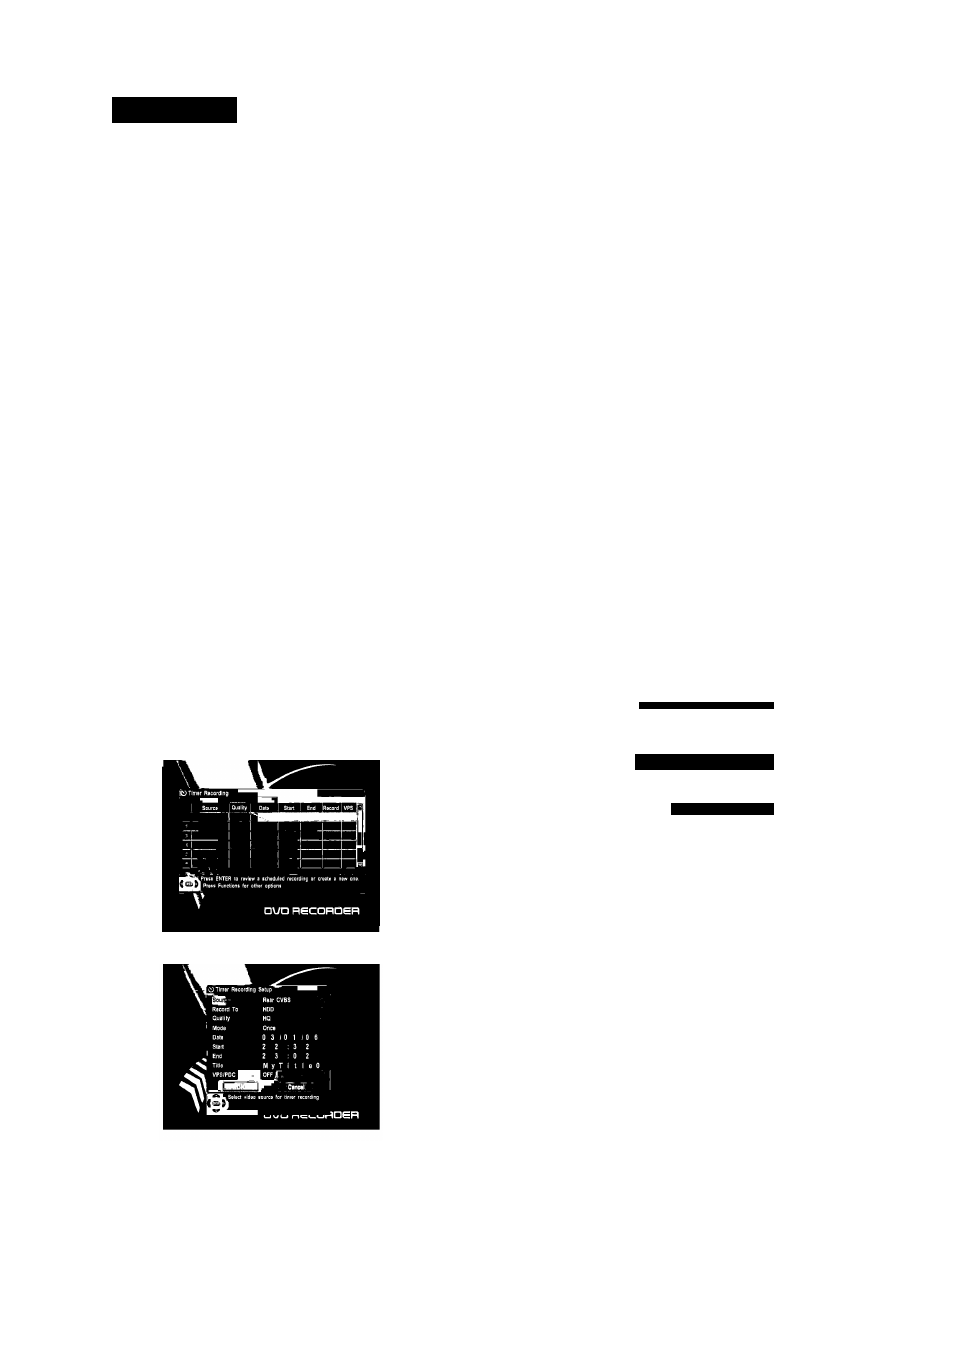
Timer Recording
Fortimer recording, the clock, date, and stations must be set correctly.
If you want to record on DVD, load a DVD±RW or DVD±R disc with
enough free space forthe recording.
1. Press TIMER REC.
2. Select an unused program by pressing A or T, then press ENTER.
3.
4.
4.
5.
I Quality I Dato ' Start I End iRECord I VPS
,1 I I ^^
1 ^
□UD RECORüeR
Select the program you want to change or erase by pressing .
Erasing a setting
3. PressADD/CLbuttontoerase.
Changing a setting
Press ENTER button. Select the details you want to change by
pressing and pressthe ENTER button.
Change the settings by using or 0-9.
When you have made all the changes, press ENTER button.
Press ENTER button after selecting “OK” using ▼ button if all the
settings are correct.
Press TIMER RFC button to exit.
Recording from a DV (Digital Video) camcorder
Youcan record the contents of DV tape from a DV camcorder viaDVIN.
Make sure your digital camcorder is connected to DV INjack on the front
panel.
Also turn on your DV camcorder and set it to PLAY (or VCR) mode.
Press ENTER button. The sub-menu appears. Select the signal
sources by using ▲ or ▼, and press the ENTER button to confirm.
Select “Record To” by pressing ▼, press ENTER button to bring up
the list. Select HDD for hard disc recording or DVD for DVD recording
by using▲ or ▼, pressthe ENTER button to confirm.
Select “Quality” by pressing ▼, and press ENTER button to bring up
the list. Select the Record Quality by using ▲ or ▼, press the ENTER
button to confirm.
1
.
Press HDD/DUB or DVD button to select the HDD (Hard Disk Drive)
or a recordable DVD (DVD±R/DVD±RW) on which you want to
record.
If you want to record on DVD, load a DVD±RW or DVD±R disc with
enough free space forthe recording.
Press DV/USB button.
Find the place on the camcorder tape that you want to start
recording from.
You can use the remote controller for this recorder to control the
camcorder using
PLAYj STOP, PAUSE ◄◄, ►►. For best results, press PAUSE button
10
4097IMnew.indd 10
27.02.2007 13:34:57