Installing the rm-320f on a wall – Toa VM-3000 Series User Manual
Page 95
95
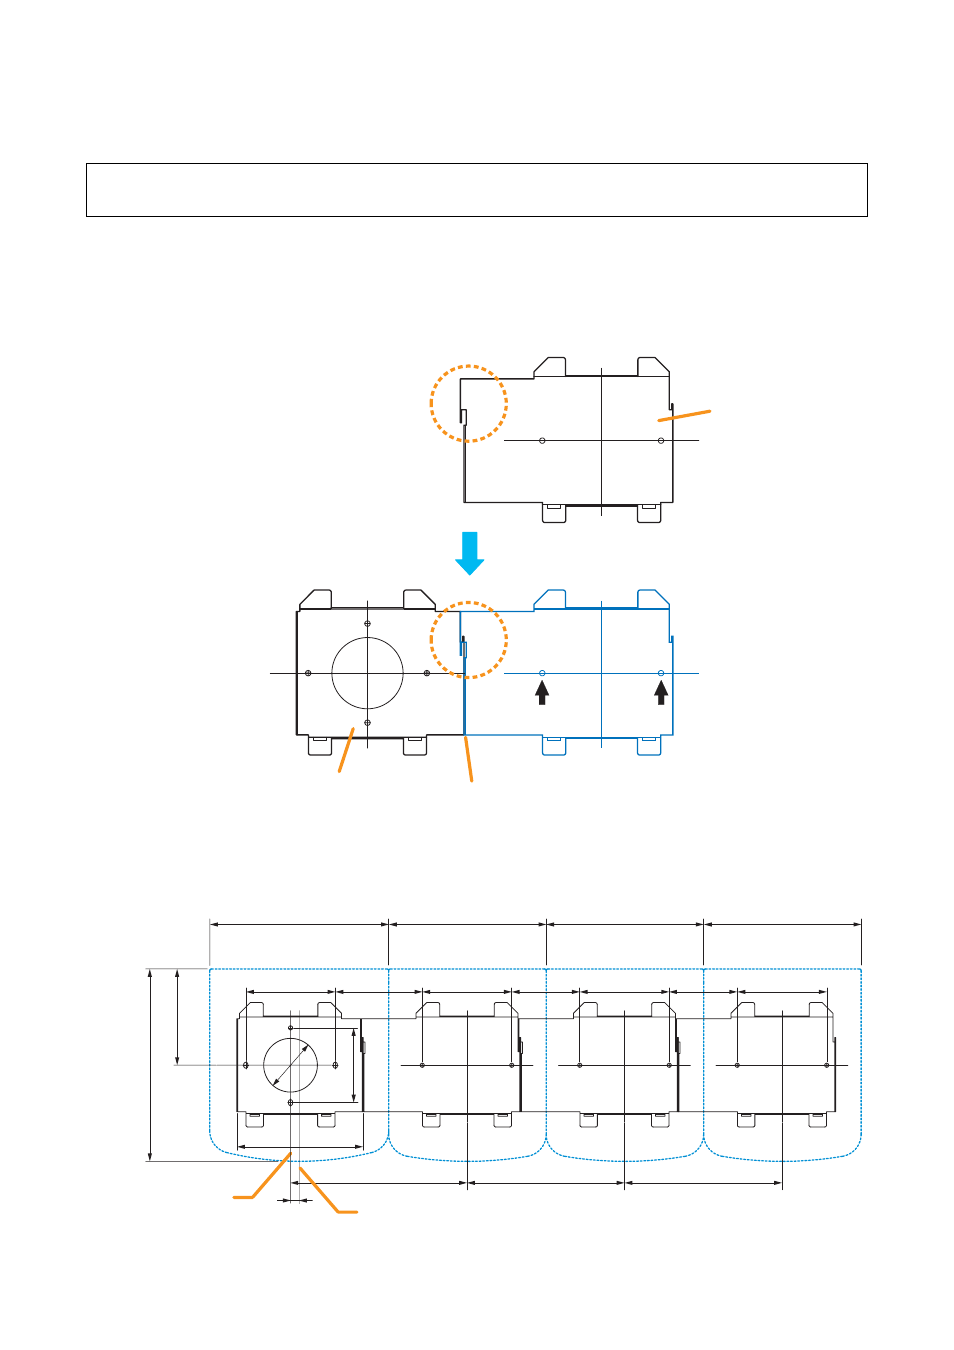
Step 1. Install the wall mount bracket unit supplied with the RM-300MF on the wall. (Refer to
Step 2. Place the RM-320F’s bracket so that it fits in the RM-300MF’s bracket as shown below. Then, fix the
RM-320F’s bracket to the wall with the supplied 2 tapping screws.
[Positional dimensions of the RM-300MF and RM-320F]
Wall mount bracket for the RM-320F ........................................... 1 (supplied with the RM-320F)
Tapping screw 4 x 25 (for direct wall mounting) .......................... 2 (supplied with the RM-320F)
Slide the RM-320F’s bracket
to link at this joint.
Align both
bracket edges.
Wall mount bracket
for the RM-320F
Wall mount bracket unit
for the RM-300MF
(secured to the wall)
Use 2 mounting holes indicated by
arrows to secure the bracket.
200
100
141.2
100
76
100
76
100
97.2
215
107.6
83.5
ø60
176
176
197.2
Center line of the RM-300MF
Center line of
the bracket unit
9.7
176
[RM-300MF]
[RM-320F]
176
[RM-320F]
176
[RM-320F]
13.2. Installing the RM-320F on a Wall
To mount the RM-320F on the wall, the following parts are required.