Creating a field boundary – TeeJet SmartPad II User Guide User Manual
Page 119
SmartPad II
Software Version 4.03
Chapter 3 - Real-Time Guidance
3-65
Creating a Field Boundary
Creating a Field Boundary
SmartPad II allows you to create a map of the field boundary while applying product around the perimeter of the
field. If you want to create a field boundary map, you will need to setup SmartPad II to do so. For more information
on field boundary setup, review Chapter 2 Data Setup. A field boundary can be created in all three guidance options,
Parallel, Headland and Circle Pivot.
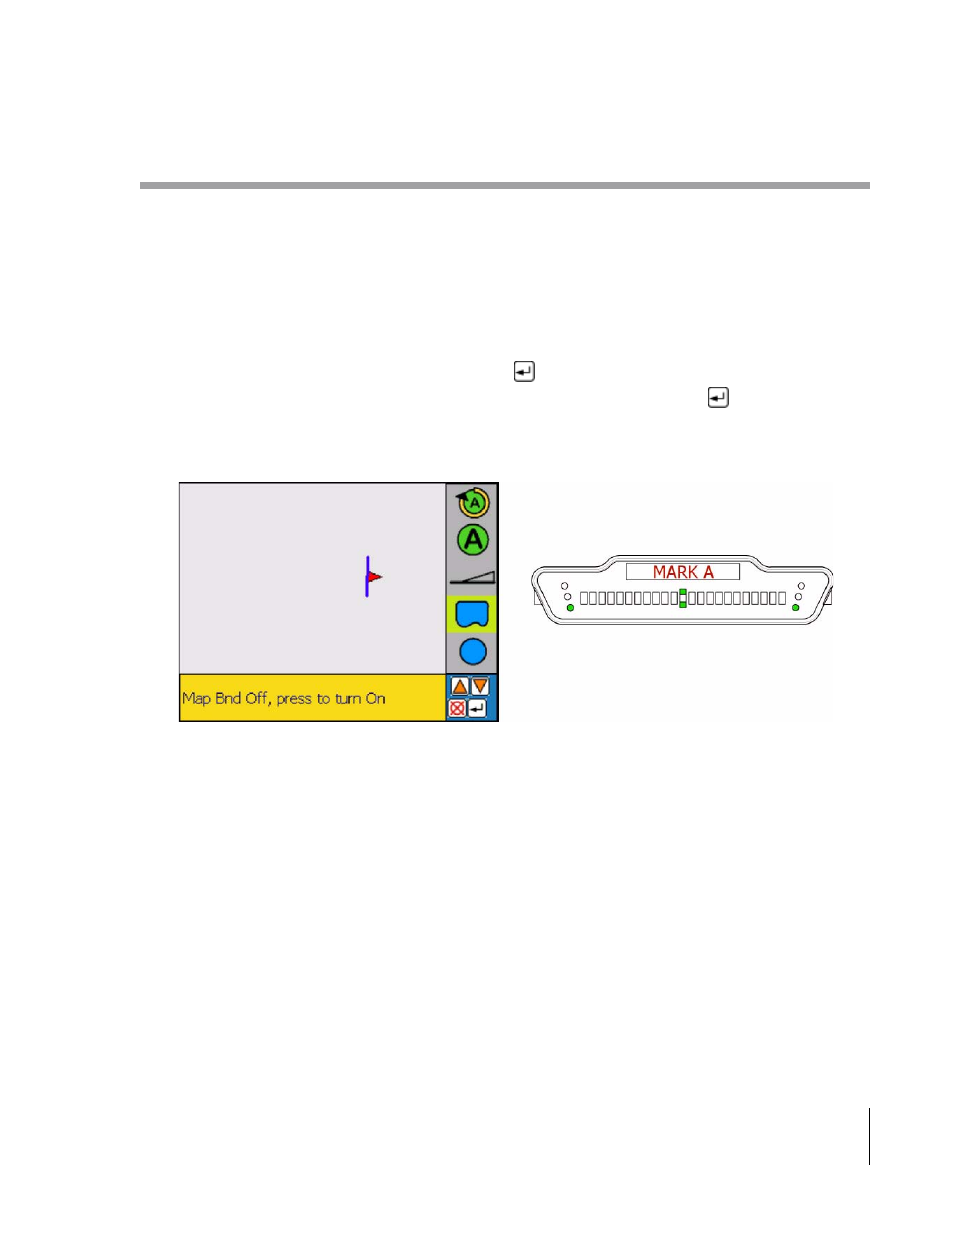
When SmartPad II is setup to create a field boundary, a Map Boundary button is added to the button bar in the view
page, see Figure 3-91. To start mapping the field boundary, first align the edge of the vehicle swath with the edge of
the field boundary. In the following example, SmartPad II was setup to create a field boundary off the right side of the
vehicle. Next highlight the Map Boundary button and press
. Once the vehicle begins moving a line representing
the field boundary will be drawn off the right edge of the swath, see Figure 3-92. Once the
key is pressed, the
lightbar will display MAP BND as well as an arrow indicating which side of the vehicle is being used to create the
boundary.
Figure 3-91: Preparing to Map Field Boundary