Removing and replacing the gas valve (continued) – LAARS NeoTherm NTV (Sizes 150–285 MBTU/h) - Service Manual User Manual
Page 38
28
Service Manual NeoTherm 80 - NeoTherm 285
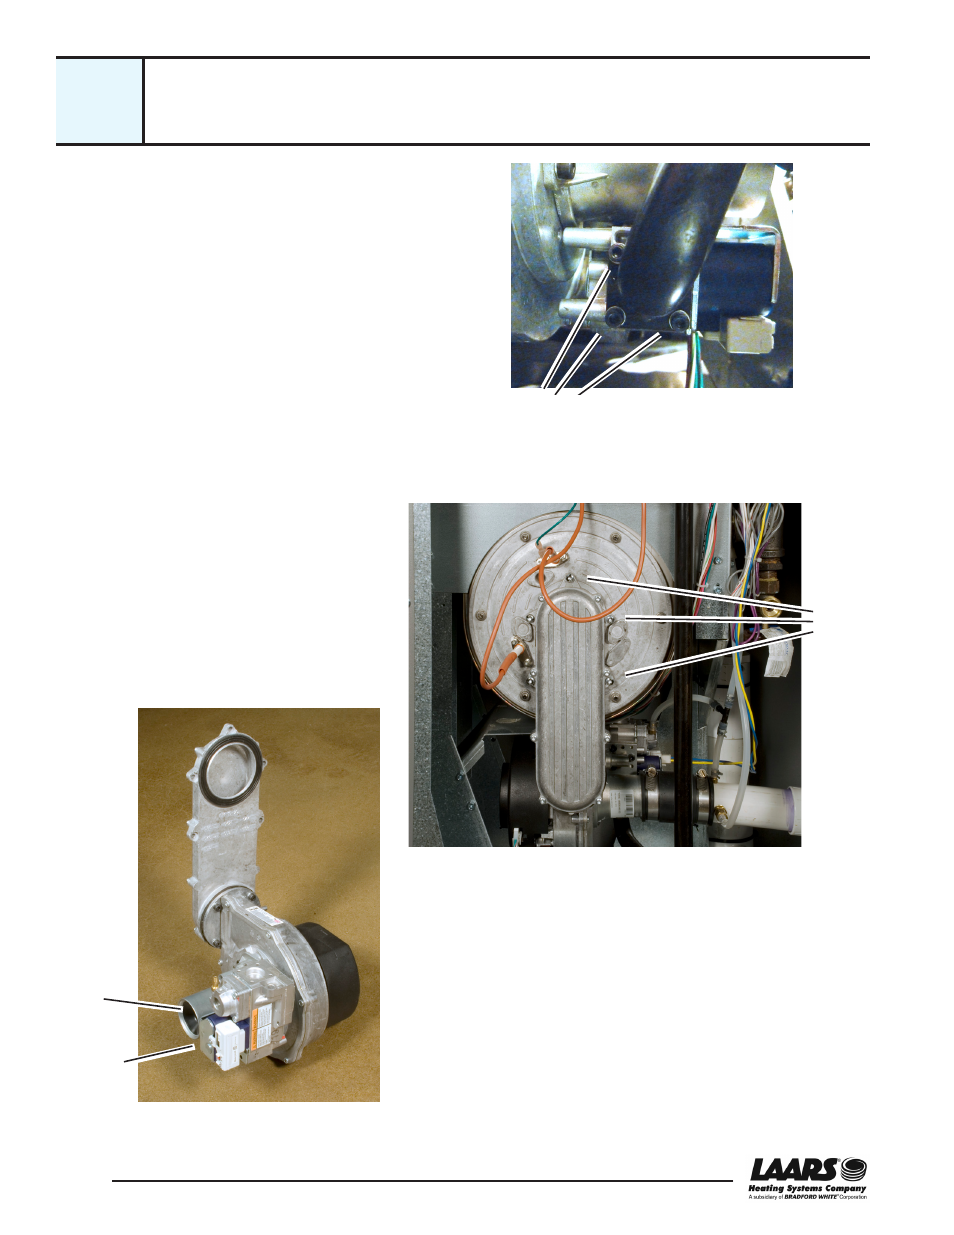
9. Now you can remove the air/gas channel
and blower assembly from the machine.
Remove the five #25 Torx-head screws
around the air/gas channel. See Fig. B11-
7. (These are the outer screws on the front
of the assembly. The inner screws attach
the cover on the air/gas channel - do not
remove these.)
10. Support the assembly as you remove the
last screws, so it does not fall. Figure B11-
8 shows how the assembly looks once it
has been removed.
Remove
these
screws
Fig. B11-7 - Removing the air/gas channel and attached blower
Gas valve
Venturi
Fig. B11-8 - Gas valve still attached to blower and Venturi
Removing and Replacing the Gas Valve (continued)
B11
cont.
8. The gas inlet pipe runs to the underside of the gas
valve. It is attached by four 3mm Allen-head screws,
and these are difficult to reach. Figure B11-6 shows
the screws as seen from below the gas valve.
Use a 3mm Allen wrench to undo these screws. It
will be hard to reach one of the screws. The best tool
for this job is a traditional “L-shaped” Allen wrench,
with one long leg and one short leg. You will be able
to use the short leg to undo that one difficult screw.
Fig. B11-6 - Four mounting screws for the gas inlet
pipe, viewed from below
Screws