Removing and replacing the, Low water cutoff switch, Removing and replacing the low water cutoff switch – LAARS NeoTherm NTV (Sizes 150–285 MBTU/h) - Service Manual User Manual
Page 30
20
Service Manual NeoTherm 80 - NeoTherm 285
Removing and Replacing the Low Water Cutoff Switch
The low water cutoff switch is designed to shut down
the unit if there is a low water condition. The control
includes two parts: a control box, and a probe which
reaches into the water piping.
Tools and equipment required:
• Small Phillips-head screwdriver (#1)
• Two medium-sized pipe wrenches or adjustable
wrenches
• 5/16” socket
Procedure - Removing or replacing the probe
1. Turn off power to the system. Use the main discon-
nect switch mounted above the front panel.
2. Isolate the boiler. Turn off the water shutoff valves
located upstream and downstream of the unit.
3. Drain the boiler. The drain valve is located near the
lower end of the heat exchanger.
4. Now you can remove the probe. Remove the top
panels on the unit so you can reach the probe.
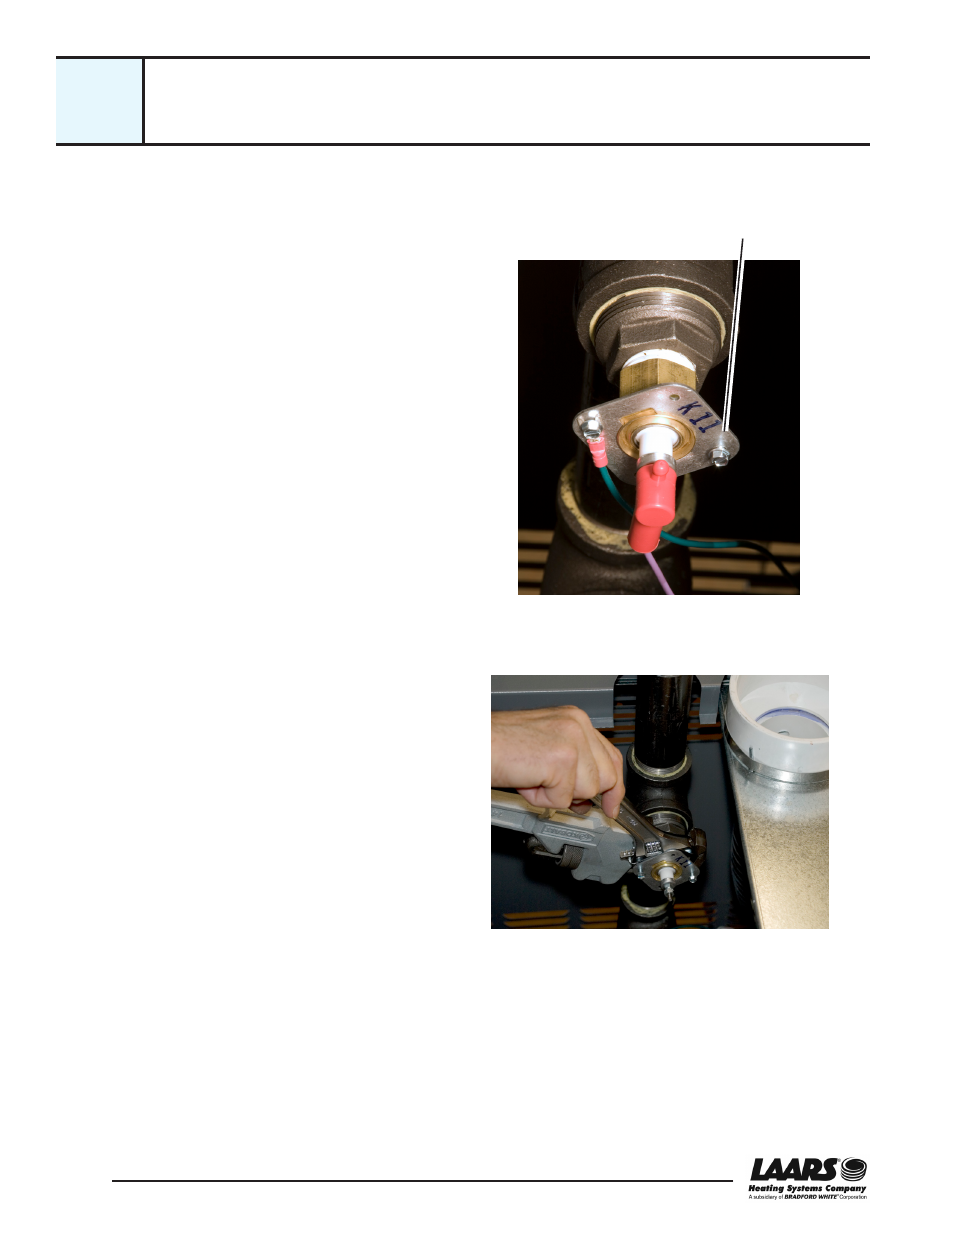
5. Disconnect the probe wire (violet wire, red cap) and
the ground wire (green). See Fig. B6-1.
6. Use two pipe wrenches to unscrew the probe as-
sembly. See Fig. B6-2.
Turn the probe assembly counter-clockwise to
loosen it.
Note - Two sheet metal screws extend through the
plate around the probe assembly. You may have to
unscrew these a bit to allow enough space behind
the probe for the two wrenches.
7. To reassemble, reverse the procedure we have just
described. Keep these points in mind as you do this:
• Remember to re-tighten the two sheet metal
screws, if you unscrewed them to increase the
clearance for the wrenches.
• Use pipe dope or Teflon
®
tape on the threads on
the probe assembly.
• Be sure the red cap is seated firmly on the contact
at the end of the probe.
Fig. B6-1 - Removing the probe wires
You may need to unscrew
these screws to allow
clearance for the wrenches
behind the probe assembly.
Fig. B6-2 - Removing the probe
B6