Great Planes ESP6 Easy Sport 60 - GPMA0152 User Manual
Page 8
ceiling tile Before beginning to build, use a straight edge
to check fore and aft, side to side and diagonally for
warps Shim your board until it is exactly flat.
D 1 Unroll the plan sheet Reroll the plan inside out to
make it lie flat.
D 2 Remove all parts from the box As you do,
determine the name of each part by comparing it with
the plans and the parts list included with this kit Using a
felt tip or ball point pen, write the part name or size on
each piece to avoid confusion later Use the die-cut
patterns shown on pages 5 and 6 to identify the die-cut
parts and mark them before removing them from the
sheet Save all scraps If any of the die-cut parts are
difficult to punch out, do not force them' Instead, cut
around the parts with a hobby knife After punching out
the die-cut parts use your bar sander to lightly sand
the edges to remove any die-cutting irregularities
D 3 As you identify and mark the parts, separate them
into groups, such as fuse (fuselage), wing, fin, stab
(stabilizer) and hardware.
D 1 Tape the fuselage plan down to your flat work
surface Tape a piece of waxed paper over the fin and
rudder portion of the plan
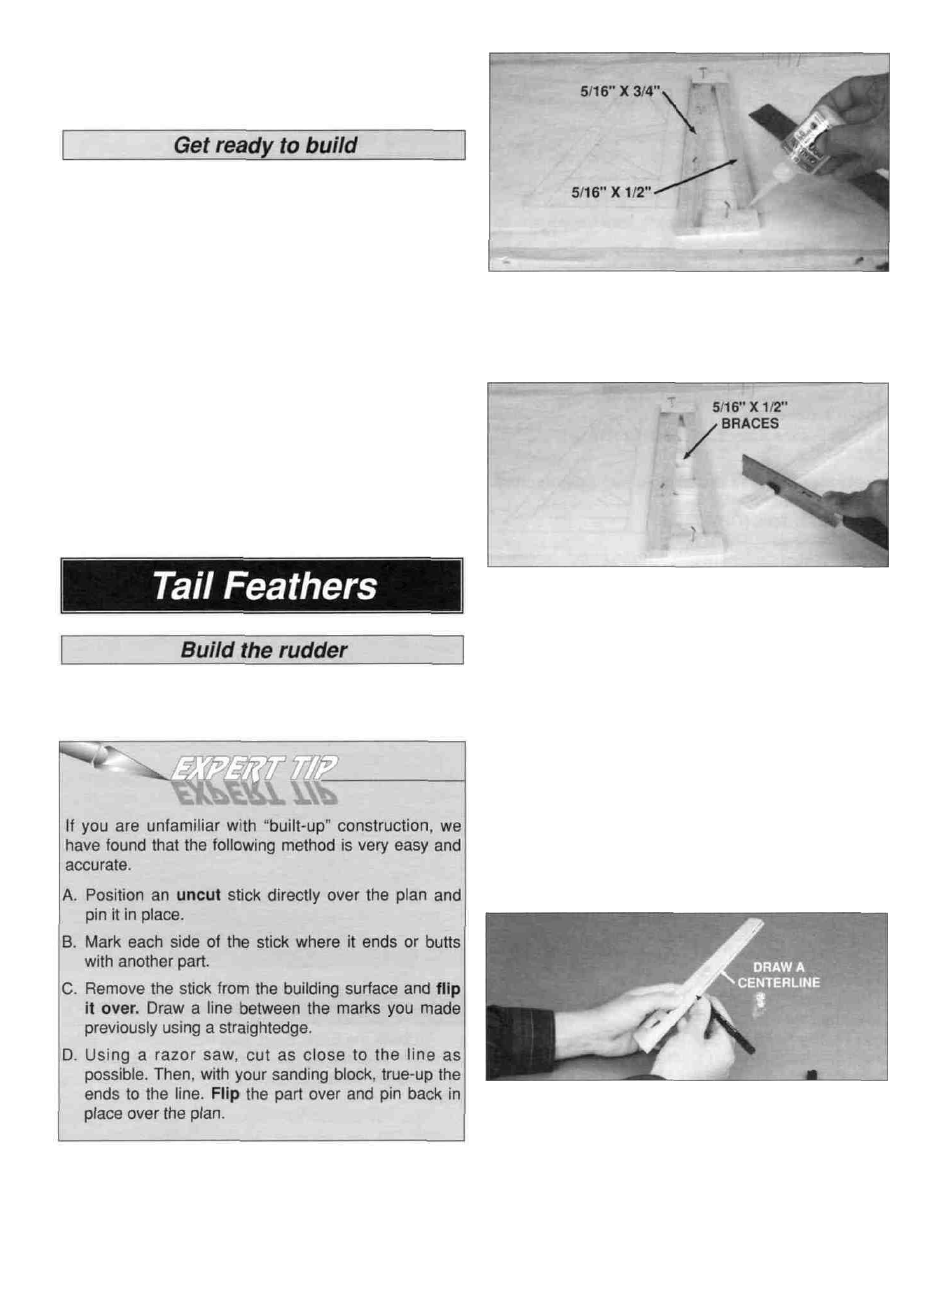
D 2 Using a razor saw, cut pieces of 5/16" x 3/4" and
5/16" x 1/2" balsa (from the 30" sticks) to make the
rudder framework. Working right on the plan, pin these
parts in place and glue them together using thin CA glue
D 3 From the 5/16" x 1/2" x 30" sticks, cut braces to fit
between the rudder framework and glue them in place
Note: It is not necessary to get these braces in the
exact position shown on the plan If you re building the
Easy Sport 40, cut a 1" piece from the 5/16" x 3/4"
balsa stick If you are building the Easy Sport 60, cut a
1-1/4" piece from the 5/16" x 3/4" balsa stick From this
small piece cut the triangular gusset for the front bottom
corner of the rudder.
D 4 Remove the rudder from your building surface
Examine and add thick CA glue to any open joints Then
use your sanding block with medium (150-grit) sandpaper
to sand both sides of the rudder framework smooth
D 5 Carefully draw a centerline all around the edges
of the rudder (this will help to maintain symmetry
when sanding).
8