Great Planes ESP6 Easy Sport 60 - GPMA0152 User Manual
Page 36
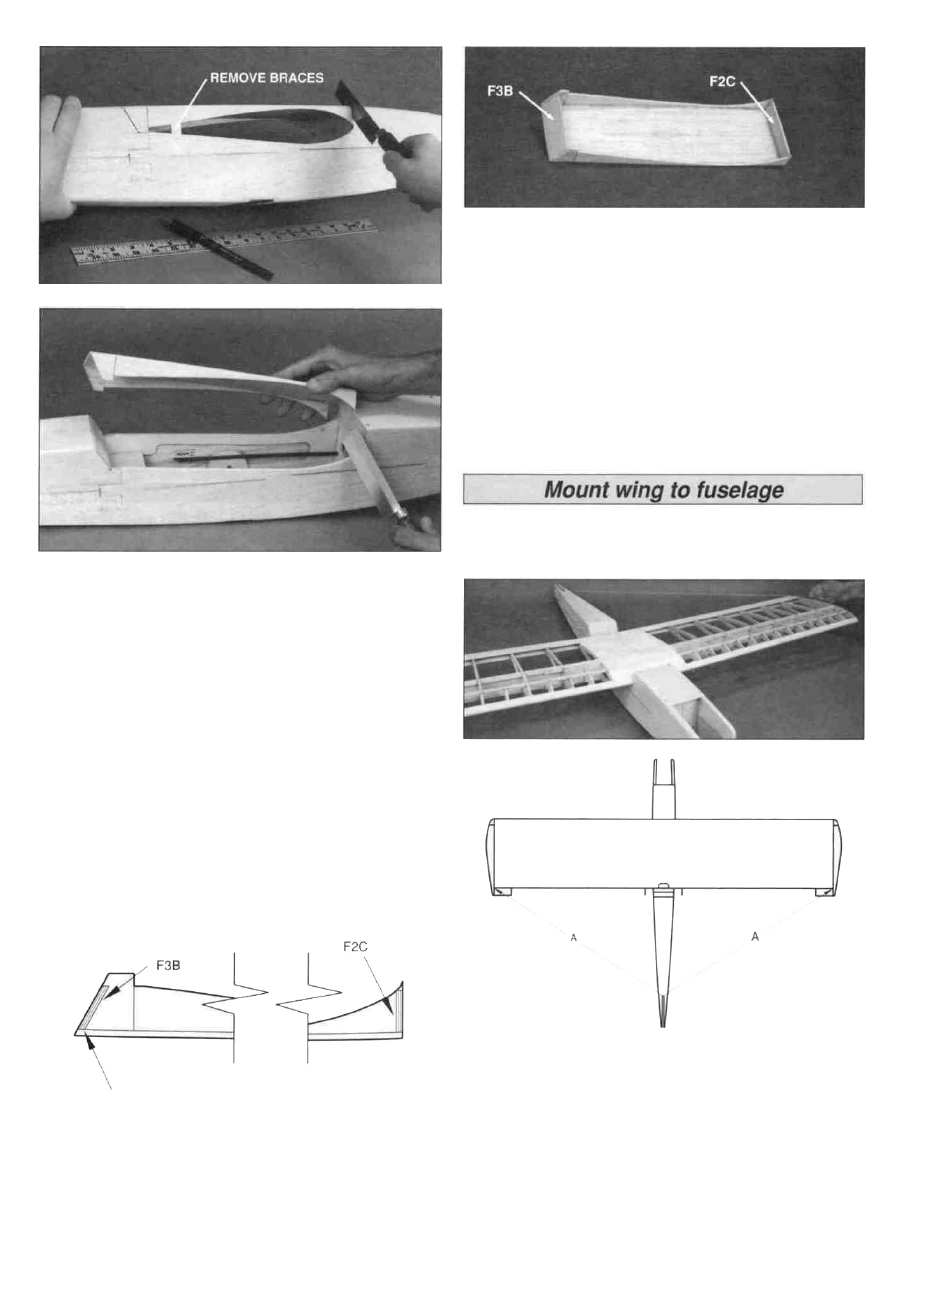
D 2. Using a hobby saw and a hobby knife, cut the two
die-cut braces from the wing opening on the Easy Sport
40 only. Then, on the Easy Sport 40 and 60, cut the
center fairing free from the fuselage following the lines
you drew in the previous step. Use fine (220-grit)
sandpaper to clean up the edges of the center fairing
and the fuselage. The center fairing should fit the
fuselage with approximately 1/32"-1/16" clearance at all
of the fuse Joints.
Bevel
Center Fairing
D 3. Test fit the die-cut 1/8" ply F3B to the inside aft
opening of the center fairing. The bottom of F3B is
slightly wider than the top and is designated with an
arrow. The top fits against the middle fuse top. You will
need to bevel the top and bottom edges of F3B to the
angle of the middle fuse top with coarse (80-grit)
sandpaper to allow it to fit the center fairing properly.
Glue in place with medium CA.
D 4. In the same manner that you installed F3B, install
F2C to the inside forward opening of the center fairing
with medium CA.
D 1. Test fit the wing in the wing saddle on the fuse.
Sand the saddle lightly so that the wing contacts the
saddle evenly on both sides.
D 2. With the fuse resting on a flat surface, measure
down from the bottom of both tip ribs to the flat surface.
If the measurements are not equal (within 1/16"), sand
the saddle slightly until the wing sits level in the saddle.
Hold a string (with one end attached to a pin centered at
36