Great Planes ESP6 Easy Sport 60 - GPMA0152 User Manual
Page 23
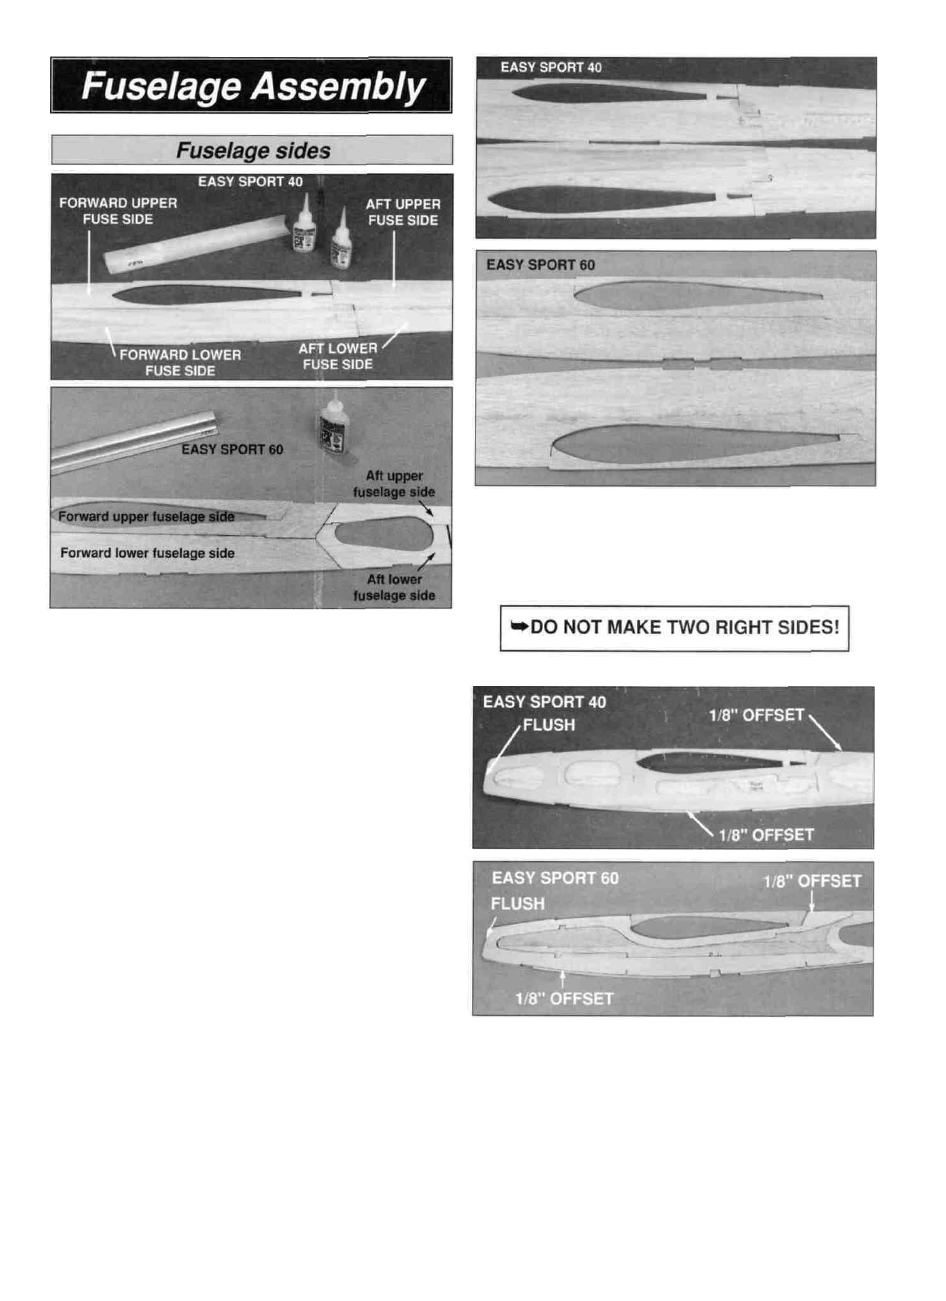
D D 1. Pin or tape the fuse plan to a flat surface and
cover it with waxed paper. Test fit the die-cut 1/8" balsa
forward upper fuse side, forward lower fuse side, aft
upper fuse side and aft lower fuse side together as
shown in the photo. Sand them as necessary to achieve
a good fit, align them carefully with the plan and glue
them together with thin CA.
NOTE: On the Easy Sport 40, you can also check the
alignment of these parts using a straightedge along the
centerline of the assembly.
D D 2. Remove the fuse side from the plans and
inspect the glue joints for gaps, adding thick CA glue if
necessary. Sand the glue joints smooth on both sides
using a T-bar and medium (150-grit) sandpaper. Then
repeat the above steps to make the other fuse side.
D D 4. Position the two fuse sides as shown and mark
one with the words "Right inside" and the other "Left
inside." Doing so will assist you in building and
identifying the fuse sides.
D D 3. Pin the two assembled fuse sides together.
Sand the edges as necessary to make the two
sides identical.
D D 5. Glue the die-cut 1/8" ply fuse doublers to the
inside of the fuse sides, making a RIGHT and a LEFT
side. The front and the wing saddle of the doublers
should be flush with the front and wing saddle of the
fuse sides. The bottom of the doubler will be offset 1/8"
from the bottom of the fuse side.
23