Great Planes ESP6 Easy Sport 60 - GPMA0152 User Manual
Page 25
Q 2. If you are going to use the engine mount supplied
with the kit, drill a 5/32" hole through the firewall at each
of the four punch marks. If you are going to use a
different mount, center it on the embossed lines and
mark and drill the mounting holes.
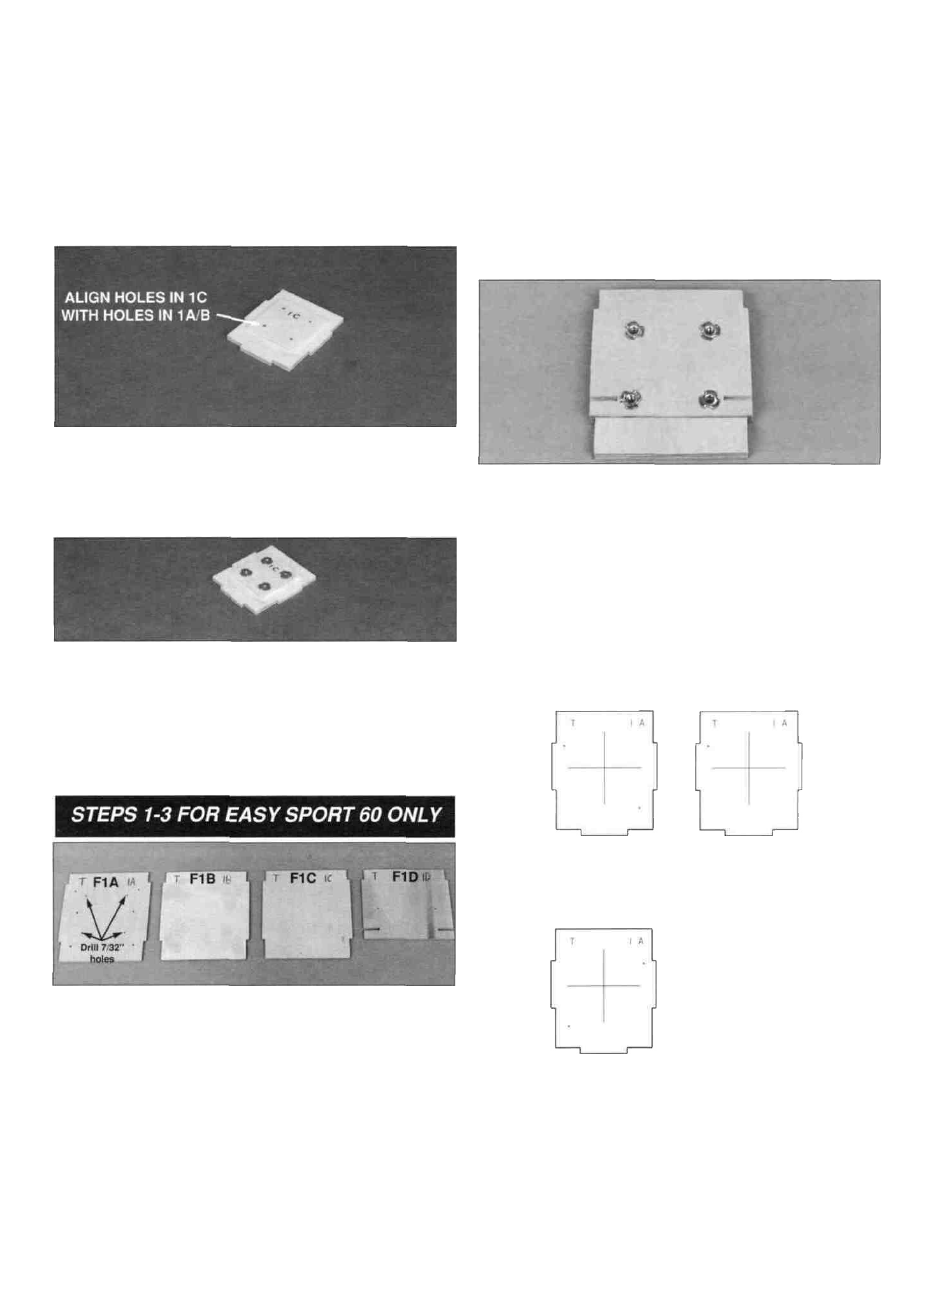
Q 3. Locate the die-cut firewall tripler F1 C and drill a
5/32" hole through the tripler at each of the four engine
mount punch marks.
D 4. Using medium CA, securely glue F1 C to the back
of the previously laminated F1A and F1B. Align F1 C by
lining up the holes in the formers. Once attached, redrill
the holes to clean out any hardened CA.
Clamping the assembly to a table or flat board will
eliminate any warp in the formers. Caution: Check that
the formers do not move out of alignment when they are
clamped to the table. After the epoxy cures, sand the
edges to make them uniform.
D 2. If you are going to use the engine mount supplied
with the kit, drill a 7/32" hole through the firewall at each
of the four punch marks. If you are going to use a
different mount, center it on the embossed lines, mark
and drill the mounting holes.
D 3. Insert the #8-32 Blind Nuts into the engine
mounting holes in F1 D. Tap the blind nuts in place with a
hammer. Apply epoxy or thick CA to the blind nut flanges
and F1 D to hold them in place.
Note: Do not allow the glue to enter the threaded portion
of the blind nuts.
FIREWALL OPTIONS
Use This Diagram To Drill The Firewall Holes
D 5. Insert the #6-32 Blind Nuts into the engine
mounting holes in F1 C. Tap the blind nuts in place with a
hammer. Apply epoxy or thick CA to the blind nut flanges
and F1 C to hold them in place.
NOTE: Do not allow the glue to enter the threaded
portion of the blind nuts.
D 1. Locate the die-cut 1/8" ply Formers F1A, F1B,
F1 C and F1 D. Using 6-minute epoxy, securely glue F1A,
F1B, F1 C and F1 D together. Make sure that F1A is on
top of the stack with the punch marks facing outward
and that F1 D is on the bottom of the stack. Check that
the locking tabs are aligned and the top of the formers
are flush. Weight or clamp the assembly over waxed
paper to a flat table or board while the epoxy cures.
2-stroke
Taildragger
2-Stroke
Tricycle
4-stroke
Taildragger
4-Stroke
Tricycle
Carefully study the "Firewall Options" sketch, and,
depending on which version of the Easy Sport you are
building, drill at the appropriate punch marks with a
3/16" drill.
25