Great Planes ESP6 Easy Sport 60 - GPMA0152 User Manual
Page 17
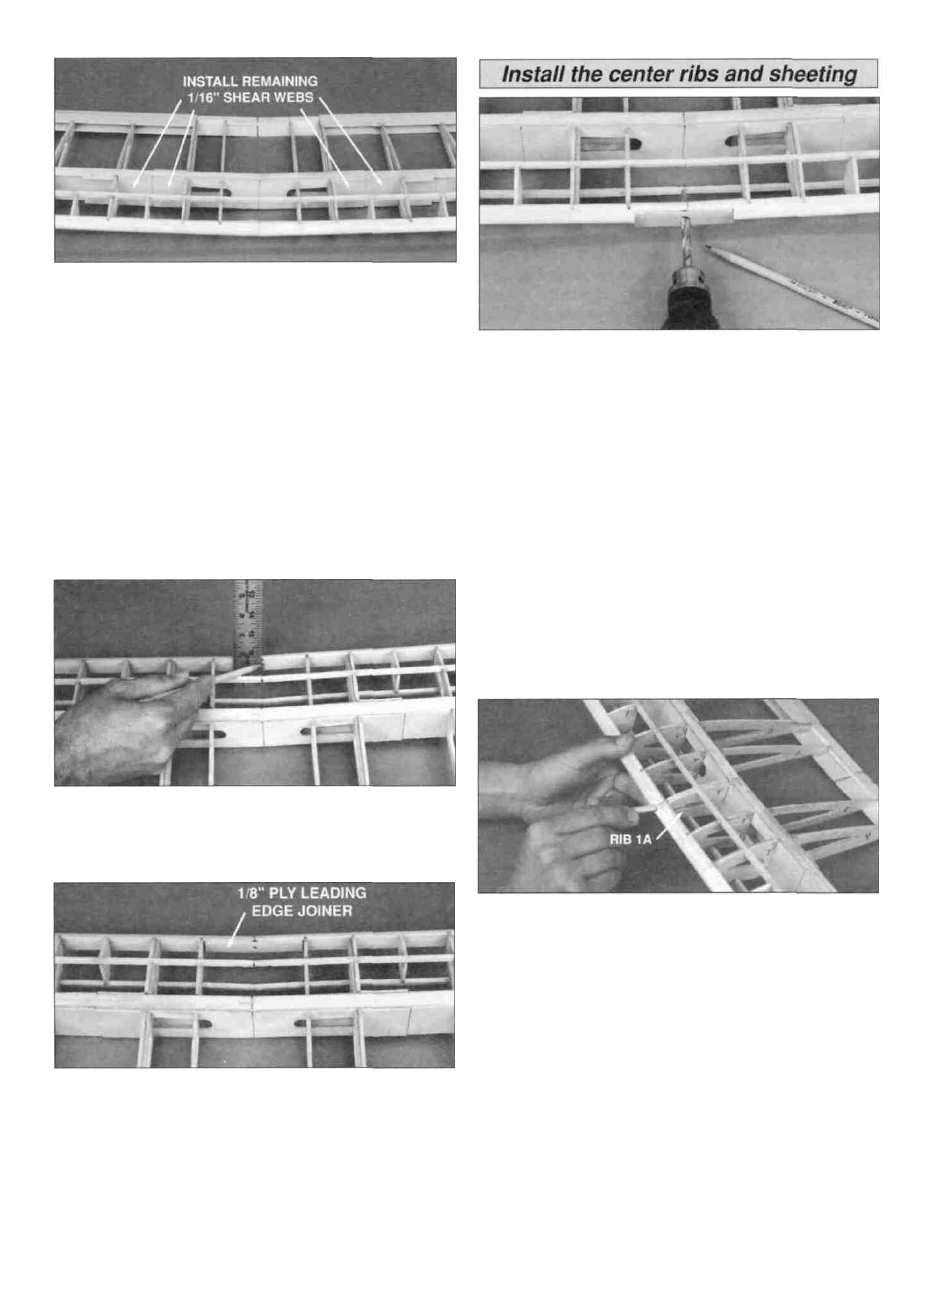
D 9. Securely glue the remaining balsa shear webs to
the front and back sides of the spar joiners between ribs
#4 and #5 (ribs #2 and #3 for Easy Sport 60). Trim the
shear webs so that they do not protrude above or below
the spar joiner where they will interfere with the center
sheeting applied in a later step.
D 10. Glue the die-cut 1/8" ply TE Brace in place
between the #2 ribs as shown on the plan.
If you are building the Easy Sport 60, skip to step 6
under Install the center ribs and sheeting.
D 1. Mark the center of the front LE joint with a pencil.
Vertically center the remaining LE joiner on the mark
and tack-glue in place. Then. using both LE joiners as
guides, drill through the front LE joiner, shaped LE and
back LE joiner with a 1/4" drill. Remove only the LE
joiner that is tack-glued to the front of the LE.
D 11. With a pencil, mark the back of the LE center
joint: 3/32" and 3/8" down from the top of the LE. Also,
3/32" up from the bottom of the LE. See photo.
D 2. Round both ends of the pre-cut, 3" long wing
dowel with medium (150-grit) sandpaper.
D 3. Install the previously laminated 1A ribs as shown
on the plans (do not glue yet.) Slide the wing dowel
through the LE and all the way into the slot in rib 1A.
D 12. Center a die-cut 1/8" ply leading edge joiner on
the back of the LE center joint. Use the marks drawn in
the previous step to aid in alignment. Glue in place with
thin CA.
D 4. Align the 1A ribs and the wing dowel so that the
wing dowel is flush with the outside edges of the slot in
1A. Glue 1A to the LE and forward spar joiner with
medium CA. Be careful not to glue in the wing dowel.
17