Great Planes ESP6 Easy Sport 60 - GPMA0152 User Manual
Page 19
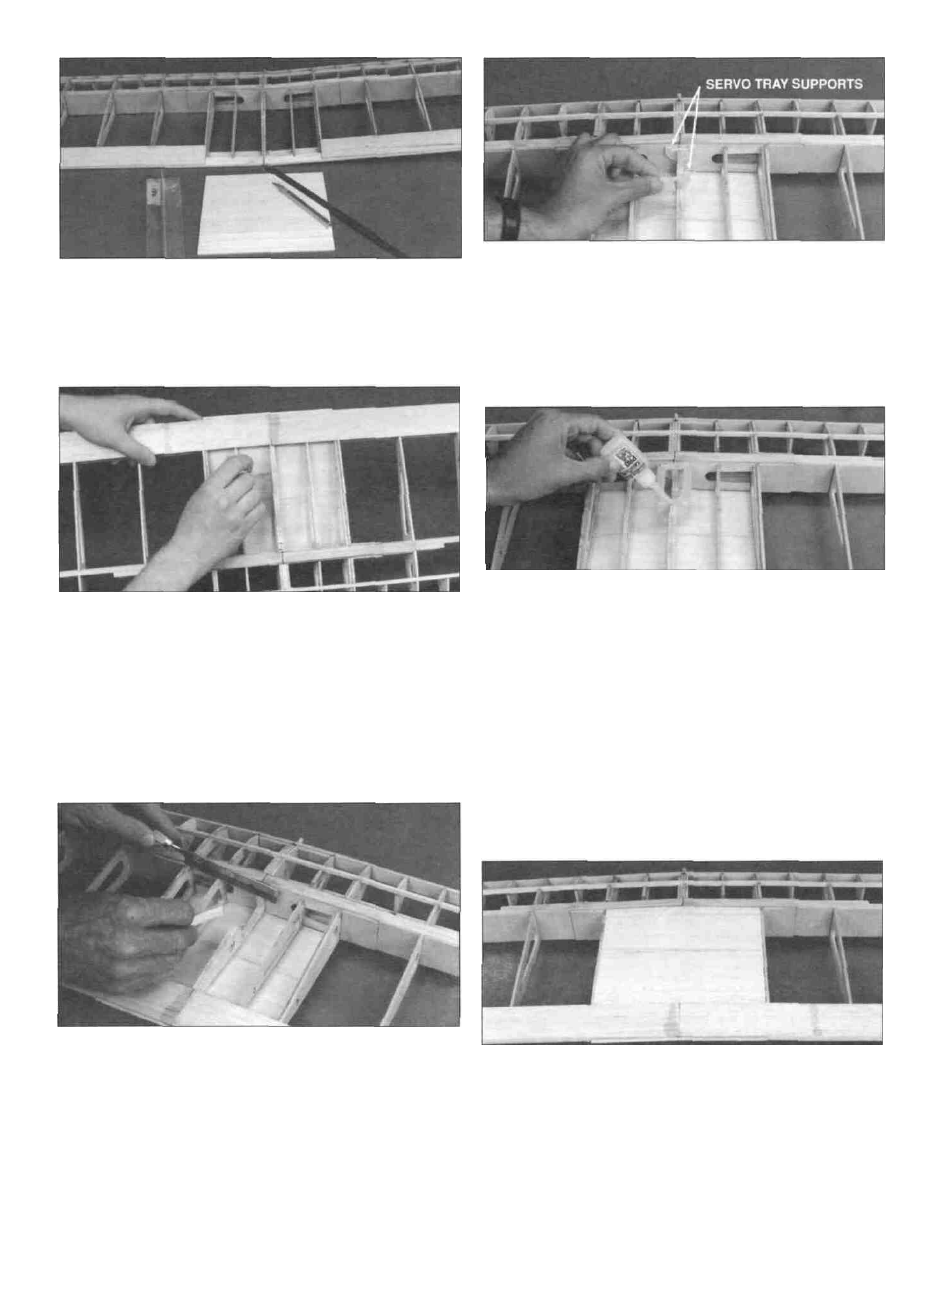
Lt 8. Fit the top center sheet in place on the top of the
wing. Its position is aft of the main spar. Trim or sand, if
required, for a good fit. The sheet should fit into the rails
created at the joint of ribs #3 and #4. Do not glue.
Repeat this step to fit the bottom center sheet.
D 11. Slide the two die-cut ply aileron servo tray
supports in place. Do not glue them in yet.
D 9. Place the top center sheet into position. Turn the
wing over so that the bottom is facing up. With moderate
finger pressure, squeeze the sheet so that it contacts the
top of rib #1C. Holding it in this position, glue the center
sheet to rib #1C with thin CA. Work the pressure evenly
along 1C so that there are no gaps while gluing. In the
same manner, glue the center sheeting to the #2 and #3
ribs. Now, examine all center section joints and apply
medium or thick CA to any questionable areas.
D 12. Install the die-cut ply aileron servo tray in place
on top of the aileron servo tray supports. When
everything is in position, glue the servo tray supports
and servo tray in place with thin CA.
D 10. Using a hobby saw or knife, remove the partially cut
brace from rib #1C. At this point test fit one of your servos
into the pocket just created. If it fits, great! If not, now is the
time to enlarge the cutout. This is most easily
accomplished with either a hobby saw or a Dremel
MultiPro.
D 13. Test fit the bottom center sheet one last time. The
bottom sheeting will be installed directly over the servo
tray. Remove the sheet and apply thick CA to the ribs
and servo tray. Press the sheeting down and hold it in
place until the glue sets.
19