Great Planes ESP6 Easy Sport 60 - GPMA0152 User Manual
Page 22
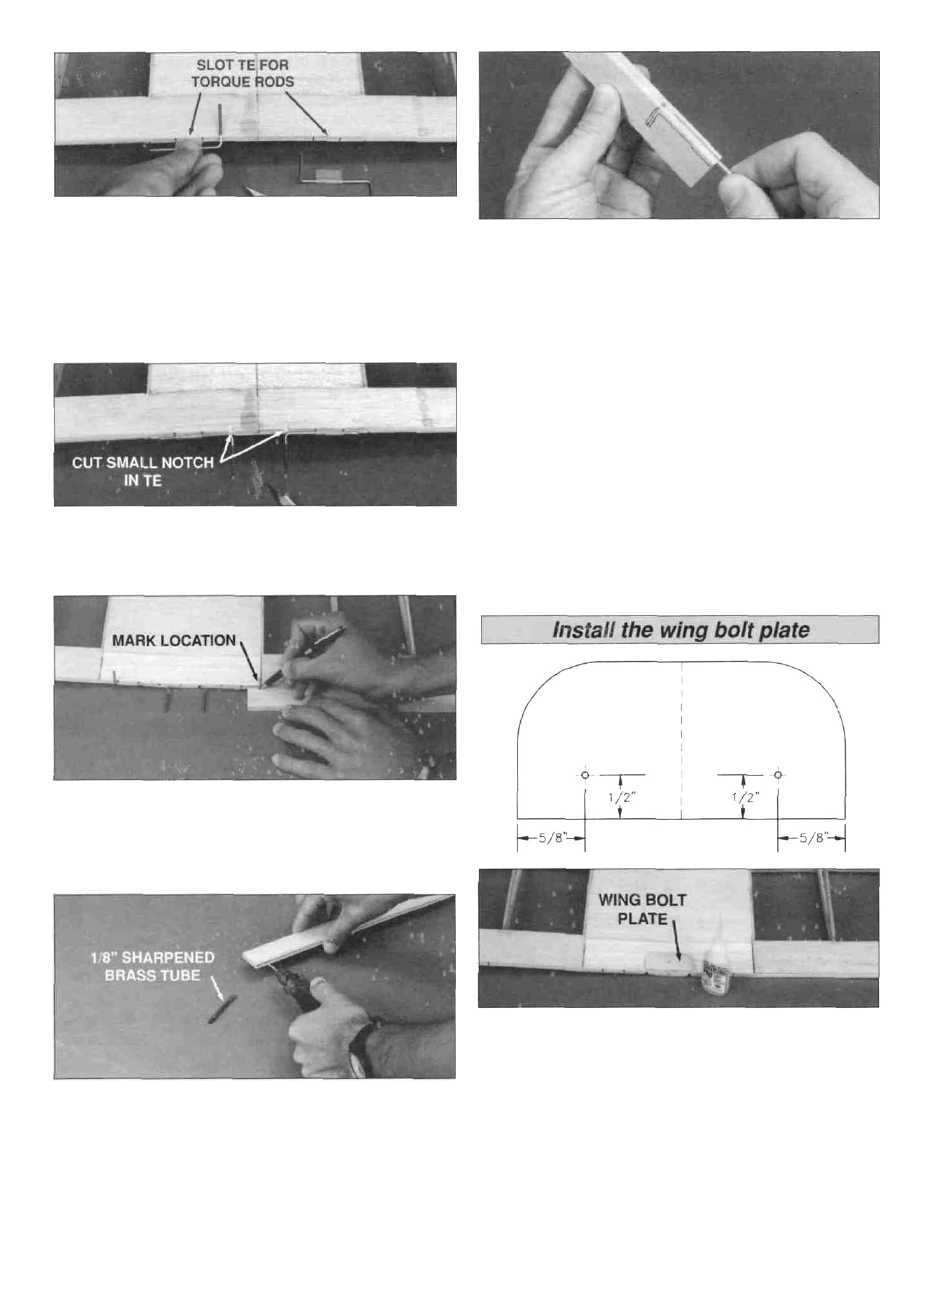
D 5. Align each wing half over its respective view on the
plans and mark the locations of the aileron torque rod
bearings and hinges. Using the same technique as
slotting for hinges, carefully slot the TE to accept the
aileron torque rod bearing in both wings. It helps to
have the torque rod handy for reference.
D 6. Cut small notches in the bottom of the TE to allow
the torque rod arms to swing forward.
D 9. Use the sharpened 1/8" diameter brass tube to cut
a groove in the leading edge of the ailerons to accept
the torque rods. Test fit the ailerons onto the torque rods
and cut as necessary until they fit.
D 10. Sand the LE of the ailerons to a "V" shape and
the TE of the ailerons to a rounded shape, as shown on
the plans.
D 11. Test fit the ailerons on the wing. Check for free
movement in both directions. There should be no
binding. Now is the time to locate any problems and
rectify them before the wing is covered and the ailerons
are permanently attached. A f t e r the ailerons are
checked, round the TE tips to match the ailerons.
D 12. Remove the ailerons, hinges and torque rods for
now. They'll be reinstalled later.
D 7. While holding the ailerons in place against the TE
(with the ends of the ailerons lined up with the TE tip),
mark the locations where the torque rods will enter
the ailerons.
D 8. Drill a 7/64" hole in each aileron to accept the
torque rod. Start at the leading edge centerline and drill
straight in to the proper depth.
Locate the die-cut 1/8" ply wing bolt plate (WB) and,
with medium CA, glue it to the top center TE of the wing
as shown on the plans. Make sure that (WB) is centered
on the TE and securely glued in place. On the Easy
Sport 40, the punch mark must face up so that you can
use it later. On the Easy Sport 60, place two marks at
the locations shown on the drawing above.
22