Flap setting – Futaba 14MZ User Manual
Page 83
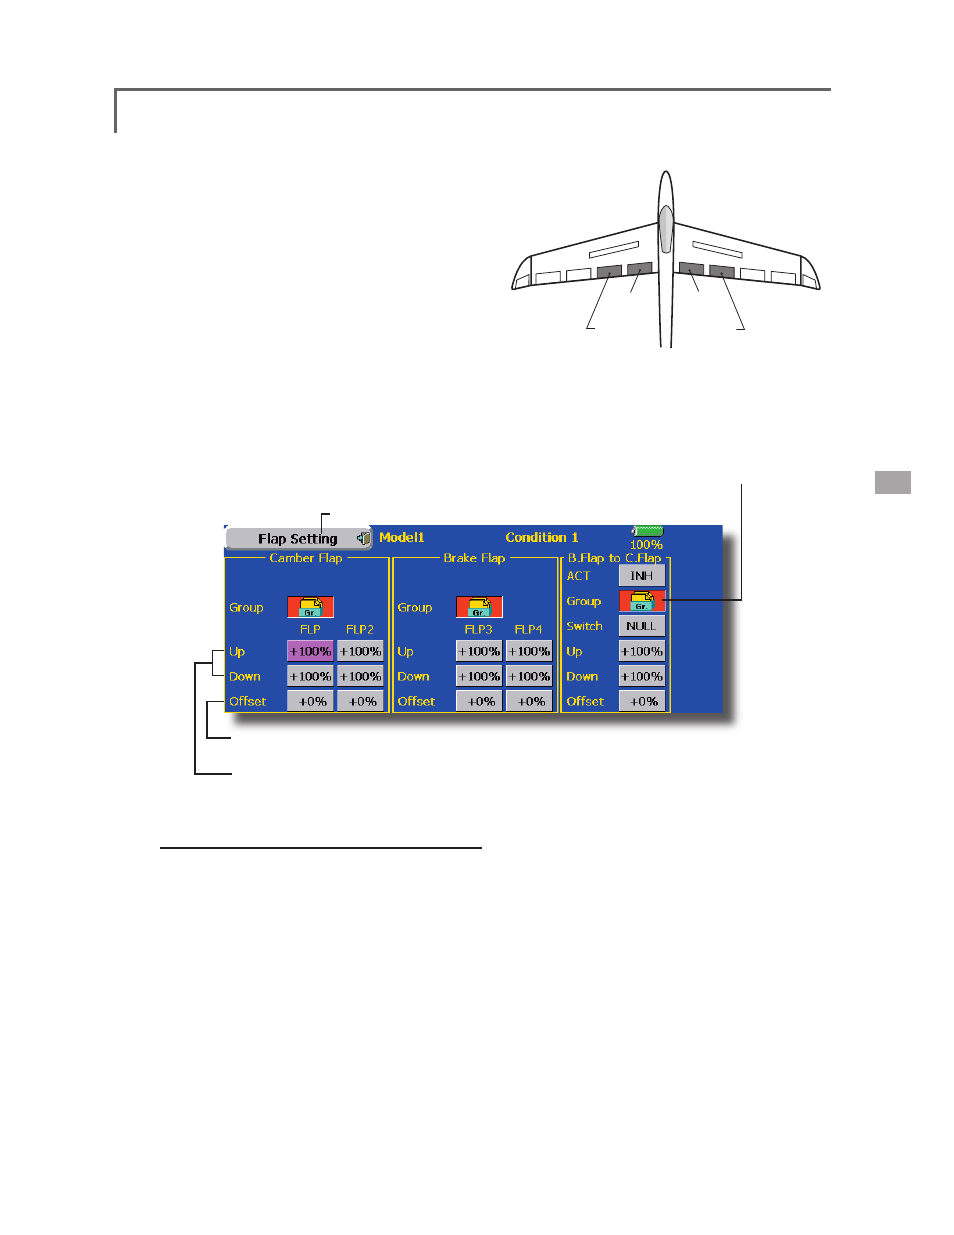
FLP 2
(Camber Flap)
FLP 1
(Camber Flap)
FLP 3
(Brake Flap)
FLP 4
(Brake Flap)
●Return to Model Menu
● Touch the [Flap Setting] button in the Model Menu to
call the setup screen shown below.
Flap setting
[Corresponding model type]: Airplane/glider, 2 fl aps or more
The up/down travel of each fl ap (camber fl aps:
FLP1/2, brake flaps: FLP3/4) can be adjusted
independently at each servo according to the wing
type.
● The operation reference point of each fl ap can be
offset
The camber flaps of a 4-flap model can be
mixed with the brake fl aps. (Brake FLP to camber
FLP)
● An ON/OFF switch can be set.
● Group/single mode switching
(Gr./Sngl)
(For more information, see the description
at the back of this manual.)
*The display screen is an example. The actual screen depends on the
model type.
Setting method
● Touch the fl ap (FLP) 1~4 Up or Down button
according to the wing type and adjust the travel
independently.
● To offset the operation reference point of each
fl ap, touch the corresponding Offset button. Use
the adjustment buttons displayed on the screen to
offset the reference point.
● When using Brake FLP to Camber FLP mixing, touch
the ACT button and set the function to ACT (ON).
When setting a switch, touch the [NULL] button of
the switch to call the
select the switch and set its ON direction. (Always
ON at "NULL" setting)
(For a description of the switch selection method,
see the description at the back of this manual.)
●Operation reference point offset
●Up side/Down side adjustment
83