CNET ecopy Printer/Fax/Scanner/Copier User Manual
Page 83
Registering Scan Settings
75
3
CCCC
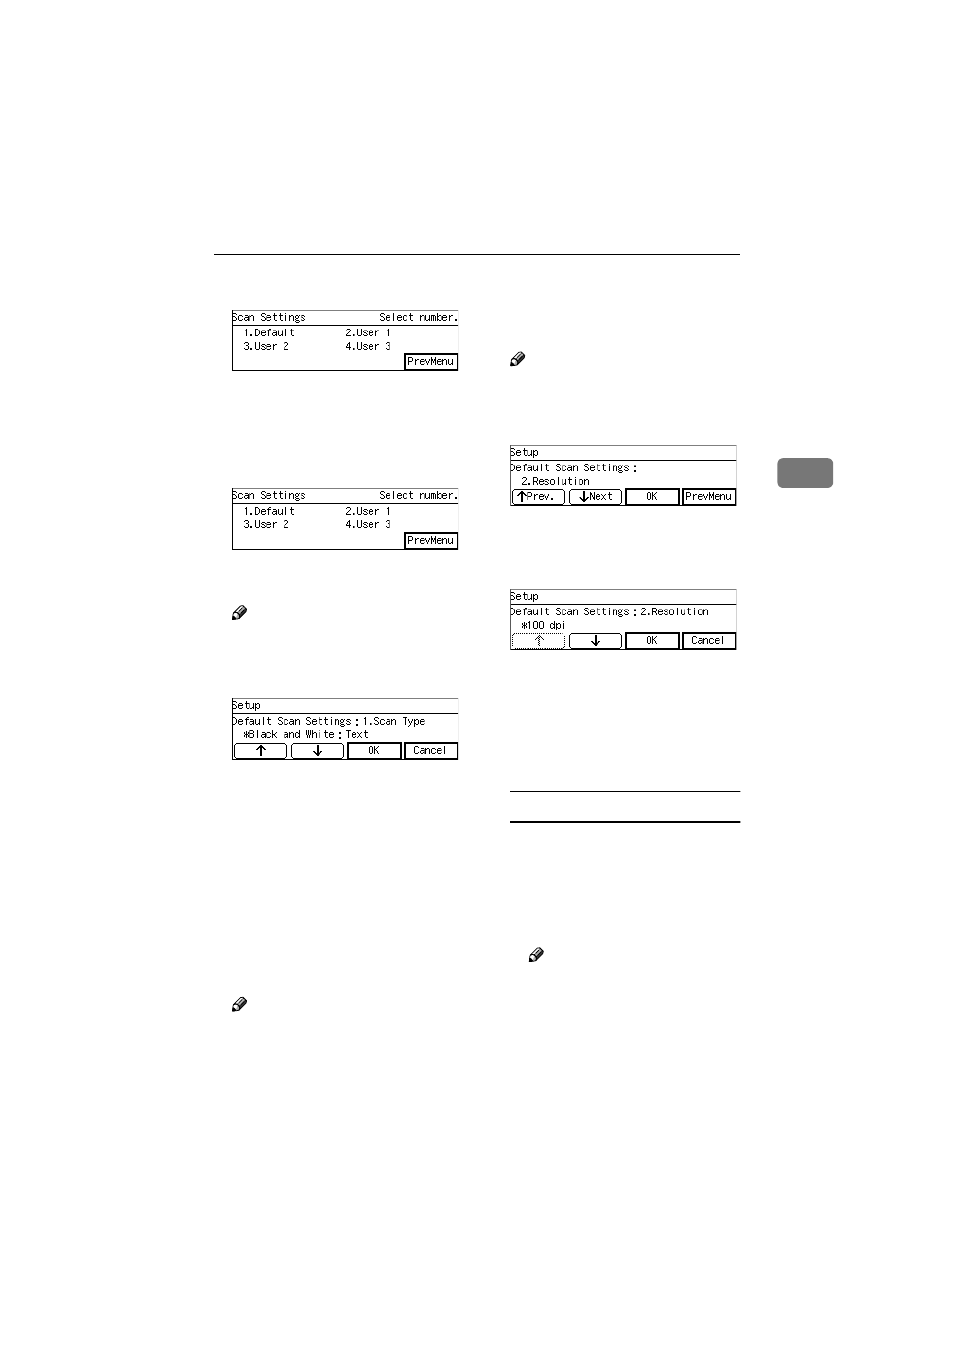
Press the
{{{{1}}}} key.
The Default Scan Settings menu is
displayed, and “1. Scan Type ” ap-
pears as the setup item currently
selected.
DDDD
Press [OK].
The setting screen for “1. Scan
Type ” appears.
Note
❒ Pressing [PrevMenu] returns to
the parent menu screen.
EEEE
Select scan type.
• The option that is currently se-
lected is displayed first.
• “*” mark appears along with the
option currently selected.
• Use [
↑↑↑↑] and [↓↓↓↓] to display the
option you want to select.
FFFF
While the option you want to se-
lect is displayed, press [OK].
This saves the setting you have se-
lected, and returns to the Default
Scan Settings menu.
Note
❒ Pressing [Cancel] discards the
selected option, and returns to
the Default Scan Settings menu.
GGGG
Press [Next ].
“2. Resolution ” appears as the set-
up item currently selected.
Note
❒ Pressing [Prev.] displays the pre-
vious setup item.
HHHH
Press [OK].
The setting screen for “2. Resolu-
tion ” appears.
IIII
Select the resolution you want.
• The option that is currently se-
lected is displayed first.
• “*” mark appears along with the
option currently selected.
• Use [
↑↑↑↑] and [↓↓↓↓] to display the
option you want to select.
To select a preset resolution
A While the preset resolution
you want to select is displayed,
press [OK].
This saves the setting you have
selected, and returns to the De-
fault Scan Settings menu.
Note
❒ Pressing [Cancel] discards the
selected option, and returns
to the Default Scan Settings
menu.
www.cnet.ie