Installation guidelines – Waterworks R.W. Atlas Exposed Thermostatic System with 8" Shower Rose, Extended Arm, and Metal Wheel Handles User Manual
Page 4
PRODUCT SUPPORT 800.927.2120 8am - 6pm EST
RW ATLAS
Exposed Thermostatic System with 8" Shower Rose
INSTALLATION GUIDELINES
Page 4 of 6
8.26.2014
These guidelines have been prepared for the professional contractor to aid in the installation of:
RW ATLAS EXPOSED THERMOSTATIC SYSTEM WITH 8" SHOWER ROSE WITH METAL WHEEL OR
LEVER HANDLE & WITH HANDSHOWER STYLE #'S RWXS21, RWXS31, RWXS41 & RWXS51
[RW21XS (UK), RW31XS (UK) RW41XS (UK) & RW51XS (UK)].
All dimensions are based on original specification and are subject to change and variation.
Please consult your Design Associate for current specifications.
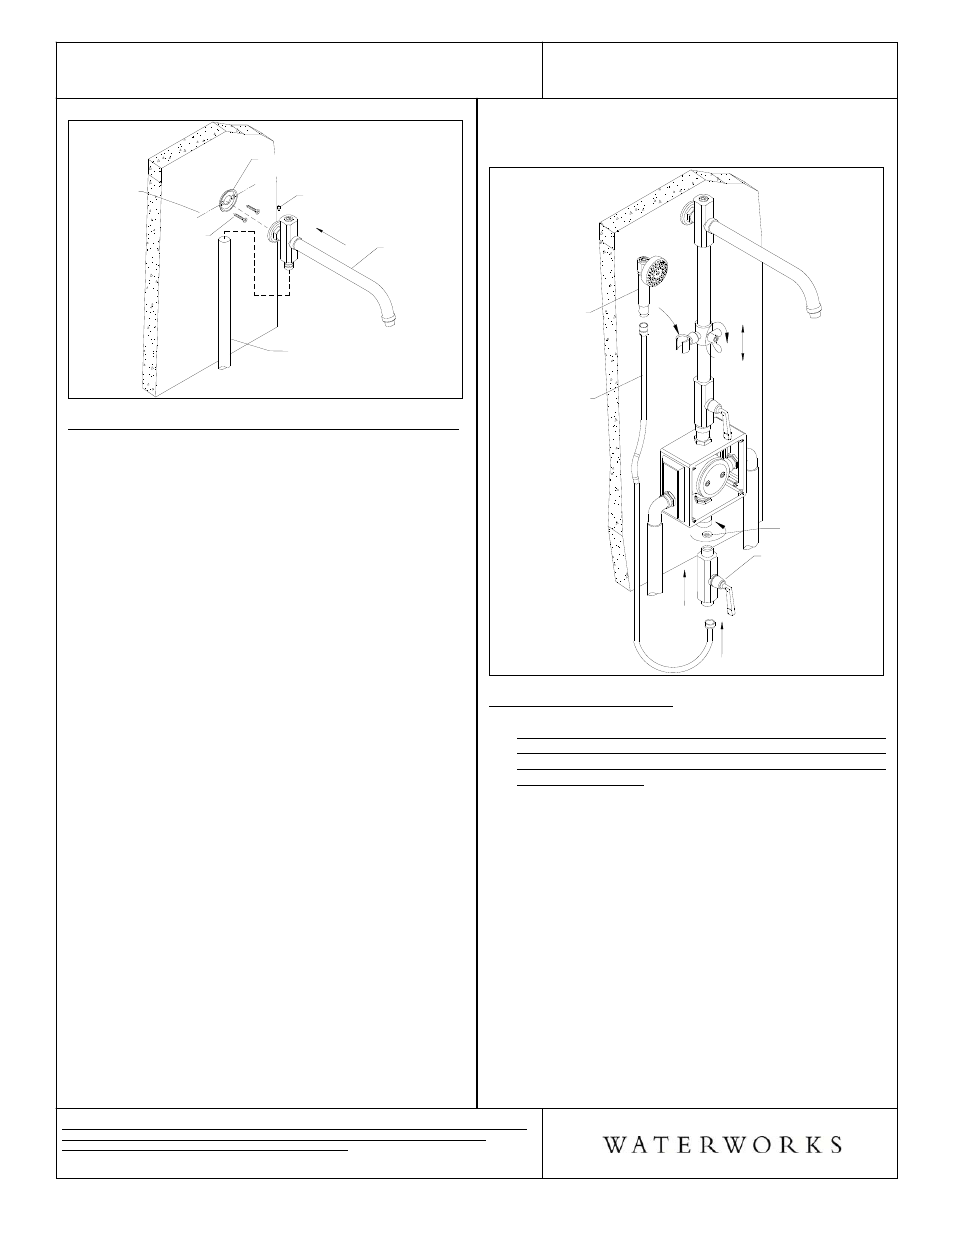
Figure - 05
SHOWER RISER
[CAN BE FIELD CUT]
SHOWER ARM
ASSEMBLY
CENTERLINE
MADE IN
STEP 15
SCREW
WALL MOUNT
PLATE
SET SCREW
HANDSHOWER INSTALLATION (RWXS40 & 50 ONLY):
¾ See Figure - 06 for steps 21 - 23.
¾ Maximum Flow Rate: 2.5 gpm, For use with
automatic compensating valves rated at 2.5gpm.
21. Connect the handshower wall valve using the
knurled nut on the bottom of the valve body,
making sure the rubber washer is between. Once the
knurled nut fully tightened, make sure the wall valve
if facing forwards and then tighten the hex nut on
bottom of the valve body.
22. Connect the knurled end of the handshower hose to
the bottom of the handshower wall valve. Connect
the conical end of the handshower hose to the
bottom of the handshower.
23. Place handshower into the clip on the slider,
previously installed in Step 16. Note: The
handshower slider is adjusted by loosening the
wing-nut on the slider and then retightening at the
desired height.
Figure - 06
HANDSHOWER
WALL VALVE
HANDSHOWER
HANDSHOWER
HOSE
RUBBER GASKET
FLUSH OUT THE SYSTEM:
¾ The supply lines must be flushed out to prevent
clogging of the filter screens. Failure to flush the
lines will permanently damage the cartridge and
void the warranty.
¾ See Figure - 07 for Steps 24-28.
24. The exposed wall valve comes pre-installed with the
flush plate and is ready for flushing the lines.
25. Remove the shower head and/or handshower (any
fitting with a flow regulator).
26. Turn on the water supply to flush out the lines, then
inspect all connections for leaks.
27. After all the lines are flushed, turn off the water
supply and remove the flush plate.
28. Install the cartridge using the 2 cover screws and
turn the service stops off.