6 replacing the server board, 1 removing the server board, Replacing the server board 3.5.6.1 – Kontron TIGW1U Carrier Grade Server User Manual
Page 62: Removing the server board, Figure 51
TIGW1U server—Server Installations and Upgrades
Kontron Carrier Grade Server TIGW1U
Product Guide, rev. 1.3
December 2009
62
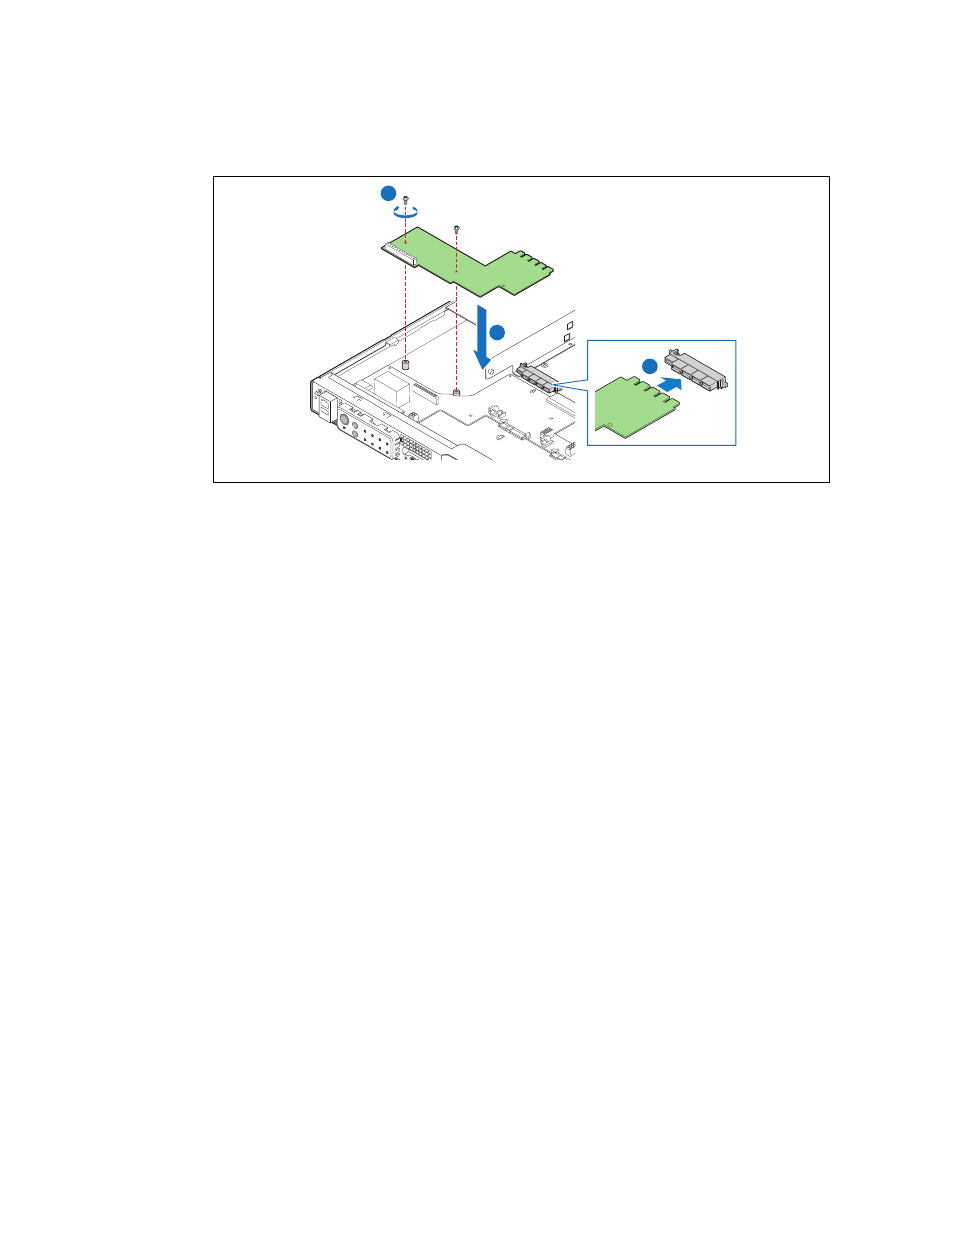
Figure 51.
Installing the PDB
3. Connect all power cables and the edge connector (“B”).
4. Install the PCI fan air duct and the chassis cover.
3.5.6
Replacing the Server Board
The Carrier Grade Server TIGW1U uses the Intel
®
Server Board S5000PHB server
board. To replace the server board, the following components must be removed:
All components on the server board:
• Heat sink(s)
• Processor(s)
• All DIMMs
• PCI riser assembly
• Four-fan assembly
To replace the server board, use the following instructions.
Caution:
Before replacing a board, you must first take the server out of service, turn off all
peripheral devices connected to the system, turn off the system by pressing the power
button, and unplug the power cord from the system or wall outlet.
When handling this board or any of the components on it, observe safety and ESD
precautions. See
Appendix A, “Safety Information”
3.5.6.1
Removing the Server Board
1. Power down the server system and unplug all peripheral devices and the power
cable.
2. Remove the chassis cover and processor air duct.
3. Remove the PCI riser assembly. For instructions, see
the PCI Riser Card Assembly” on page 42
4. Remove all DIMMs. For instructions, see
Section 3.4.3.2, “Removing DIMMs” on
TS000208
B
A
C