Series 5500 xtherm – EFCO 5500X Outside Glazed User Manual
Page 48
EFCO 2012
Page 48
Series 5500 XTherm
™
Curtain Wall Assembly and Installation Instructions
Apply joint plugs into the
open areas adjacent to the
horizontals as shown in
Section 8, starting on page 29.
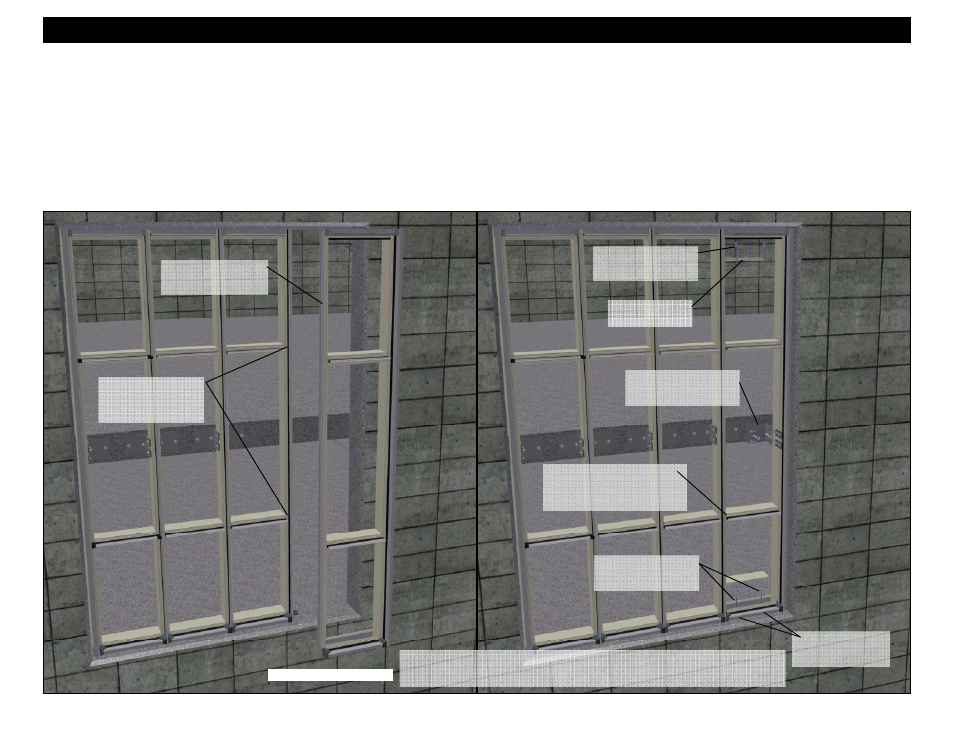
Section 12 - Install Twin Span Frame Components
Set the frame into the
opening and shim
level and plumb.
Seal the vertical at all
horizontal locations.
(See Figure 2 and 3
on page 17).
Snap fillers in to
head and sill.
Anchor the frame into
the opening as shown
on pages 33 and 34.
Anchor the frame into
the opening as shown
on pages 33 and 34.
Apply intermediate wind
load anchor. See pages
42 through 44.
Apply dead load
shims at anchors
and below verticals
25. Continue setting all the intermediate frames following previous steps until all frames have been installed except the final jamb frame.
26. Check frequently to ensure the installed framing is in the proper position with regard to established benchmarks and are level and plumb.
27. Seal the vertical at horizontal locations including the head and sill. (See Figure 2 and 3 on page 17).
28. Set the last frame in the run into the opening mating the filler with the intermediate vertical until the filler and vertical snap together.
29. At least a 3/4” space between the perimeter of the jamb mullion and the condition for setting space for the last frame unit to be installed.
30. When the frame is set level and plumb, apply the dead load shims below the verticals and anchor points, and apply anchors as shown on pages 33 and 34.
31. After securing the anchor bolts, snap in the head and sill fillers.
32. Apply the last set of joint plugs and noted in section 8, starting on page 29.
33. Apply intermediate the jamb wind load anchor as shown and noted on pages 42 though 44.
IMPORTANT NOTE:
It is critical to allow at least a 3/4” space between the perimeter of the jamb mullion
and the condition for setting space for the last frame unit to be installed.
Typical Right Jamb Frame