Series 5500 xtherm – EFCO 5500X Outside Glazed User Manual
Page 36
EFCO 2012
Page 36
Series 5500 XTherm
™
Curtain Wall Assembly and Installation Instructions
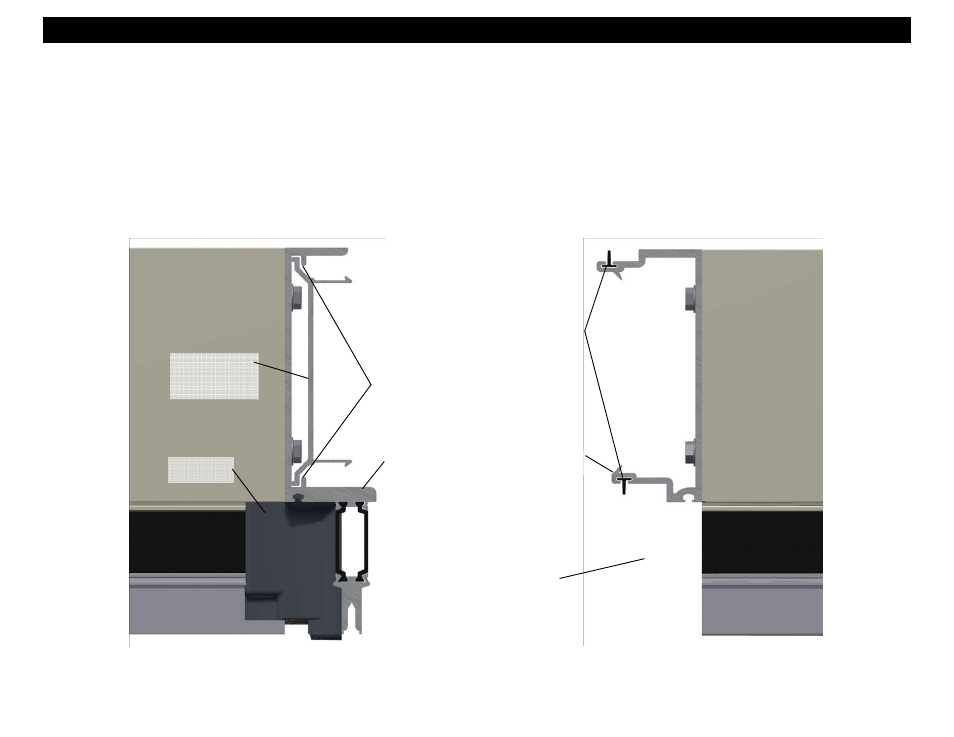
Figure 44
Section 11 - Install Single Span Frame Components
8. Expansion mullions are required for elevations wider than 20’-0”. The maximum spacing between expansion mullions is 20’-0” to 25’-0” depending on lite
size. Refer to the final approved shop drawings for specific locations and more information.
9. Slide mullion clips into the female mullion as shown in Figure 44 prior to installing the frame into the opening. Mullion clips may be shop installed at the time
of frame assembly. Space the clips at 48” on center maximum.
10. Crimp the tabs of the vertical at each end of each mullion clip with a punch or similar tool to lock it in place. Refer to the approved shop drawings for more
information.
11. Thread the finger gaskets (WEP6) into the reglets of the male half of the expansion mullion for the full length of the mullion as shown in Figure 45 below. Do
not stretch the gaskets during insertion.
12. Crimp the reglet in the mullion at the finger gaskets about ½” from each end with a punch or similar tool to lock the gasket in place.
Crimp tabs at each end of each
mullion clip to fix in place.
Mullion Clip at 48”
o/c max.
(FK34 - 7” system)
(FK35 - 8” system)
Female Expansion
Mullion
Male Expansion
Mullion
Shop applied
joint plug.
Left open for
field applied
joint plug.
Thread finger gaskets (WEP6)
into mullion reglets full length
and crimp at each end.
Figure 45