Series 5500 xtherm – EFCO 5500X Outside Glazed User Manual
Page 28
EFCO 2012
Page 28
Series 5500 XTherm
™
Curtain Wall Assembly and Installation Instructions
Section 8 - Shop Applied Joint Plugs
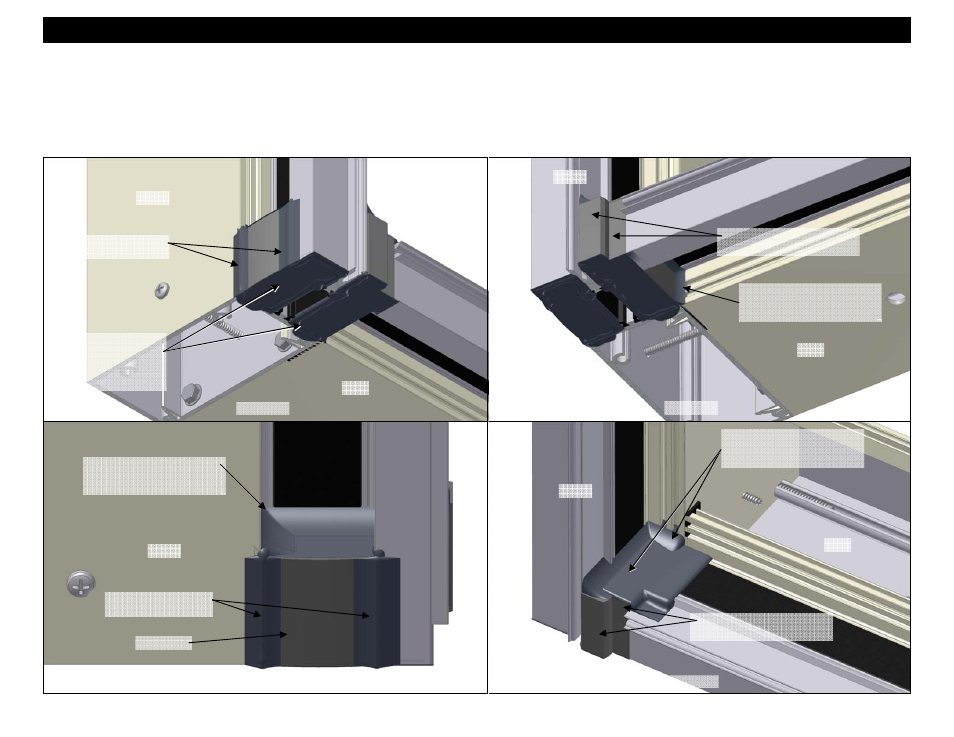
17. Once the plugs are flush and in place as shown, tool the excess sealant over the top and bottom surfaces of the joint plug.
18. Tool the sealant around the plug, sealing it to the surfaces of the glazing pocket, and side of the mullion on the exterior sides of the frame. See figures 28, 29
and 30.
19. Tool the sealant over the joint plug blending it over the head and jamb at the interior glazing pocket as shown in Figure 31.
20. Remove all excess sealant, particularly at the face of the joint plug, which will later marry into the exterior gasket and the back of the pressure plate.
Tool the excess
sealant over the top
and bottom surfaces of
the joint plugs filling
the slots in the plug.
Tool the sealant to the
side of the mullion.
Tool the sealant around the
plug, sealing it to the surfaces
of the glazing pocket.
Figure 28
Figure 29
Figure 30
Figure 31
Tool the sealant around the
plug, sealing it to the surfaces
inside the glazing pocket.
Tool the sealant around the
plug, sealing it to the surfaces
of the glazing pocket.
Remove all excess sealant,
from the face of the joint plug.
Remove all excess sealant,
from the face of the joint plug.
Tool the sealant to the
side of the mullion.
Jamb
Joint Plug
Sill
Sill
Jamb
Jamb
Sill
Jamb
Sill