Series 5500 xtherm – EFCO 5500X Outside Glazed User Manual
Page 29
EFCO 2012
Page 29
Series 5500 XTherm
™
Curtain Wall Assembly and Installation Instructions
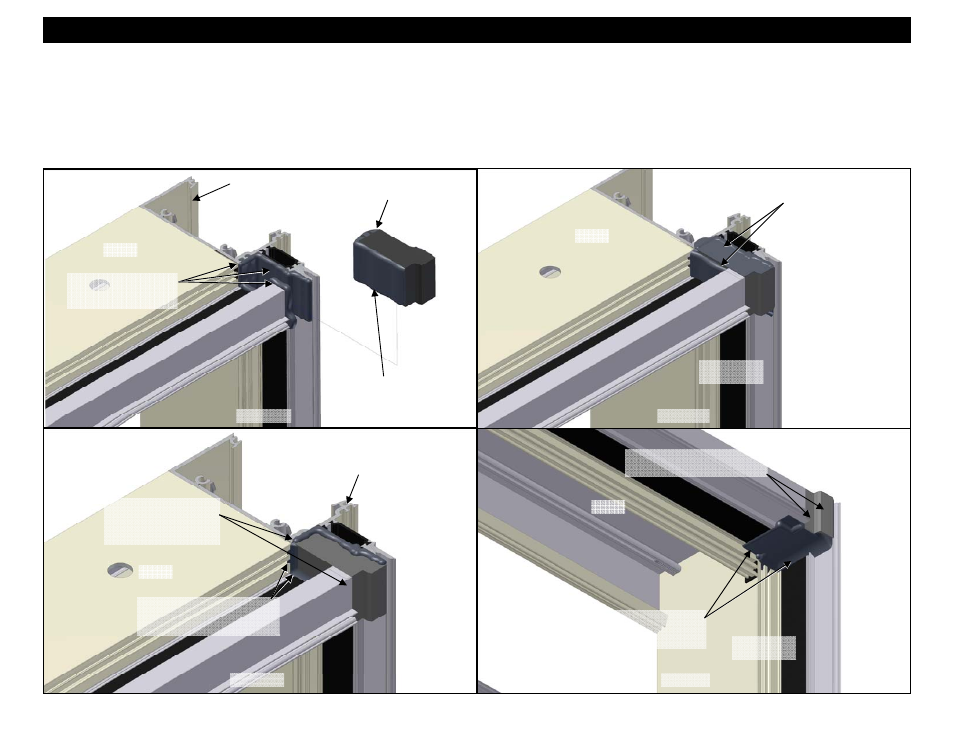
Section 8 - Shop Applied Joint Plugs
21. Using an approved solvent or cleaner, clean the joint plug, and the joint plug sealant contact surfaces of the mullions of all oils and other
contaminants.
22. Apply sealant to the joint plugs and the joint plug sealant contact surfaces of the mullions as shown and noted below. Be sure to fill the gasket reglets in the
vertical mullion at the sealant contact areas.
23. Insert the joint plugs into the opening oriented as shown, compressing it into place. The depression in the face of the joint plug is to allow clearance for the
exterior glazing gasket to pass by when it is installed later.
Figure 32
Figure 33
Figure 34
Figure 35
Apply a sealant bed on
the surfaces of the
mullion where shown.
Tool sealant all around
the joint plug inside the
glazing pocket.
Insert the joint plug
into the openings of
the mullions.
Compress the joint
plugs in place, flush
with the end and faces
of the vertical as shown.
Apply sealant on
three sides of each
of the joint plug.
Head
Head
Intermediate
Vertical
Head
Head
Intermediate
Vertical
Tool the excess sealant
over the top and bottom
surfaces of the joint plug.
Tool the sealant around the
plug, sealing it to the surfaces
of the glazing pocket.
Remove all excess sealant,
from the face of the joint plug.
Intermediate
Vertical
Intermediate
Vertical