Upgrading the microprocessor, Replacing the microprocessor – Dell PowerEdge 500SC User Manual
Page 43
Upgrading the Microprocessor
To take advantage of future options in speed and functionality, you can upgrade the system microprocessor.
The microprocessor and its associated L2 cache memory are contained in a PGA package that is installed in a ZIF socket on the system board. The following
subsection describes how to upgrade or replace the microprocessor.
Replacing the Microprocessor
The following items are included in the microprocessor upgrade kit:
l
A microprocessor
l
A heat sink
l
A securing clip
1.
Remove the system cover (see "
Removing the System Cover and Support Beam
" in "Troubleshooting Your System").
2.
Remove the cooling shroud (see "
" in "Troubleshooting Your System").
3.
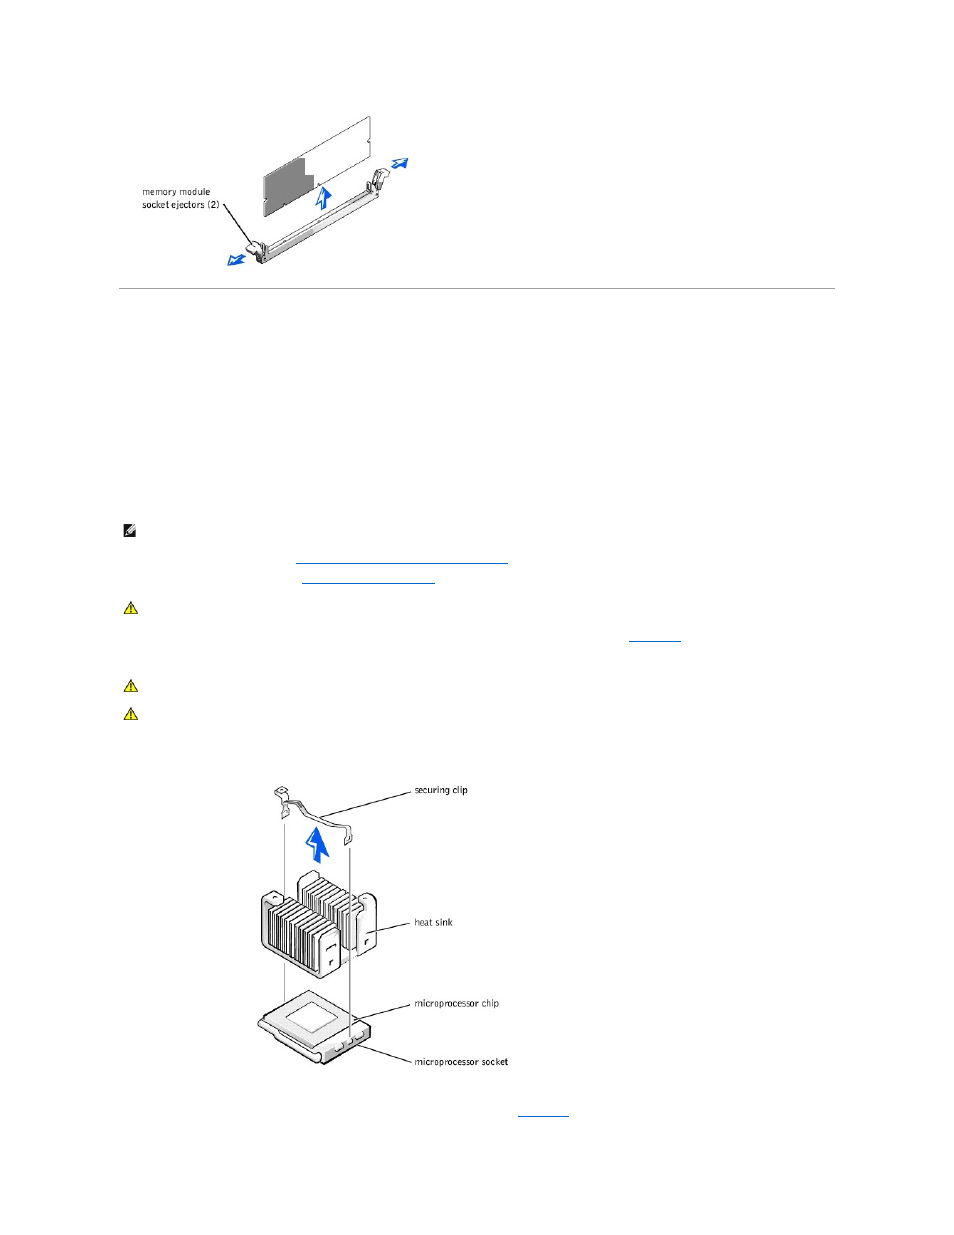
Press down on the heat-sink securing clip to release the clip from the retaining tab on the ZIF socket (see
4.
Remove the securing clip.
Figure 6-10. Securing Clip
5.
Remove the heat sink.
6.
Pull the socket release lever straight up until the microprocessor is released (see
NOTE:
Dell recommends that only a technically knowledgeable person perform this procedure.
CAUTION:
See "Protecting Against Electrostatic Discharge" in the safety instructions in your System Information document.
CAUTION:
Never remove the heat sink from a microprocessor unless you intend to remove the microprocessor. The heat sink is necessary to
maintain proper thermal conditions.
CAUTION:
The microprocessor and heat sink can become extremely hot. Be sure the microprocessor has had sufficient time to cool before
handling.