Removing expansion cards – Dell PowerEdge 500SC User Manual
Page 40
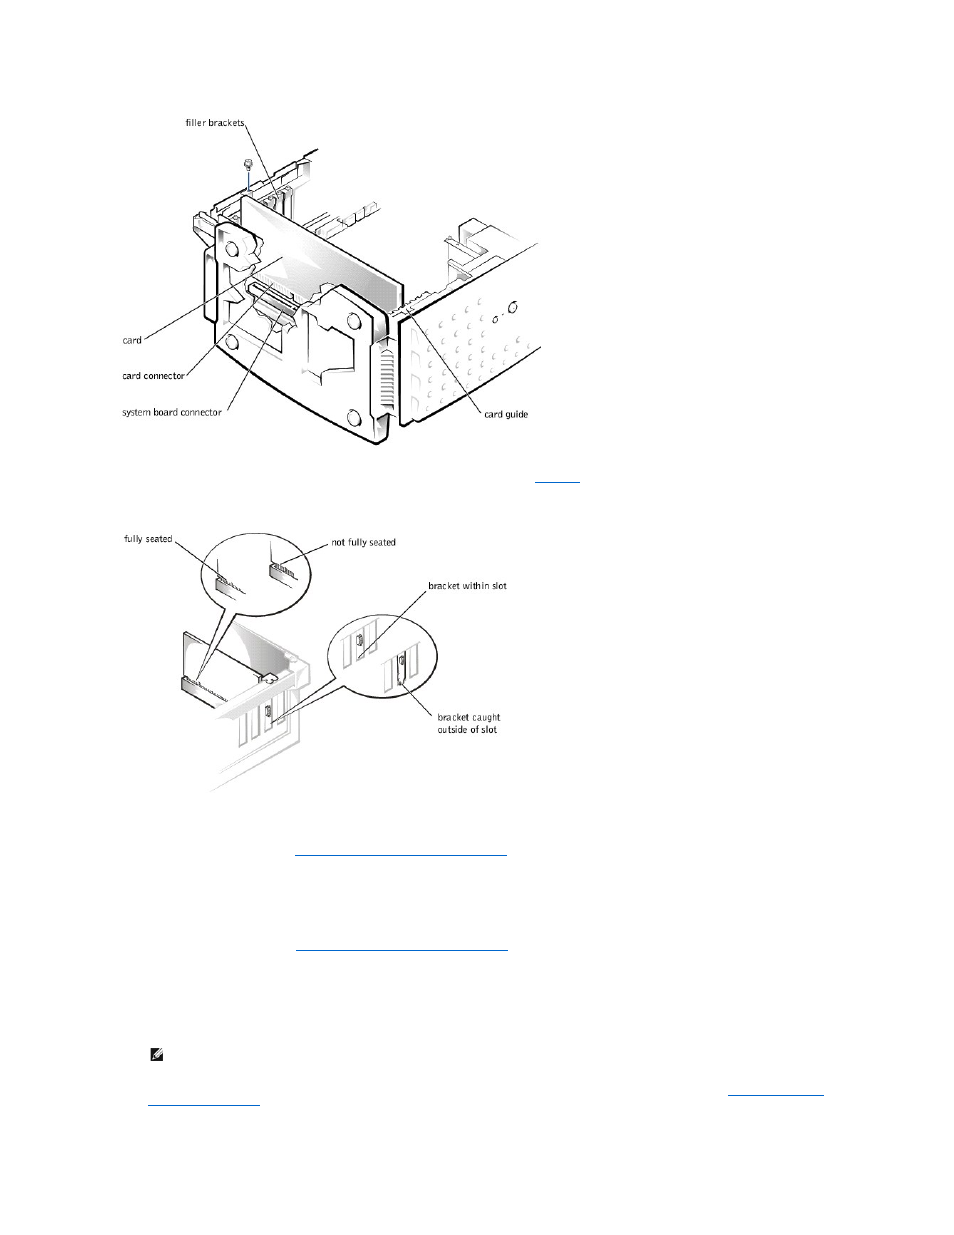
Make sure that the card is fully seated and that its bracket is within the card slot (see
).
Figure 6-6. Seating an Expansion Card
5.
Secure the bracket on the end of the card with the screw you removed in step 3.
6.
Connect any cables required for the card as described in the card documentation.
7.
Replace the system cover (see "
Replacing the System Cover and Support Beam
" in "Troubleshooting Your System").
8.
Plug your system and devices into their electrical outlets, and turn them on.
9.
Install any drivers required for the card as described in the card documentation.
Removing Expansion Cards
1.
Remove the system cover (see "
Removing the System Cover and Support Beam
" in "Troubleshooting Your System").
2.
Disconnect any cables connected to the expansion card.
3.
Remove the screw from the card bracket.
4.
Grasp the card by its top corners, and lift it from the system board.
5.
If you are removing the card permanently, install a metal filler bracket over the empty card-slot opening.
6.
Replace the system cover, and then reconnect the system and peripherals to their power sources and turn on the system (see "
Replacing the System
Cover and Support Beam
" in "Troubleshooting Your System").
NOTE:
Installing a filler bracket over an empty expansion slot is necessary to maintain Federal Communications Commission (FCC) certification of
the system. The brackets also keep dust and dirt out of the system and aid in proper cooling and airflow inside the system.