Edge Lighting TruLine 1.6A, 24VDC - Plaster-In LED system User Manual
Page 5
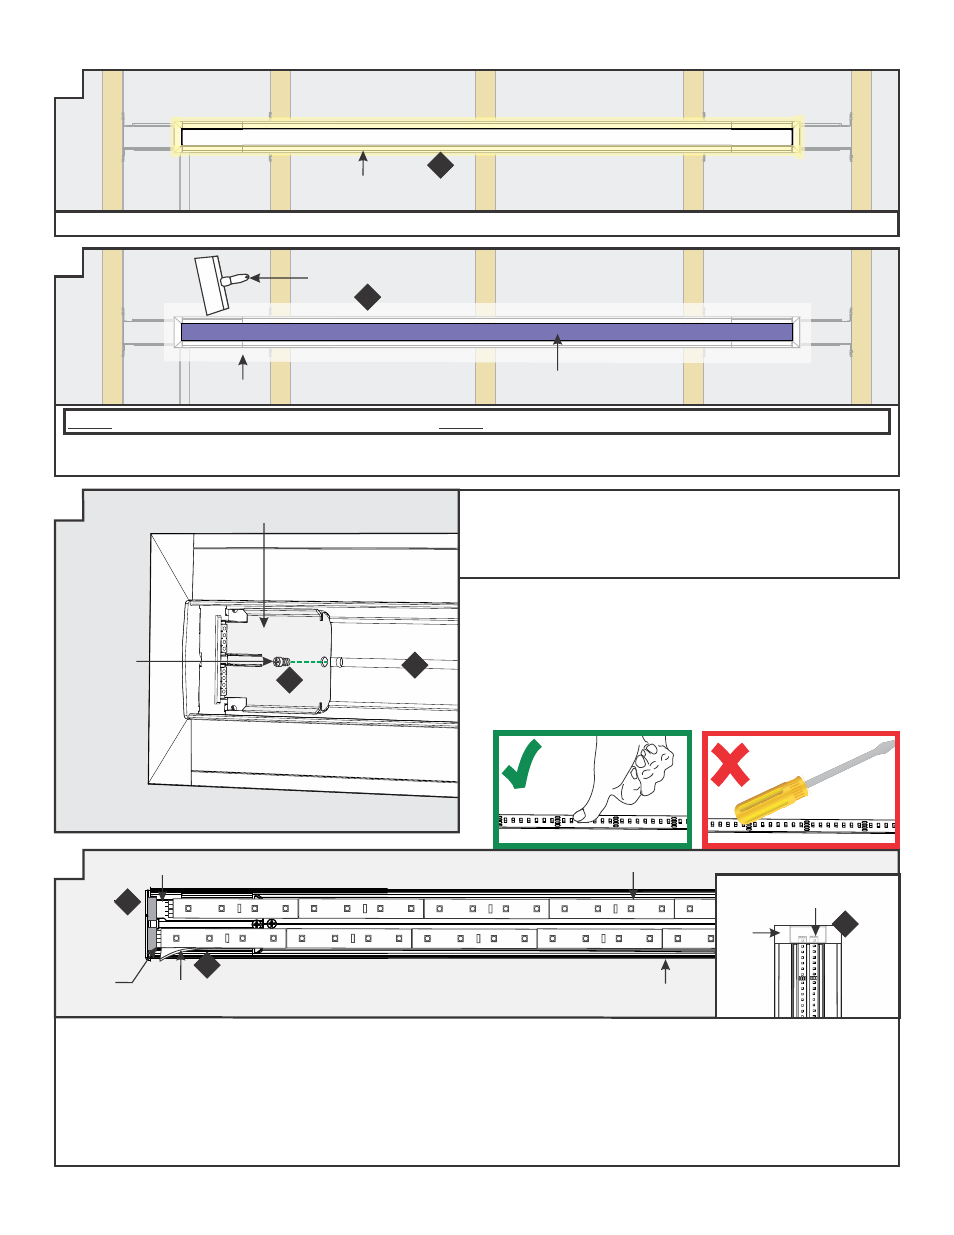
21: Use a 12" compound knife for a smooth compound spread. Sand, paint, and finish the plaster and drywall before removing the
blue contractor’s tape.
NOTE:
Test the LED strip before any plaster work is done.
NOTE:
Cover the channel opening with blue contractor’s tape before plastering.
20: Apply ultra-thin drywall tape along edges of channel to prevent cracking of plaster after installation.
12" COMPOUND
KNIFE
22: Remove the blue contractor’s tape from the inside of the
channel. Clean the channel surface with alcohol to remove
any dust or debris before continuing.
23: Attach the trap door to the junction box using the #6-32 screw.
TRAP DOOR
N
24: Line up the red wire side of the power connector with the “+24VDC” marking on the Soft Strip. Push the male connector of the
Soft Strip into the female connector of the power cables.
25: Carefully remove the backing from the LED soft strip, making sure not to remove the tape from the soft strip. Firmly press down
the adhesive portion of the soft strip onto the channel surface while removing the rest of the backing, making sure there are no
air bubbles that can cause surface irregularities.
26: If required, trim the soft strip on the dashed cuttable section, place the excess soft strip inside the take up box (see inset).
Ensure the entire length of the channel is covered with Soft Strip to avoid unlit areas.
CHANNEL
SOFT STRIP
PAPER
BACKING
TRAP DOOR
POWER
WIRE
25
24
M
L
K
5
ULTRA THIN
DRYWALL TAPE
20
21
PLASTER
CONTRACTOR'S
TAPE
#6-32
SCREW
22
23
TAKE UP
BOX
EXCESS
SOFT STRIP
26