Edge Lighting Triumph User Manual
Triumph, Installation instructions for, Important information
SAVE THESE INSTRUCTIONS!
M-TRI-4_
FJ-TRI-4_
M2-TRI-4_
- This product is ETL listed for indoor dry locations.
- This product is not restricted to certain height installation.
It is approved to be used at any height above the floor.
- Applicable accessories are Hexcell Louver and Glass
Lenses.
Triumph
Installation Instructions for
1
904-TRIUMPH-05
IMPORTANT INFORMATION
1718 W. Fullerton Ave
Chicago, IL 60614
Tel: 773-770-1195
Fax: 773-935-5613
www.edgelighting.com
®
© 2012 Edge Lighting. All Rights Reserved.
To reduce the risk of fire, electrical shock, exposure to
excessive UV radiation, or injury to persons:
- Use this fixture indoors only.
- Do not look directly at the lamp while the fixture is on.
- RISK OF FIRE: Use only the type of lamp and maximum
wattage indicated in this instruction manual.
- Never cover the halogen lamp with anything other than a
lamp shield provided by Edge Lighting and never place
flammable material close to the fixture.
- Never turn the fixture on and off by connecting and
disconnecting the halogen lamp.
- Do not touch the fixture head, shade or lamp shield while
the fixture is on. These surfaces may be VERY HOT.
- Do not touch lamp at anytime. Use a soft cloth. Oil from skin
may damage lamp.
- It is normal for a new halogen lamp to produce minor
smoke when first turned on.
- Do not operate the luminaire with a missing or damaged
shield.
- Turn power off and allow to cool before replacing lamp.
IMPORTANT SAFETY INSTRUCTIONS
A
Use
MAX
50
Watt, Type MR16 Front Glass Cover Halogen
Lamp.
CAUTION:
To reduce risk of a burn or electrical shock during
lamping, disconnect the power to the fixture.
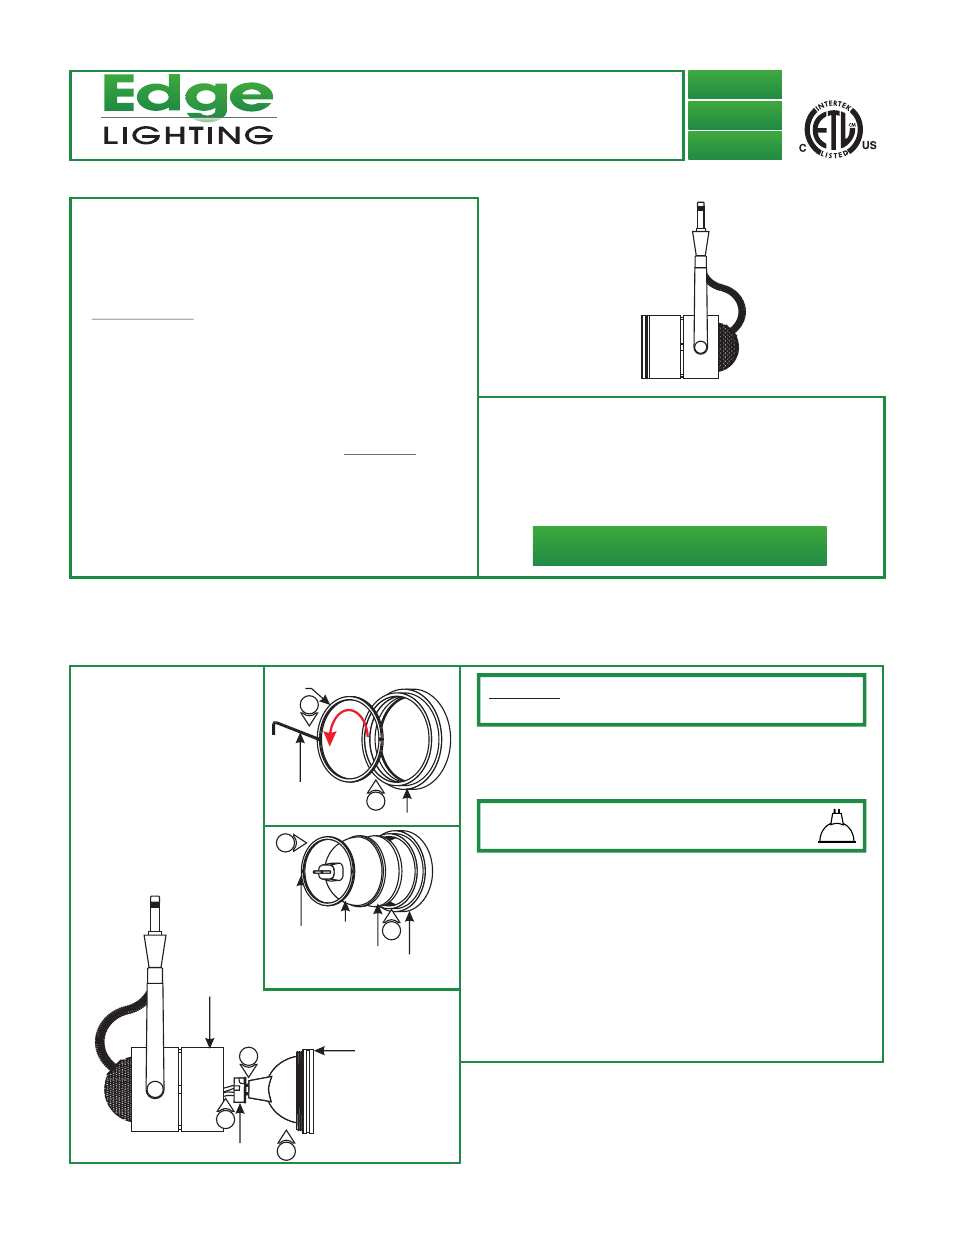
Install the MR16 Lamp with or without a Single Optical
Control Accessory
SOCKET
FIXTURE HEAD
1:
2: From inside the cap, use a small Allen wrench or pen point
to unscrew and remove the lens holder ring.
Unscrew to remove the cap from fixture head.
6
5
CAP
3:
hexcell louver or glass lens, then place the optical accessory
(optional) followed by the MR16 lamp into the cap.
4: Replace and tighten the lens holder ring to the cap to hold
the lamp in place.
5: Pull a small portion of the socket out of the fixture head.
6: Push the lamp pins into the socket holes.
7: Screw the cap to the fixture head.
If installing the MR16 lamp on its own or along with a single
SMALL ALLEN
WRENCH
LENS HOLDER
RING
CAP
1
2
CAP
LAMP
LENS
HOLDER
RING
GLASS
LENS
4
3
7